Showing posts with label anniversary. Show all posts

Sunday, September 13, 2026

Here's to another year birthday card with scalloped gift card pocket

I am so thankful for the new Stampin' Hot Foil system by Stampin' Up! ®   It's so easy to use and adds such beautiful accents to all my projects.  I'm so glad I invested in this brand-new tool.  Have you seen the new hot foil colors?  We have added copper, silver opal, red & green to the lineup.  I'm loving the copper foil for my fall leaves and backgrounds.  My card tonight was inspired by a card I saw Sara Douglas make using this layout and some of the products I've pulled together.  Her card was all about Christmas, but I'm not quite there yet....I still need my fall, Halloween and Thanksgiving projects!  With that being said, let's make a fall card using some new items from the September product releases.  You can follow along with me and make a card of your own using my video tutorial over on my YouTube channel by clicking this direct link.


Supplies and measurements:
Home for Christmas dies 168508 (can be purchased in a bundle* 168509 with stamps)
Notes of Collage 169763 (Sneak peek item coming November 2026)
Pretty Poinsettia 168140 (can be purchased in a bundle* 168147 with dies)
Sweetly Sentimental hot foil dies 170052
Lustrous Leaves bundle* 170559 (includes hot foil dies & decorative masks)
Buffalo Check hot foil die 170590
Reverse hot foil die 170043
Calypso Coral two-tone cardstock 2 pieces each approx 5 1/4" x 6" 
    after hot foiling, cut one to 3 7/8" x 5 1/8"
Early Espresso cardstock for card base 5 1/2" x 8 1/2", scored in center at 4 1/4"
Basic White cardstock 4" x 5 1/4", inside layer 3 5/8" x 4 7/8" & scraps for stamping & hot foiling
Ink Pads: Old Olive, Cajun Craze, Crushed Curry, Golden Glow, Early Espresso, Calypso Coral
Blending brushes for ink blending leaves
Glossy Garden Dots 168577
Calypso Coral & Copper Bordered ribbon 168444
Copper Foil 170553
Hot Foil system 170009
Stampin' Cut & Emboss machine 149653

Thanks so much for stopping by.  You can purchase all of the items I've used today in my online store.  Until next time; be happy, good health to you and happy stamping!
Teresa

Shop these links for the

Sunday, August 30, 2026

Magic gate card with Sunflower Fields

 A LOT of new product is being released by Stampin' Up! on September 1st.  For my project tonight I couldn't wait to use to the Sunflower Fields suite and combine it with the dies from Painted Pumpkin for this super cute fun fold card with a surprise inside.  I hope you like it and will give it a try!  To watch the video tutorial over on my YouTube channel, click this direct link.


Supplies and Measurements:
Radiant Sunflower bundle*168359 (includes stamps & dies) Sneak Peek releases 9-1-26
Painted Pumpkins dies 168437 (available in a bundle* 168349 with coordinating stamps) Sneak Peek
Reason to Celebrate 166905 for sentiments
Sunflower Fields Designer Series Paper 168351 Sneak Peek
    2 pieces each 2" x 5 1/4" OR 5 3/8" if crumpling as shown in the video for texture
Country Woods Designer Series Paper approx 3 1/4" x 3 1/2" for gate die
Basic Beige cardstock approx 3 1/4" x 3 1/2" also for gate die
Basic White cardstock 2" x 5 3/8" for inside layer, scraps for stamping
Fluid 100 Watercolor paper 149612 
Ink pads: Early Espresso, Cajun Craze, Golden Glow, Pecan Pie 
Ink refill bottles, Old Olive, Early Espresso, Pecan Pie, Golden Glow
Stampin' Blends alcohol markers: Golden Glow, Pecan Pie, Old Olive, Lt. Cajun Craze, Deep SU 100
Water Painter 168253
Linen Thread 104199
Radiant Gems 168363
Detail Scissors 170902

Thanks so much for stopping by today!  I appreciate you so much.  You can purchase all the items I've used today in my online store (keeping in mind those sneak peek items coming on September 1st.)

Until next time; be happy, good health to you and happy stamping!
Teresa

*Purchasing bundles saves 10% over the individual piece prices when combined.  You must use the bundle item code for the 10% bundle discount.  When purchasing Last Chance items; be sure to check if the individual piece prices are discounted.  Individual piece prices may be less expensive if the discounts are deep enough.

Shop these links for the


Saturday, December 14, 2024

Embraced with Love anniversary card

Today’s card features more Last Chance products I think you will love.  Be sure to get these before they sell out.  When I first created this card I made it as a get well card.  As this is the third card I made, I decided to turn it into an anniversary card.  Both sentiments are in the same stamp set.  To see how I put my card together, watch the video over on my YouTube channel.


Measurements and Supplies:
Last Chance Items:
Embraced With Love stamp set 164246
Sweetly Scripted Stamp Set 163600
Regal Flora stamp set 164157 (also has coordinating dies 164033)
Everyday Details Dies 162864
Regal Winter 12 x 12 Designer Series Paper 164156, 4" x 5 1/4"
Three Color Glimmer Paper 162813, (2) pieces 3/8" x 5" in Pretty Peacock

Regular Inventory Products:
Stylish Shapes dies 159183
Pretty Peacock cardstock 5 1/2" x 8 1/2", scored at 4 1/4" for card base & piece for circle die cut
Boho Blue cardstock 1/2" x 5" for sentiment strip
Pretty Peacock cardstock for Stylish Shapes circle die cut
Basic White cardstock for stamping and inside piece 3 5/8" x 4 7/8"
Ink Pads: Night of Navy, Memento Tuxedo Black
Ink Refills: Night of Navy, Shaded Spruce & Pretty Peacock 
Stampin' Blends alcohol markers: Lt Blackberry Bliss, Lt Shaded Spruce, Natural Tones Collection Deep SU 200, Med Deep SU 400, Medium SU 600 and Light SU 1000
Medium Basic White Envelope 159236
Tinsel Gems Three-Pack 161624
Plain Baby Wipe 

Thanks so much for stopping by today.  I hope you have enjoyed this project and will give it a try.  To shop for your Last Chance items and/or any SU supplies, please visit my online store by clicking on the shopping cart in the upper right corner.

Until next time; be happy, stay healthy and happy stamping!
Teresa

Monday, August 26, 2024

Frosted Forest Masculine Thinking of You/Birthday card

 Hello everyone! I hope you had a fabulous weekend.  For the kids here in Sheridan, this is the last week of summer vacation.  I plan to soak up the most of it with our grandkids and spend some time at the beach this week.  The weather is supposed to be nice, but often when it's nice here at home, it's not so nice at the beach.  Hopefully, we'll have good enough weather to play in the sand. 

Now onto my card for today.  I made the original card you see here for my husband for our 44th wedding anniversary last Friday.  When I made the card during my YouTube live, I switched out the inside sentiment for a birthday card.  Either way, the design works well without changing the sentiment on the front.  I do love how it turned out.  You can watch the YouTube replay to see how I put the card together.


Supplies & Measurements:
Frosted Forest bundle 164137* (includes stamps 164344,  dies 164136 & masks 164350) **
In The Grove bundle 163512* (includes stamps 164459 & dies 163511)
Thoughtful Journey DSP, 4 x 5 1/4"
Basic White cardstock for stamping/die cutting, inside piece 3 5/8" x 4 7/8"
Pretty Peacock cardstock for card base, 5 1/2" x 8 1/2", scored in the center at 4 1/4"
Old Olive cardstock for die cutting trees
Ink Pads: Old Olive, Mossy Meadow, Early Espresso, Pecan Pie, Pretty Peacock, Gray Granite, Wild Wheat
Blending Brushes
Adhesive-backed Dragonflies & Birds, 162743
Basic White Medium Envelopes

Thanks so much for stopping by today.  I do so appreciate you taking time from your busy day to spend a little with me.  

Until next time; be happy, stay healthy & happy stamping!
Teresa

Wednesday, June 12, 2024

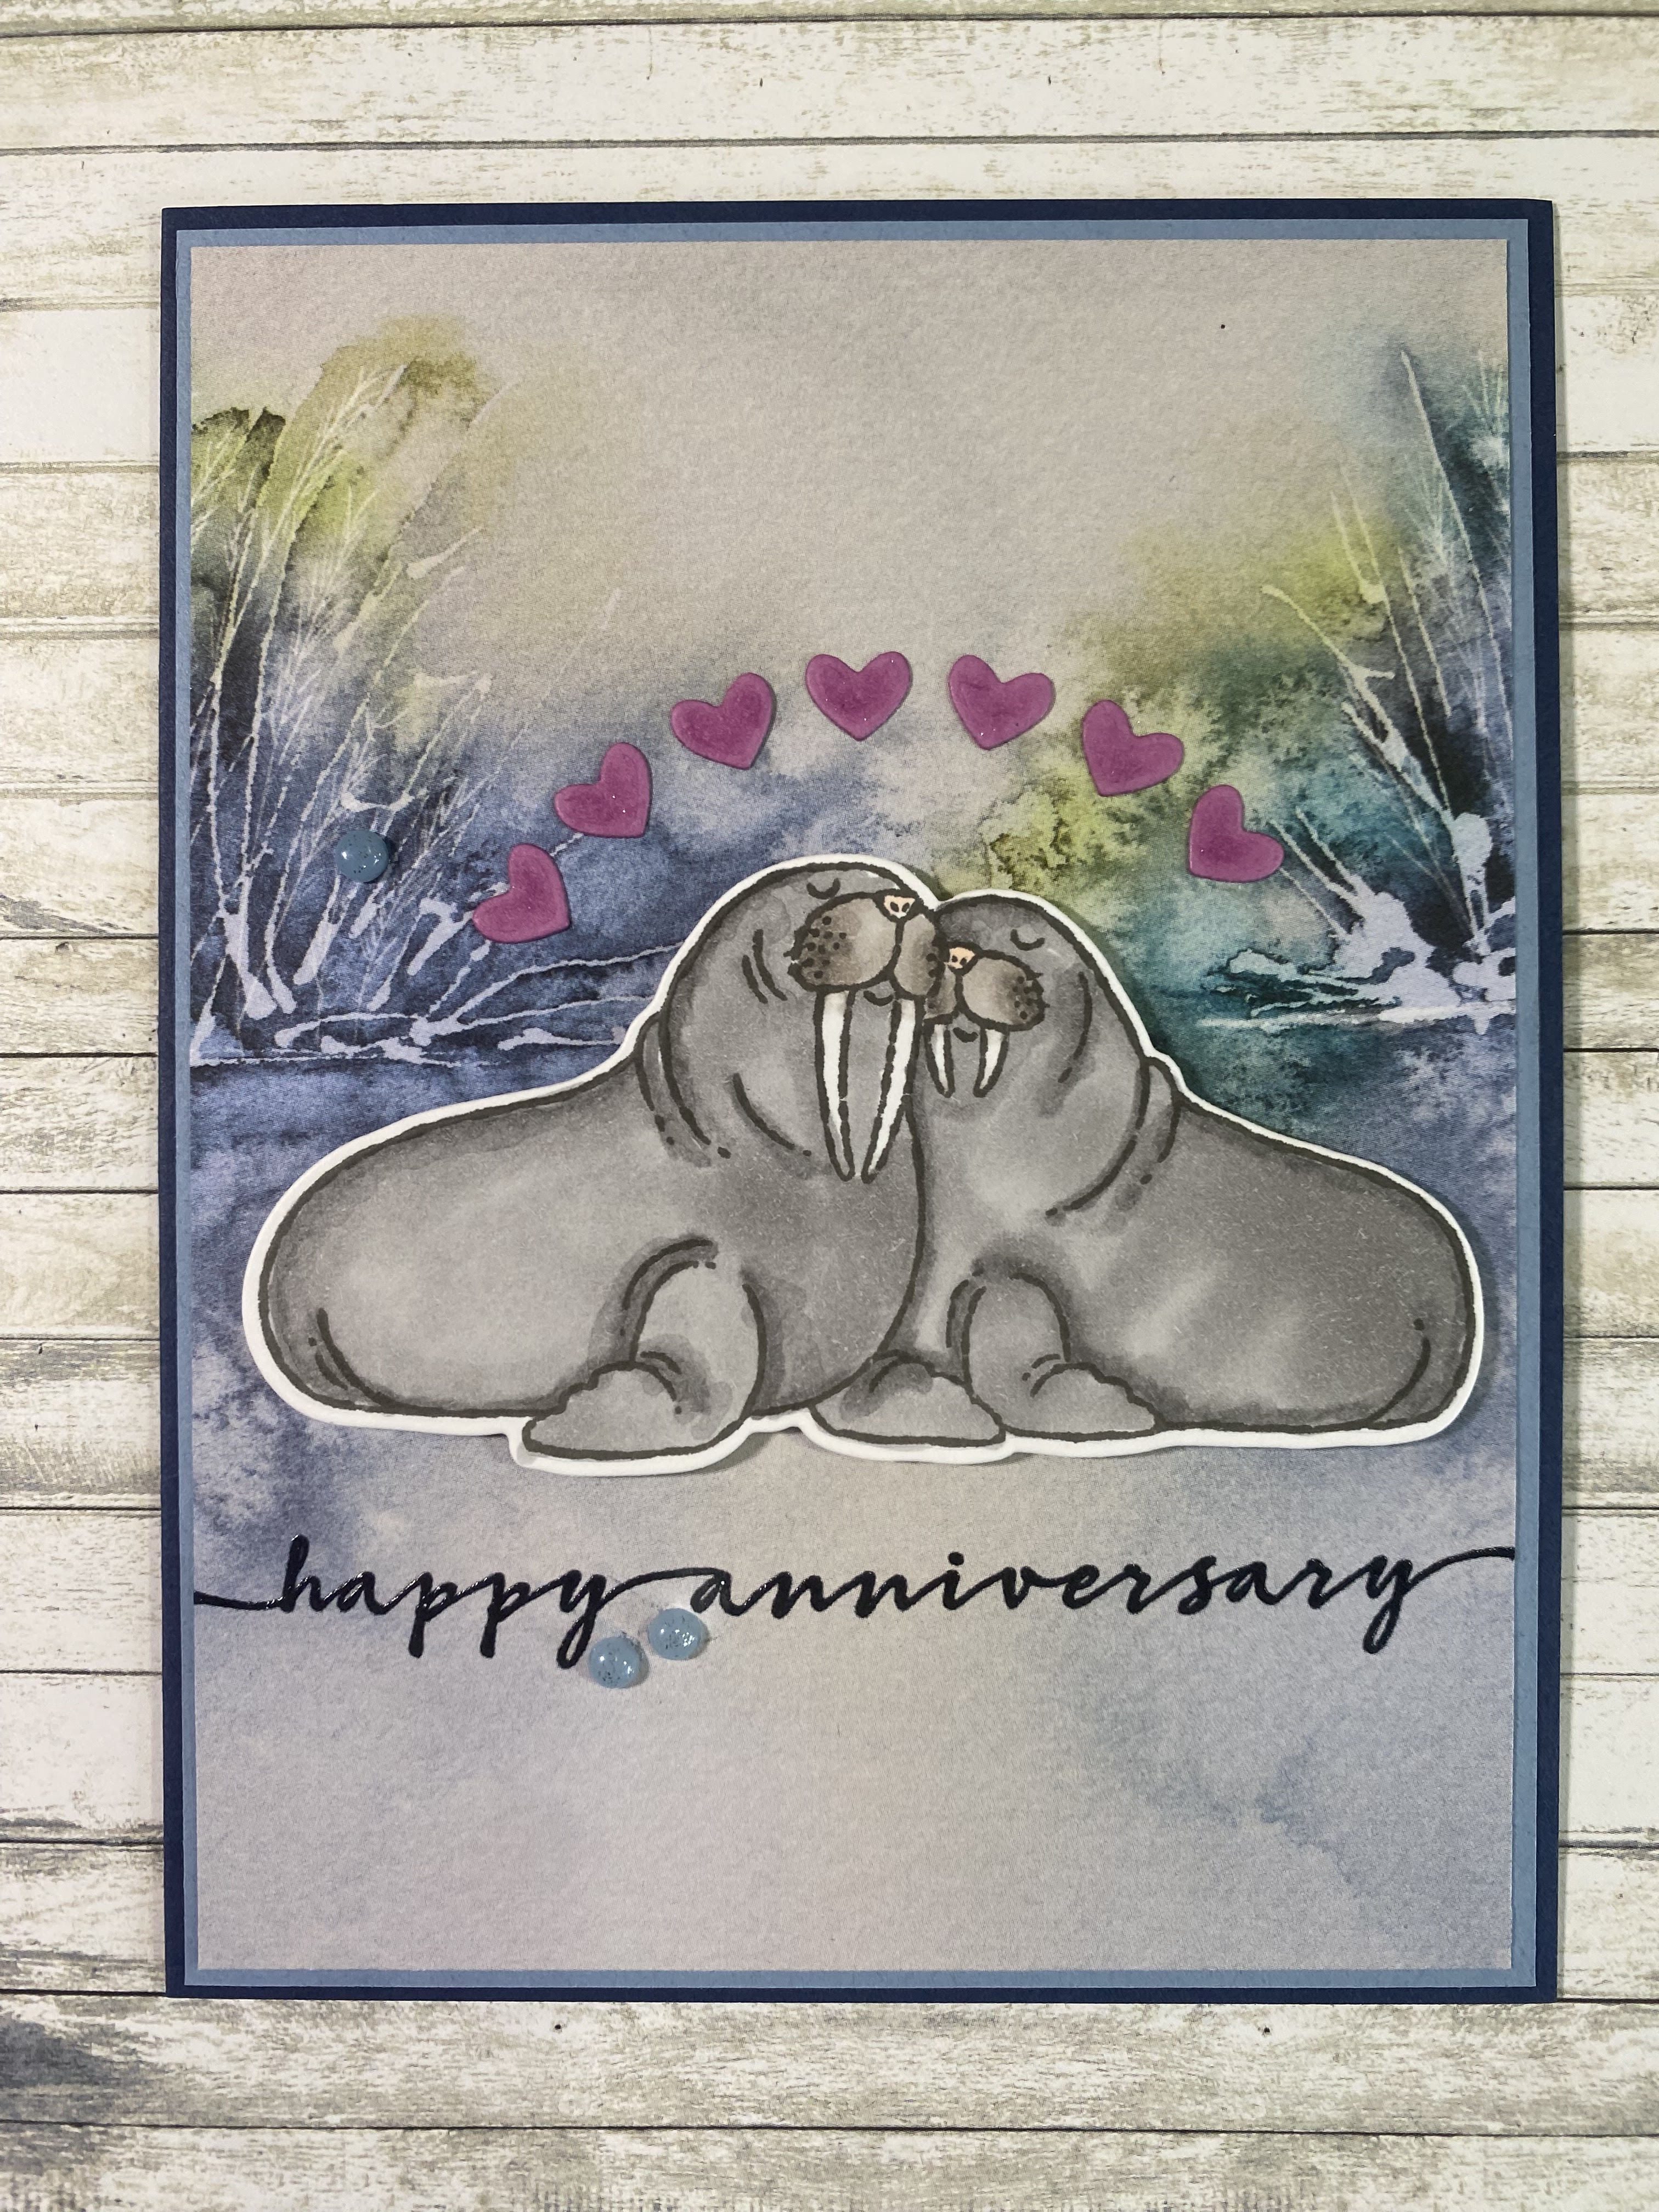
Hearts & Hugs Anniversary card

 My featured this bundle is the Hearts & Hugs bundle by Stampin' Up!  I'm so happy you stopped by!  I thought the walrus image from this bundle would be perfect for an anniversary card.  This is a quick and easy card to put together as the Designer Series Paper does a lot of the work for you.  A little stamping, coloring and die cutting, and everything is ready to go!  Of course, for an even faster card, you don't have to color the walrus couple.  

If you would like to see how I put this card together, hop on over to my YouTube channel.  


Supplies and Measurements:
Hearts & Hugs bundle 163667 (on sale through June 30, 2024--includes stamps 163659 & dies 163666*
Sweetly Scripted 163600
2023-2025 Opaque Sparkle Gems 1637812
Thoughtful Journey DSP 163303 4" x 5 1/4"
Card base=Night of Navy cardstock 5 1/2" x 8 1/2", scored at 4 1/4"
Boho Blue cardstock 4 1/8" x 5 3/8"
Basic White cardstock inside layer 3 5/8" x 4 7/8" & scrap for walrus couple
Petunia Pop cardstock scrap for hearts
Ink Pads: Basic Gray, Night of Navy, Versamark clear ink, Petunia Pop for inside hearts (optional)
Stampin' Blends alcohol markers: Gray Granite, Smoky Slate, Petal Pink, Color Lifter
Clear embossing powder from Basics 165679
Embossing Additions Tool Kit (optional, but helpful) 159971

Click on the shopping cart to order all your Stampin' Up! supplies from my online store, I would be ever so grateful.  

Until next time; be happy, stay healthy and happy stamping!
Teresa

*Bundle pricing saves 10% over the combined prices of the individual pieces
Sale saves an additional 10% off the stamp & die bundle through June 2024.

Friday, August 9, 2019

Over the Moon Udderly fantastic


Today’s card uses one of my favorite sets from the annual catalog (I have quite a few!)  The set is called Over The Moon (149331).  For this card I started with a basic black card base cut at 5 1/2" x 8 1/2" scored and folded in half at 4 1/4".  I took a piece of whisper white cardstock cut at 4" by 5 1/4" and ink blended with balmy blue and granny apple green ink.  I used makeup brushes I purchased from Amazon to achieve the effect.  I stamped the grass clumps in granny apple green ink, then stamped my remaining images in Momento tuxedo black ink.  My little cow was stamped on a scrap piece of whisper white, stamped and colored with Stampin' Blends markers, then fussy cut and added to the card with dimensionals.  Blends markers I used were dark lovely lipstick, light basic black, petal pink combo, dark smokey slate, light so saffron, colorless blender, dark soft suede and dark mango melody. 


For the inside of my card, I added more images from the same stamp set.  I inked the moon in so saffron ink, then colored with the blends markers.  I just love how this turned out.  I planned to put this in my husband's lunch pail just before he heads out for work, but as our 39th wedding anniversary is right around the corner, I might use it for that instead.

I hoped you've been inspired today.  If you are in the USA and would like to order to any products I've used (or anything else you might fancy), please click on the shopping cart.  I'd love to earn your business.  Until next time, make it a great day and happy stamping!

Monday, February 19, 2018

Always and Forever Painted Harvest wedding card

I love the way this card turned out (and so did the bride).  It uses Sweet Sugarplum, Berry Burst and Fresh Fig for the flowers and Tranquil Tide for the leaves.  I've used the wood textures (144177) designer series paper in the background.  The flowers are stamped with Painted Harvest (144783) which is a carryover set from the 2017 holiday catalog and is still available for purchase.  I also used Always and Forever (143814) from the annual catalog for the Mr. & Mrs. and the tree stump. 


I fussy cut the flowers and tree stump.  The leaves were punched with the leaf punch (144667) which is also a carryover from the 2017 holiday catalog.  With wedding season coming soon, this would make a lovely card in any color scheme. 

If you would like to order any of the products used, please click on the shopping cart on the right.  It will take you directly to my online store.   Thanks for stopping by my blog today and taking time out of your busy day.  I hope you were inspired.