Thursday, February 29, 2024

Easter Bunny Encircled in Nature wreath card

 Man, have I been having fun this week playing with some new Online Exclusives products releasing to customers in my online store on March 5.  Be sure to check back then and click the shopping cart to see what's been added to the Online Exclusives section.  

For this card I wanted to show the versatility of the dies for most any occasion.  In this case, Easter, or you could use for Spring by leaving the Easter eggs out.  I started by die cutting the floral images out of Basic White cardstock.  I then water colored them and set them aside to dry before moving on to stamping and coloring my bunny and eggs.   If you would like to watch the video replay, you can rewatch on Facebook here as I'm unable to download my video and upload to YouTube.  So sorry for the inconvenience! FB video replay here:


Supplies and Measurements:
Encircled in Nature bundle (releases March 5) 163629 (includes stamps 163623 & dies 163628)*
Easter Bunny stamp set 160272 (can use sentiment from here OR from the February Paper Pumpkin if you have it)
Cane Weave 3D Embossing Folder, 160580
Deckled Circles dies 162286 (or circle approx 3" in diameter)
Everyday Details dies 162864 (or rectangle for sentiment approx. 2 1/4" long x 1/2 to 3/4" high)
Flight & Airy DSP (SAB item, no longer available after 2/29/24)
Thick Basic White cardstock for card base, 5 1/2" x 8 1/2", scored in center at 4 1/4"
Highland Heather cardstock, 4 1/8" x 5 3/8"
Basic White cardstock for stamping and die cutting
Purple Fine Shimmer Gems 162611
Copper & Natural Ribbon Combo Pack, 162192 or other ribbon
Ink Pads: Fresh Freesia, Gorgeous Grape, Granny Apple Green, Basic Gray & Pecan Pie
Stampin' Blends Markers: Granny Apple Green, Azure Afternoon, Bubble Bath, Fresh Freesia, Daffodil Delight, Highland Heather, Petal Pink (I used the light markers mostly)
Water Painters 151298

Thanks so much for stopping by today.  I truly appreciate you taking time from your busy schedule to spend a few minutes with me.  

Until next time; be happy, stay healthy, and happy stamping!
Teresa

*save 10% over the individual piece price when purchased in a bundle

Saturday, February 24, 2024

There's no bunny like you egg basket

Hello!  I'm so glad you've found me today.  With Easter early this year (March 31), it's time to get working on those Easter projects before time gets away from us.  As soon as I saw the Excellent Eggs bundle, I knew I wanted to try to pair it with the Easter Bunny stamp set from the annual catalog.  I love how this little treat box turned out and I hope you do too.  To see how to put these little egg baskets together, be sure to watch the video replay on YouTube.


Measurements and Supplies:
Excellent Eggs bundle 162808 (includes stamps 162801 & coordinating dies 162807)*
Easter Bunny stamp set 160272 (does have a coordinating Easter Bunny punch 160331 available)
Garden Meadow dies 162740 (can be bundled with coordinating stamp set 162741)*
Wild Fern Dies, 162654 (can be bundled with coordinating stamp set 162655)* (sentiment label)
Lighter Than Air DSP, cut fresh freesia scalloped pattern with largest egg die
Card stock scraps in Lemon Lolly, Flirty Flamingo, Balmy Blue and Basic White
Fresh Freesia cardstock, two scraps cut with largest egg die
Fresh Freesia cardstock, 4" x 4 1/2"
    Score on 4" side at 1" on each end
    Score on 4 1/2" side at 1 3/4" each end
Inks: Granny Apple Green, Azure Afternoon & Basic Gray
Stampin' Blends: Azure Afternoon light, Petal Pink light & Gray Granite light
Blending brush
Flat Adhesive-Backed Pearls, 160449
Sheer Ribbon Combo Pack, 161635 in Azure Afternoon

Thanks for stopping by!  To purchase your Stampin' Up! supplies, click the shopping cart in the upper right.  I would love to earn your business.

Until next time; be happy, stay healthy and happy stamping!
Teresa

*save 10% over the individual piece price when purchased in a bundle


Thursday, February 22, 2024

Thinking of You Excellent Eggs trio sketch card

 This week we will be working with the Excellent Eggs bundle by Stampin' Up!  I've created this card and a 3D treat basket so be sure to check back on Saturday to see it.  I love this bundle of products, it makes such quick and cute cards.  The card I have today does have a bit of coloring and I like the bright colors!  I hope you are inspired to begin your Easter projects.  To see how I put this card together, be sure to watch the video replay on YouTube.


Measurements and Supplies:
Excellent Eggs bundle 162808 (includes stamps 162801 & coordinating dies 162807)*
Fern 3D Embossing Folder 158804
Deckled Rectangles dies (a staple in my studio) 159173
Bee Mine DSP 4 x 5 1/4" (flower pattern)
cardstock in Daffodil Delight for card base, 5 1/2" x 8 1/2", scored in center at 4 1/4"
Granny Apple Green cardstock, 1 1/4" x 4 3/4", embossed with Fern 3D embossing folder
Petal Pink cardstock 1/2" x 4 3/4"
Pool Party cardstock, cut with 3rd largest Deckled Rectangle die
Basic White cardstock, scraps for stamping & 2 5/8" x 4" for focal image piece
Adhesive-Back Hearts & Flowers
Ink Pads: Basic Gray, Sweet Sorbet, Pecan Pie
Stampin' Blends: Pool Party, Daffodil Delight, Sweet Sorbet, Granny Apple Green, Petal Pink, Pecan Pie

A shout out to Marisa Alvarez and her Short Cut Card Sketch #10.  It sure makes putting cards together quick and easy.  I hope you give this card sketch a try.  

Until next time; be happy, stay healthy and happy stamping!
Teresa

*save 10% over the individual piece price when purchased in a bundle

Saturday, February 17, 2024

Black Magic Technique with Easter Lilies & Botanicals

Today I have a card which features the Black Magic Technique.  It uses black cardstock and white ink.  I've combined this technique with the Easter Lilies bundle by Stampin' Up!  I had a lot of fun combining the watercolor pencils and the black magic technique to make this Thinking of You card.  Of course, if you change the sentiment, you can use it for just about any occasion.  To see how to do the black magic technique and how I put the card together, be sure to watch the video replay on YouTube.


Measurements and Supplies:
Easter Lilies bundle, 162786 (includes stamps, 162783 & coordinating dies, 162785)*
Wonderful Thoughts bundle, 161494 (includes stamps, 161899 & coordinating dies, 161491)*
Everyday Details dies, 162864
Botanical Beauty background stamp, 162903
Watercolor Pencils, Assortment 1= 161700 & 2= 149014: Daffodil Delight, Blue, Granny Apple Green, Old Olive, Melon Mambo, Flirty Flamingo, Garden Green, Coastal Cabana, & Pumpkin Pie
Ink Pads: Basic Gray, Flirty Flamingo and Melon Mambo, Versamark watermark stamp pad
non-Stampin' Up!: Taylored Expressions Sugar Cube Pigment ink
Iridescent Pearls, 158987
Small blending brush, 160518

I hope you have enjoyed this technique and that you will give it a try.  It is a lot of fun.  It can take a bit of time, but it's definitely worth it and very easy to do.

Until next time; be happy, stay healthy and happy stamping!
Teresa

*save 10% over the individual piece price when purchased in a bundle

Thursday, February 15, 2024

Easter Lily card

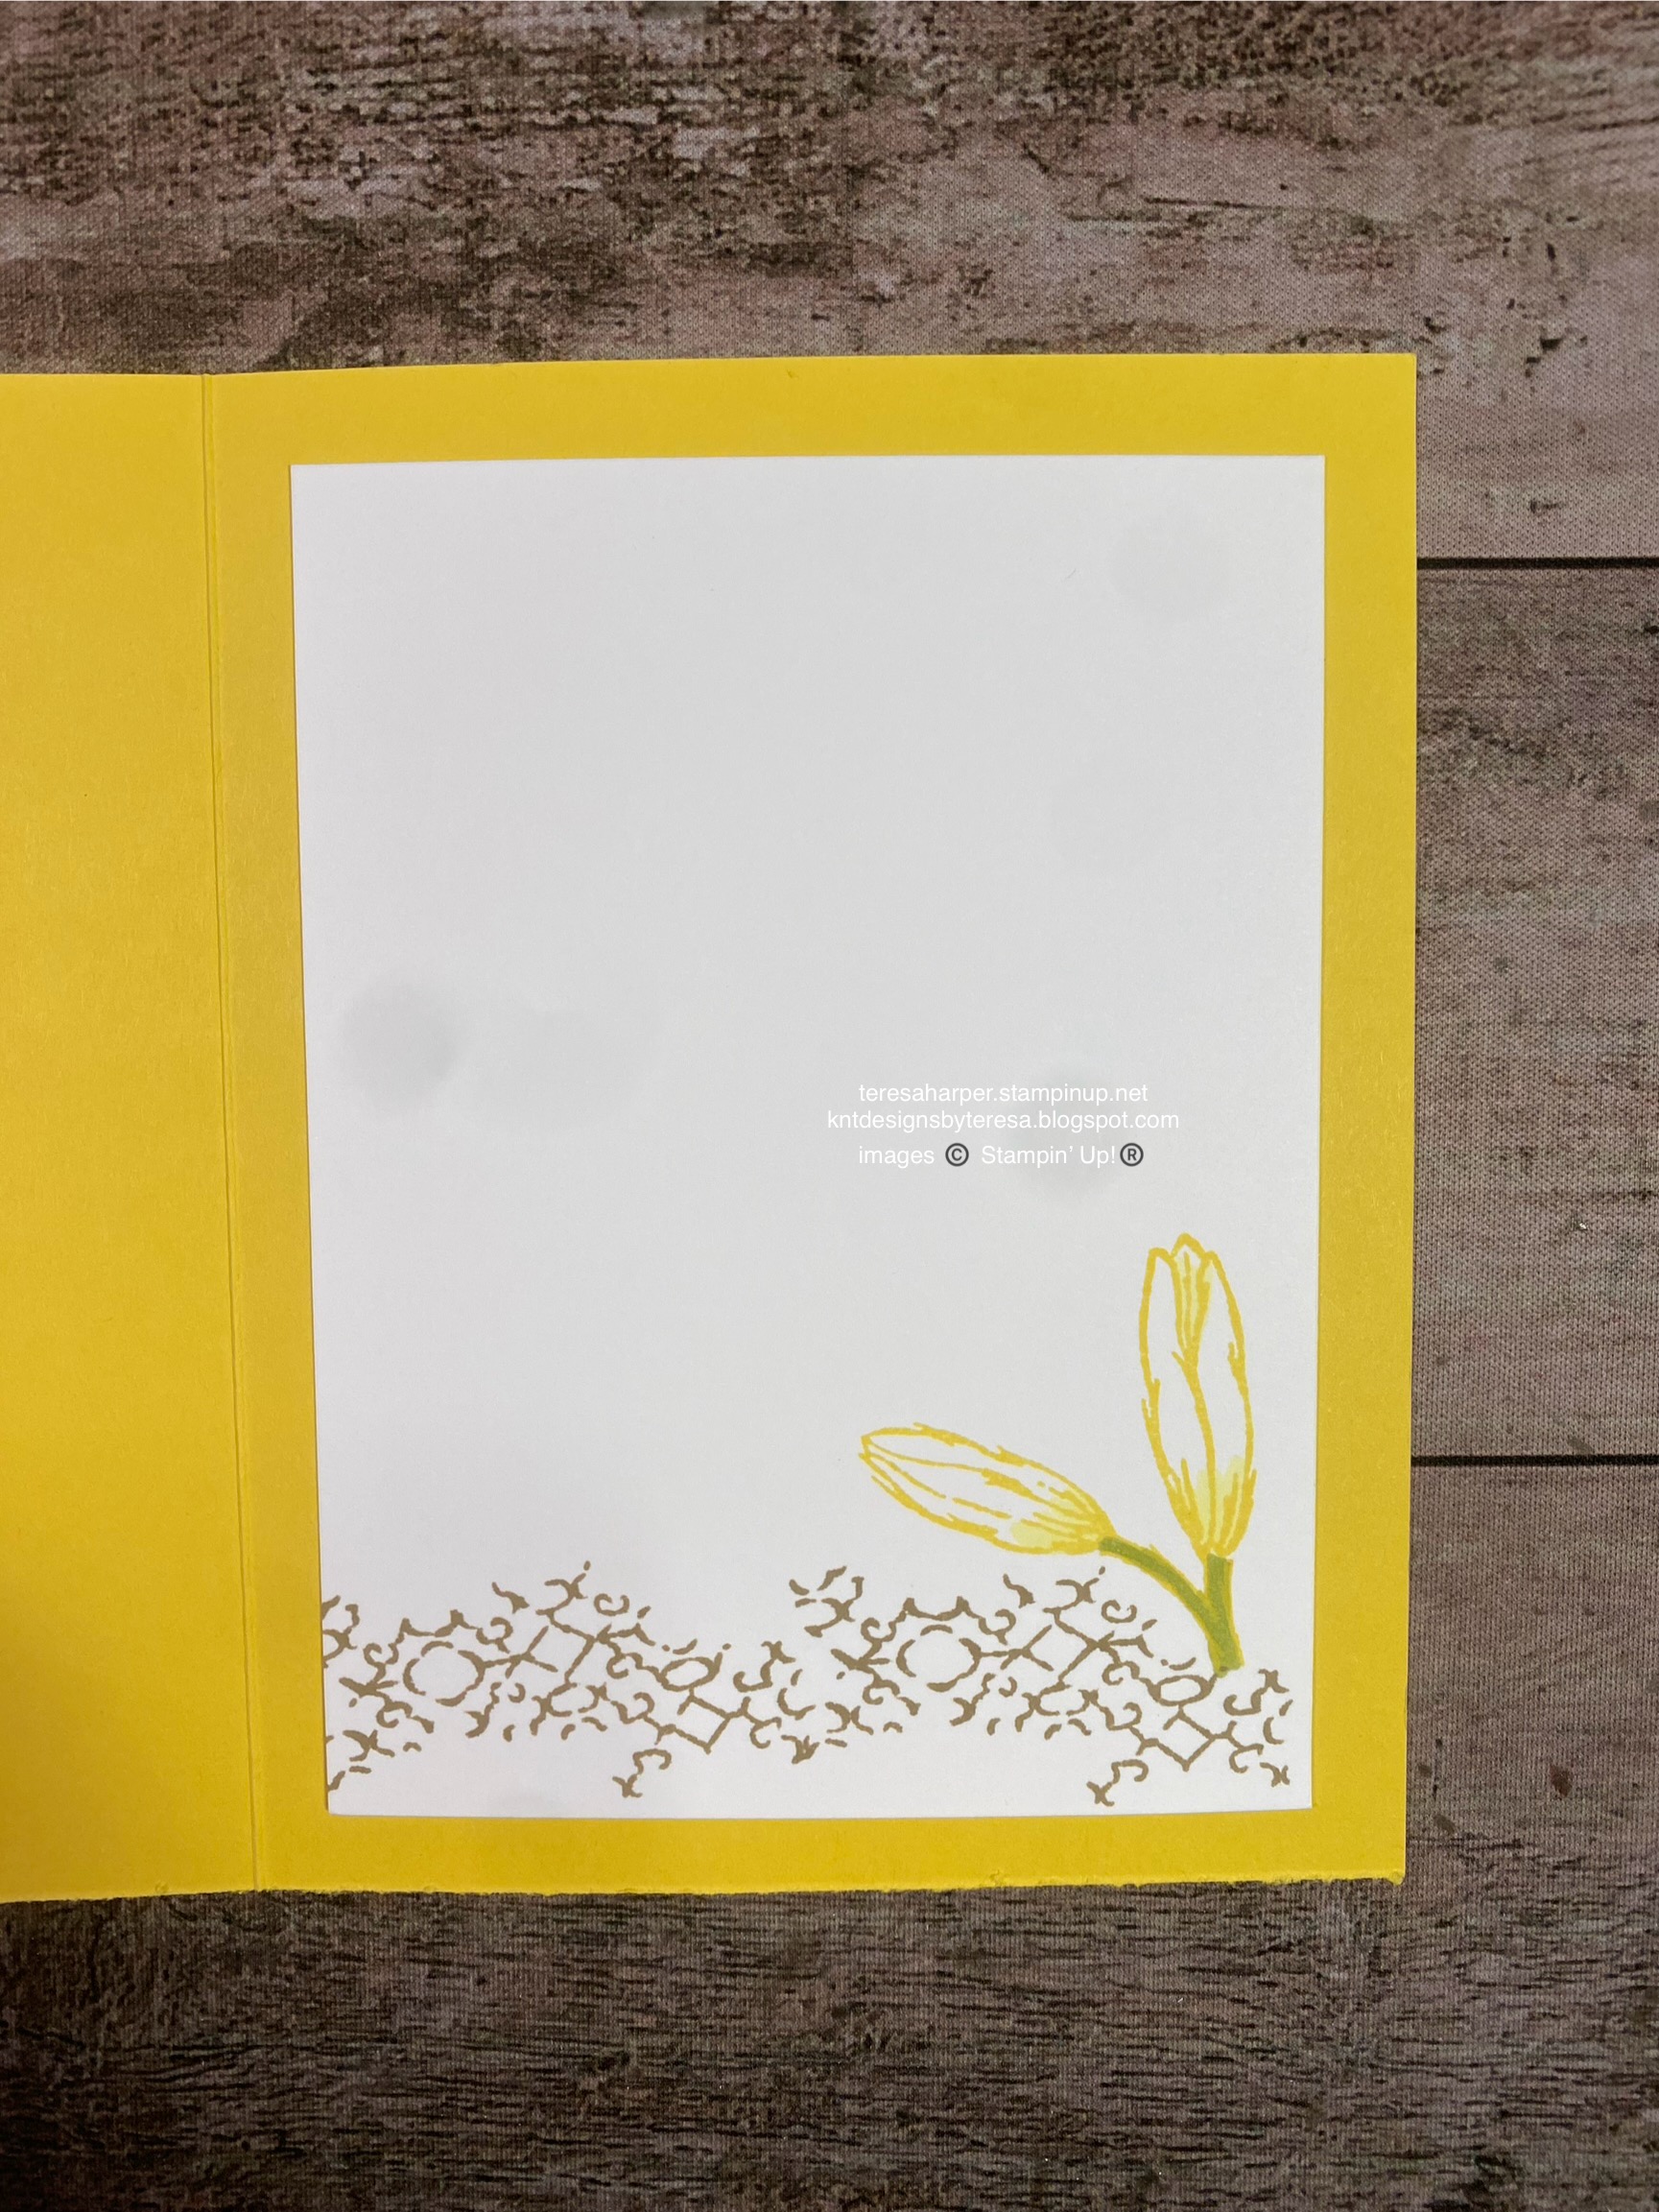
Here we are again, another week has gone by.  Today is my youngest daughter's birthday, so a very happy birthday shoutout to Suzanne!  Lilies are her favorite flower so it is very appropriate that we are using the Easter Lily bundle by Stampin' Up! as the featured product this week.  You only have until the end of February to get your free Sale a-bration rewards with purchase and I hope you will consider this bundle of stamps and dies.  I tried to show how to put together the 3D lily included in the Easter Lilies dies. It took a few minutes for me to figure out how to put the flower together, but once you get it, it's super easy.  You can watch the video replay and see how it's done over on YouTube.


Supplies and Measurements: 
Easter Lilies bundle, 162786 (includes stamps, 162783 & coordinating dies, 162785)*
Throughout the Year stamp set, 162312 (for sentiment)
Radiating Stitches dies, 161595
Iridescent Foil Gems, 162842
Card Base, Daffodil Delight, 5 1/2" x 8 1/2", scored in center at 4 1/4"
 Basic White cardstock, approx. 4 x 5 1/4" cut with Radiating Stitches largest rectangle die
Basic White cardstock for stamping and die cutting
Mossy Meadow cardstock scrap for sentiment, approx. 3 3/4" x 1"
Just Kiddin' Designer Series Paper, 2 3/4" x 4 1/4", 162828
Stampin' Blends alcohol markers: Lemon Lolly, Lt Parakeet Party, Lt. Old Olive
Wink of Stella Glitter Brush
Basics Embossing Powders, 155554 (sorry, currently unavailable but will return soon)
Heat tool, 129053
Embossing Additions Tool Kit, 159971
Inks Pads: Mossy Meadow, Crumb Cake and Daffodil Delight & Versamark watermark stamp pad

I hope you have enjoyed your visit to my blog today!  Thanks so much for stopping by.  To purchase your Stampin' Up! supplies from my online store, click on the shopping cart in the upper right.

Until next time; be happy, stay healthy and happy stamping!
Teresa

*save 10% over the individual piece price when purchased in a bundle

Saturday, February 10, 2024

Watercolor Melon two-piece gift box for gum

Today's project is a 3D project.  When I first saw the Watercolor Melon stamp set, I knew I needed to make some sort of watermelon flavored treat box.  So I went down to the local convenience store to see what I could find that was watermelon flavored and would fit the stamp sizes I had.  This is what I found that was relatively inexpensive.  Of course, I could have used some smaller candies, but that wasn't the size I was looking for.  I hope you like the gift box.  My granddaughter can't wait to get one of them.  To see how I put my box together, be sure to watch the video replay over on YouTube.


Supplies and Measurements:
Watercolor Melon Sale a-Bration free choice stamp set, 162962
Modern Oval Punch, 162234
So Refreshing Stamp Set, 161344 (for Sweetest sentiment)
Simply Sparkling stamp set, 162866 (for friend sentiment) 
All That Dies, 159078, for oval label
Adhesive-Backed Sparkle Gems, 161288
Black & White Gingham Ribbon, 156485
Stamp Pads: Poppy Parade, Garden Green, Memento Tuxedo Black
Poppy Parade Cardstock for box
   top section: 3 3/4" x 6 5/8"
    scored on 3 3/4" side 1/2" on each end
    score on 6 5/8" side @ 2 5/8", 3 1/8", 5 3/4" & 6 1/4"
   Bottom section: 4" x 6 3/8"
    score on 4" side 1/2" on each end
    score on 6 3/8" side @ 2 1/2", 3", 5 1/2" & 6"
Zany Zoo Designer Series Paper 2 1/2" x 2 5/8" in Portrait for box front & back (if desired)
Tear & Tape Adhesive, 154031

I hope you liked this project today and that you will give it a try.  As always, thanks so much for taking time from your busy schedule to spend a little bit with me.

Until next time; be happy, stay healthy and happy stamping!
Teresa

Thursday, February 8, 2024

Watercolor Melon--Enjoy the sweeter things in life

 I hope everyone is having a great week.  It's been a very productive one here in the studio.  Today, I have a quick and simple card for you using the Sale a-bration (SAB) free choice stamp set of Watercolor Melon.  SAB goes through the end of this month, so if you want this one, you'll have to get it sooner rather than later.  I love how easy the images in this stamp set are to use and the depth and dimension you get with the stamps is pretty incredible.  This set is one that is called Distinktive.  They are my favorite kind of stamps as they do most of the work for you and you look like an artist.  To see how I've put this card together, be sure to watch the video replay over on YouTube.


Supplies and Measurements:
Watercolor Melon stamp set 162962
Modern Oval Punch, 162234
Throughout The Year stamp set, 162312 (inside sentiment)
Sweet Citrus stamp set, 160641, (outside sentiment)
Countryside Corners dies 161471
Raindrops Embossing Folder 160554
Thick Basic White cardstock for card base, 5 1/2" x 8 1/2", folded in center at 4 1/4"
Basic White cardstock, cut the 2nd and 3rd largest dies, 1/2" x 3 1/4" for sentiment & scraps for stamping
Zany Zoo Designer Series Paper, 4 x 5 1/4" for card, 2 1/4" x 6" for medium envelope flap 
Ink Pads: Sweet Sorbet, Granny Apple Green and Memento Tuxedo Black
Classic Matte Dots, 158146

Thanks so much for stopping by today.  As always, I appreciate your time and interest.  
Until next time; be happy, stay healthy and happy stamping!
Teresa

Saturday, February 3, 2024

Fun Fold Angle Cut Card with Detailed Dogwood & watercolor pencils

I have a new fun fold for you today, at least new to me.  I saw Ange McKay make a fun fold very similar to this yesterday, and had to try it.  Her card was a tri-fold card and I didn't want to use a whole sheet of cardstock, so I altered it for a bi-fold card that you can make two card bases from one sheet of cardstock. When I made my original sample, I colored my focal image with Stampin' Blends markers.  I was then inspired by Linda Dalke to try my hand at some water coloring with the watercolor pencils.  I've forgotten how much I love using them.   So for this card, I've colored my image with the watercolor pencils.  To see how I've put this card together, be sure to watch the video replay on YouTube.


Cutting template

Measurements and Supplies:
Detailed Dogwood stamp set (Level 2 SAB free item choice through February) 162953*
Deckled Circles dies 162286
Wonderful Thoughts Bundle 161494 (includes stamps 161899 & coordinating dies 161491) for sentiments
Softly Stippled DSP (Level 1 SAB free item choice through February) 162975*
    1 piece 4 x 5 1/4", 1 piece 2 1/8" x 5 1/8" (see cutting template or watch video)
Calypso Coral card stock for card base, 5 1/2" x 6 3/4"
Pebbled Patch cardstock, 4 x 5 1/4" & 2 1/4" x 5 1/4", additional for deckled circle, 8th smallest
Basic White thick cardstock for deckled circle (x2) 7th from smallest
Basic White scrap cardstock for sentiment
Iridescent Foil Gems,162842
Ink Pads: Stazon black, Pebbled Path, Pool Party
Mini Blending Brush
Watercolor Pencils, (161700 Assortment 1): Old Olive, Calypso Coral and Crushed Curry
Water Painters 151298

I hope you enjoyed this card and water coloring technique.  Until next time; be happy, stay healthy and happy stamping!
Teresa


*SAB Free choices, Level 1 with a $50 USD purchase, Level 2 with a $100 USD purchase (before tax and shipping).  Each $50 increment earns a free item, no limits to how many you can redeem.

Thursday, February 1, 2024

Detailed Dogwood Friendship easy sketch card

Hello everyone!  So glad you stopped by today.  My featured product of the week is the Detailed Dogwood stamp set by Stampin' Up!  This is a Level 2 Sale a-bration (SAB) free choice until the end of February, 2024.  Now, what does that mean?  It means if you spend $100 USD or more (before tax and shipping), you can choose this stamp set as your free item.  I've used this stamp set to create two cards so be sure to check back on Saturday to see the second fun fold card.  If you want to see how I put these cards together, be sure to watch the video replay over on YouTube.


Measurements and Supplies:
Detailed Dogwood stamp set, 162953 (SAB free item through February)
Petal Park Builder Punch 160576
Softly Sophisticated 3D embossing folder (Level 2 SAB free item with coordinating stamp set through February)
Basic White Thick cardstock for card base, 5 1/2" x 8 1/2", scored in the center at 4 1/4"
Basic White cardstock scraps for stamping & inside layer (optional) 3 7/8" x 4 5/8"
Flirty Flamingo cardstock, 4 x 5 1/4"
Hello, Irresistible DSP 161139, two pieces each 1 1/4" x 5"
Ink Pads: Flirty Flamingo, Daffodil Delight and Lost Lagoon
Loose Frosted Dots, 161153

I hope you try this easy sketch.  It was created by Marisa Alvarez of Kitchen Table Stamper.  
Until next time; be happy, stay healthy and happy stamping!
Teresa