Showing posts with label whimsical. Show all posts

Wednesday, August 6, 2025

Inspirational Squad I believe in you dragon card

Hello everyone!  A lot has happened since the last post.  Stampin' Up! has begun a month-long sale for the 2025-2027 In Colors.  Head on over to my online store to see what products are included in the sale.  There are many you might not think of including some Paper Pumpkin refill kits!  You will find the direct link to that page here: 2025-2027 In Color Sale.  In addition, new products and additional discounts have been added to the Last Chance category in my online store.  You can find those items here: Last Chance

Now that we have all that completed, let's get on to our project for today.  I recently obtained the Inspiration Squad stamp set (of course, it's now on Last Chance at a discount for you!) and had to use it before it's no longer available.  I recently read the Empyrean book series and the little dragon in this set reminds me of the dragon from the books.  I imagined the little dragon in front of an arched stone wall surrounded by flowers.  This card is the end result and I do love how it turned out, don't you?

 To see the video tutorial on how to put this card together, fly on over to my YouTube channel.


Measurements and Supplies:
Inspiration Squad 165515
Charming Day bundle* 166136 (includes stamps and coordinating dies)
Everyday Arches dies 164629 (can be purchased in a bundle)
Exposed Brick 3D embossing folder 161600
Low-profile Sparkle Dots 166157
Ink Pads: Blackberry Bliss & Memento Tuxedo Black
Stampin' Blends alcohol markers: Lemon Lolly, Lt Peach Pie, Dk Old Olive, Lt Mossy Meadow, Fresh Freesia, Dk Highland Heather
Watercolor Pencils Assortment 1, 161700
Wink of Stella Glitter Brush
Fresh Freesia cardstock for card base, 5 1/2" x 8 1/2", scored in center at 4 1/4"
Floral Charm DSP 166125, 4" x 5 1/4", in Blackberry Bliss leaf pattern
Smoky Slate cardstock, approx 3" x 4"
Basic White for stamping images & sentiment

I hope you have been inspired by my card today and that you will try making one for yourself to send along to someone special.  Of course, you could use any sentiment and this would become a great card for many different occasions.

Until next time; be happy, good health to you and happy stamping!
Teresa

*Purchasing bundles saves 10% over the individual piece prices when combined.  You must use the bundle item code for the 10% bundle discount.  When purchasing Last Chance items; be sure to check if the individual piece prices are discounted.  Individual piece prices could be less expensive if the discounts are deep enough.

Monday, June 24, 2024

Playful Ghosts treat box July 2024 Online Exclusives Sneak Peek

For my sneak peek of the July Online Exclusives collection, I’m sharing a project I made using Playful Ghosts and a die from the Greetings of the Season set.  When I first saw these dies, I knew I would have to make some treat boxes using them.  This is the first one I’ve made.  I love how it turned out and plan to make several more and have them ready for October so I’m not scrambling, like usual, at the last minute to get them finished. 😂 Each box will hold two fun size candy bars (I used Snickers).  You can watch the video replay of the live tutorial here.


Supplies and Measurements:
Playful Ghosts stamp set 164366 (July 2024 Online Exclusives)
Forever Forest stamps 162054 & dies 162057
Greetings of the Season dies 164112 July 2024 Online Exclusives (can be purchased in a bundle with a sentiment set 164113)* 
Gorgeous Grape cardstock 3 3/4" x 7" & piece for tag
    score on 7" side at 1, 3 1/4, 4 1/4 & 6 1/2" (score down 1/2" only at 1/2" & 3 3/4" for gussets)
    score on 3 3/4" side at 1"
Basic White cardstock scraps
Iridescent Striped Trim 163299
Natural Tones Linen Thread (releasing Sept. 2024 in holiday mini catalog)
Wink of Stella Clear Glitter brush 
Ink Pads: Crushed Curry, Peach Pie, Flirty Flamingo, Gorgeous Grape, Night of Navy, Basic Gray, Old Olive, Basic Beige
Stampin' Blends markers: Gray Granite, Smoky Slate, Pecan Pie, Peach Pie, Pumpkin Pie, Color Lifter, Highland Heather, Petal Pink, Wild Wheat

Thanks so much for stopping by.  I hope this has helped give you a peek into what is coming in July in the Online Exclusives and that it helps you to make some decisions for yourself on what you might need to add to your collection.  Online Exclusives will be released to the public on July 3rd; however, you can add to a starter kit today if you join my team.  You will find all the joining information in this link.

Until next time; be happy, stay healthy & happy stamping!
Teresa

*purchasing bundles saves 10% over the individual piece prices when combined.  You must use the bundle item code for the 10% bundle discount.

Thursday, March 14, 2024

You Brighten My Cloudy Days with Bright Skies

 We have had a lot of rain over the past few days and now it feels like a few Spring days are here!  In honor of that, I have a card featuring the Bright Skies bundle by Stampin' Up!  I've paired it with Playing In The Rain to make this adorable card to brighten anyone's day.  I hope you are inspired to pull out your stamp/die bundles and make a card of your own.  Should you need to order any Stampin' Up! supplies, be sure to click on the shopping cart to the right.  You will find a video replay of how I put this card together over on my YouTube channel.


Supplies and Measurements:
Bright Skies bundle 162794 (Includes stamps 162787 dies 162793)*
Playing In The Rain stamps 160542 & Playing In The Rain dies 160550 (no longer offered in a bundle)
Azure Afternoon cardstock base, 5 1/2" x 8 1/2", scored in center at 4 1/4"
Basic White cardstock
    Outside layer, 4 x 5 1/4", Inside Layer 3 5/8" x 4 7/8" & scraps for die cutting 
Early Espresso cardstock scrap for die cutting
Stampin' Blends markers: Flirty Flamingo, Lemon Lolly, Cajun Craze, Lt Pool Party, Lt Gray Granite
Ink Pads: Basic Gray, Azure Afternoon, Granny Apple Green, Pool Party
Loose Daisy Embellishments 160555
Blending Brushes

Thanks so much for stopping by!  I appreciate your time and effort and I sincerely hope you like what you see. 

Until next time; be happy, stay healthy and happy stamping!
Teresa

*save 10% over the individual piece price when purchased in a bundle

Thursday, June 22, 2023

Hey Chuck, You Rule the Roost

 Hello and welcome back to my blog.  It’s been a couple of weeks since I’ve posted due to end of the school and ballet Year scheduling conflicts.  Thank you so much for coming back!  

For my featured product this week, I’m using the Hey Chuck stamp and die bindle by Stampin’ Up!  I hope you like the projects I have for you.  Be sure to check back here on Saturday for a fun fold.  You will also find more inspiration over on my KnT Designs Stampers Group Social on FB.  Go ahead and join us!  To watch the video replay for my card on YouTube click HERE:


Measurements and Supplies:
Hey Chuck bundle (stamps & dies with 10% savings 161553)
All That dies 159078
Banners Pick a Punch
Boho Blue card stock 5 1/2 x 8 1/2", scored in center at 4 1/4"
Blueberry Bushel card stock 4 x 5 1/4"
Boho Blue card stock scraps for die cuts
Basic White cardstock for stamping and die cutting & inside layer 3 5/8 x 4 7/8"
Glorious Gingham (163170) Designer Series Paper 2 1/4 x 4" & 1/2" x 3 3/8"
Inked Botanicals (161157) Designer Series Paper, 3/4" x 4"
Brushed Metallic Adhesive Backed Dots (156506)
Stampin' Blends alcohol markers for coloring: Boho Blue, Crumb Cake, Real Red, Light Daffodil Delight, Lt Pebbled Path, Ivory
Wink of Stella Glitter Brush
Ink Pads: Pebbled Path, Boho Blue
Mini Blending Brush

Thank you again for joining me today.  I hope you watch the video.  If you would like to order any Stampin' Up! supplies from my online store, I would be ever so grateful for your business.  As a reminder there is a Designer Series Paper sale going on through the end of June, 2023.  Select papers are 15% off.  Both the papers I used in this project are included in that sale.  Click the shopping cart in the upper right to shop my store.  

Until next time; be happy, stay healthy and happy stamping!
Teresa

Thursday, March 9, 2023

You’re a Friend Like No Other Bunny

 Hello and welcome to another fun stamping project!  I’m so glad you are here, thank you.  This week’s projects will feature the Easter Bunny stamp set.  For today’s card, I’ve tried to use it outside of an Easter card.  It would make a cute friend card for any spring occasion.  I hope you like it!  To see the video on how I put this card together, hop on over to my YouTube channel HERE:


Supplies and Measurements:
Easter Bunny stamp set
Mini Pocket Dies (for sentiment oval)
Masking Paper
Flirty Flamingo cardstock 5 1/2 x 8 1/2", scored in the middle at 4 1/4"
Country Gingham Designer Series Paper 
    4 1/8 x 5 3/8 and 3 x 4 1/2"
Basic White cardstock
    3 3/4 x 5 and 2 3/4 x 4 1/4, additional scrap for stamping and die cutting
Stampin' Blends alcohol markers:
    Pumpkin Pie, Shaded Spruce, Balmy Blue, Flirty Flamingo, Sweet Sorbet, Old Olive, Gray Granite, and Pale Papaya for coloring images
Loose Daisy Embellishments
Ink Pads in Memento Tuxedo Black

To purchase your Stampin' Up! supplies from my online store, click on the shopping cart in the upper right.  I do so appreciate your business.

Until next time; be happy, stay healthy and happy stamping!
Teresa


Thursday, September 8, 2022

Get Yeti to Party in Polished Pink

 Happy first week of school!  My oldest granddaughter is a senior this year.  I can hardly believe it's already here!  What happened to the time?  With the coming of school, begins the busy season for me as the chief carpool driver.  

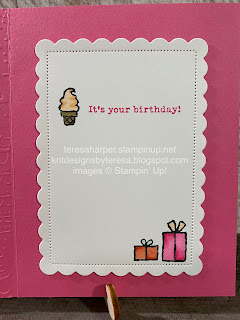
Anyway, let's get on to our project for today.  This week I am featuring the Yeti to Party stamp set and coordinating Yeti dies.  These are part of the Perfect Partners promotion Stampin' Up! is offering in September, 2022.  Six die sets and bundles have been added to already existing stamp sets.  But hurry, these are only this month AND only while supplies of the dies last.  You can watch how I put my card together and how unique some of these Yeti dies are by watching the FB Live replay over on my YouTube channel by clicking HERE:  Be sure to watch until the end so you can see the bonus cards I made with this bundle!  I had so much fun with it and you will see just how versatile it can be.


Measurements and Supplies:

Whimsical Trees 3D Embossing Folder
Wildlife Wonder (optional for shadow under Yeti)
Yet to Party stamp set 159826, Yeti Dies 160253 or Bundle for 10% savings, 162529 (Only during 9/2022 or while supplies last!  Hurry and get yours today by clicking on the shopping cart in the upper right corner.
Polished Pink cardstock 5 1/2 x 8 1/2", scored at 4 1/4"
Two (2) Basic White cardstock pieces cut with the 2nd largest rectangle Scalloped Contour die
Scraps of Thick Basic White cardstock for stamping and die cutting images
Stampin' Blends alcohol markers: Polished Pink, Pool Party, Lt. Crumb Cake, Lt. Soft Suede, Pale Papaya, Balmy Blue, Calypso Coral, Lt. Natural Tones SU 1000, Color Lifter
Stamp pads: Sahara Sand, Polished Pink, Momento Tuxedo Black
Stampin' Cut & Emboss machine
2021-2023 In Color Opal Rounds

Thank you for stopping by today!  Please leave me a comment.  I'd love to hear from you.
Until next time; be happy, stay healthy and happy stamping!
Teresa


Friday, August 9, 2019

Over the Moon Udderly fantastic


Today’s card uses one of my favorite sets from the annual catalog (I have quite a few!)  The set is called Over The Moon (149331).  For this card I started with a basic black card base cut at 5 1/2" x 8 1/2" scored and folded in half at 4 1/4".  I took a piece of whisper white cardstock cut at 4" by 5 1/4" and ink blended with balmy blue and granny apple green ink.  I used makeup brushes I purchased from Amazon to achieve the effect.  I stamped the grass clumps in granny apple green ink, then stamped my remaining images in Momento tuxedo black ink.  My little cow was stamped on a scrap piece of whisper white, stamped and colored with Stampin' Blends markers, then fussy cut and added to the card with dimensionals.  Blends markers I used were dark lovely lipstick, light basic black, petal pink combo, dark smokey slate, light so saffron, colorless blender, dark soft suede and dark mango melody. 


For the inside of my card, I added more images from the same stamp set.  I inked the moon in so saffron ink, then colored with the blends markers.  I just love how this turned out.  I planned to put this in my husband's lunch pail just before he heads out for work, but as our 39th wedding anniversary is right around the corner, I might use it for that instead.

I hoped you've been inspired today.  If you are in the USA and would like to order to any products I've used (or anything else you might fancy), please click on the shopping cart.  I'd love to earn your business.  Until next time, make it a great day and happy stamping!