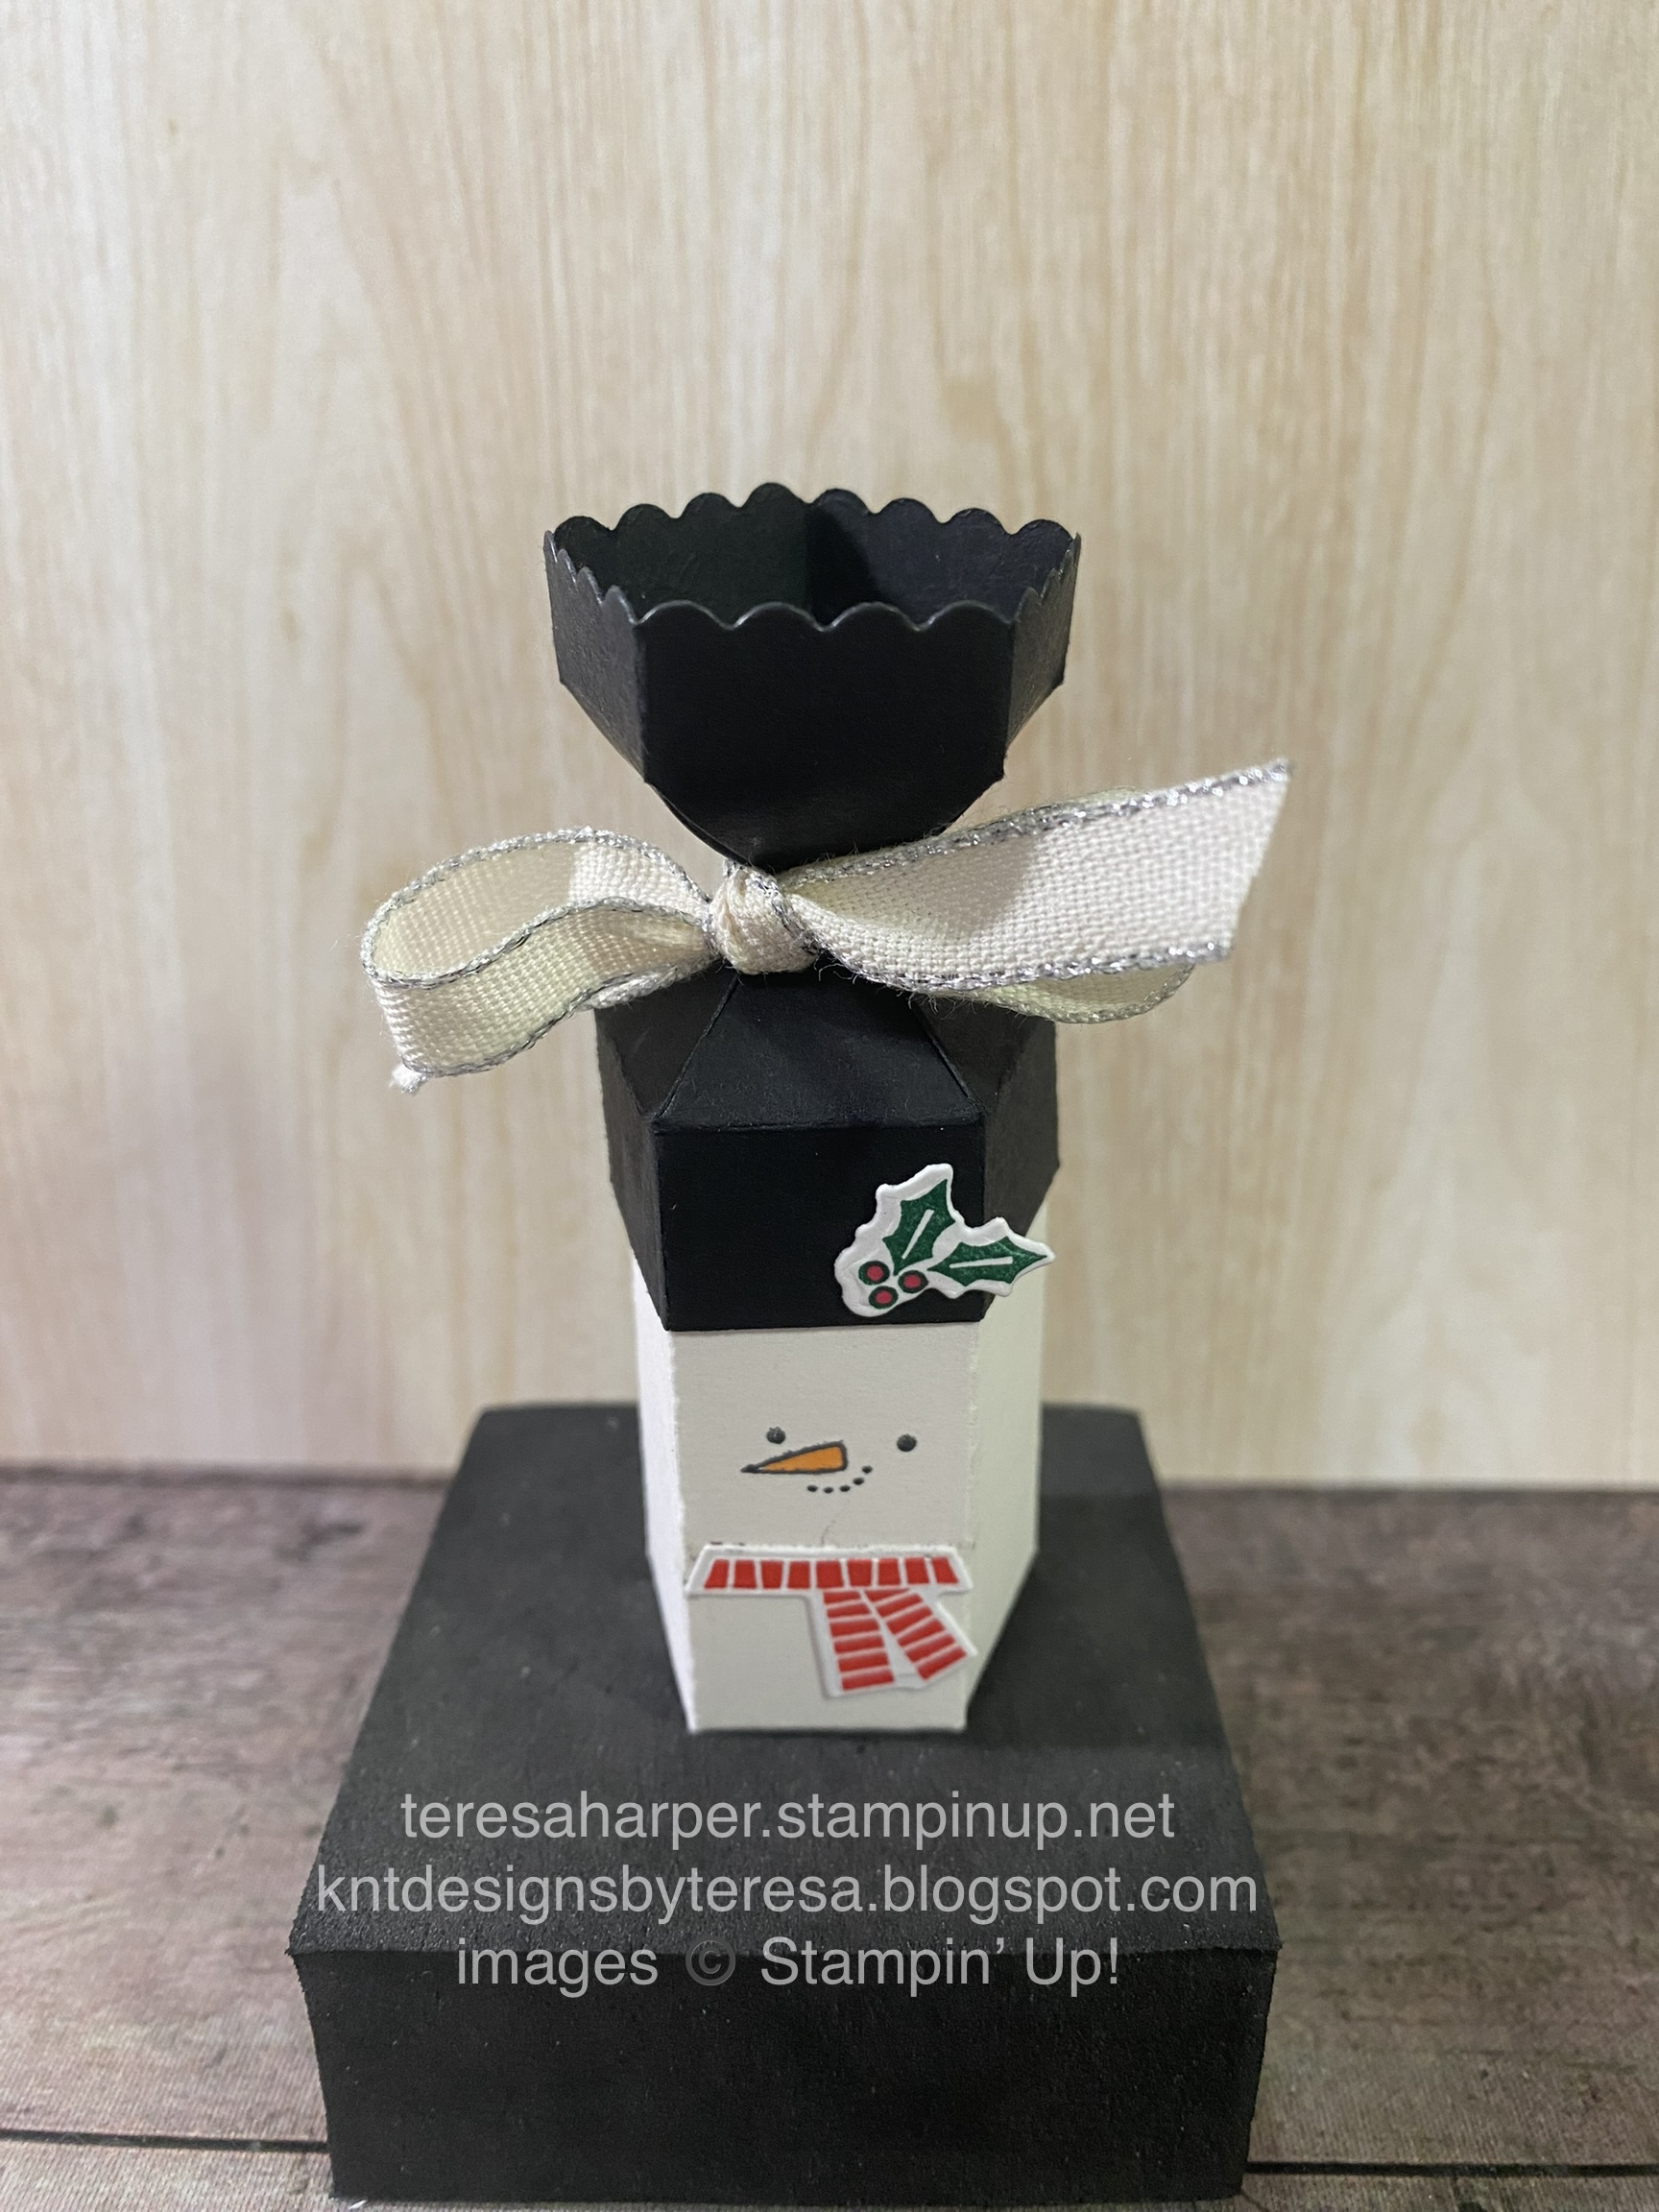
Hello and Happy Saturday. Today is the final project in the 12 Projects of Christmas series. It is a bonus project I created to wrap a Russel Stover 2 oz chocolate bar. This came about after I found the candy bar which had a cat on the wrapper and said meaowy Christmas. Well, I just couldn't resist making a wrapper with the Cheerful Basket bundle using the cat! Here is the result and I'm very happy with how it turned out. I hope you like it.
To see how I put the wrapper together, watch the video replay over on my YouTube channel HERE:


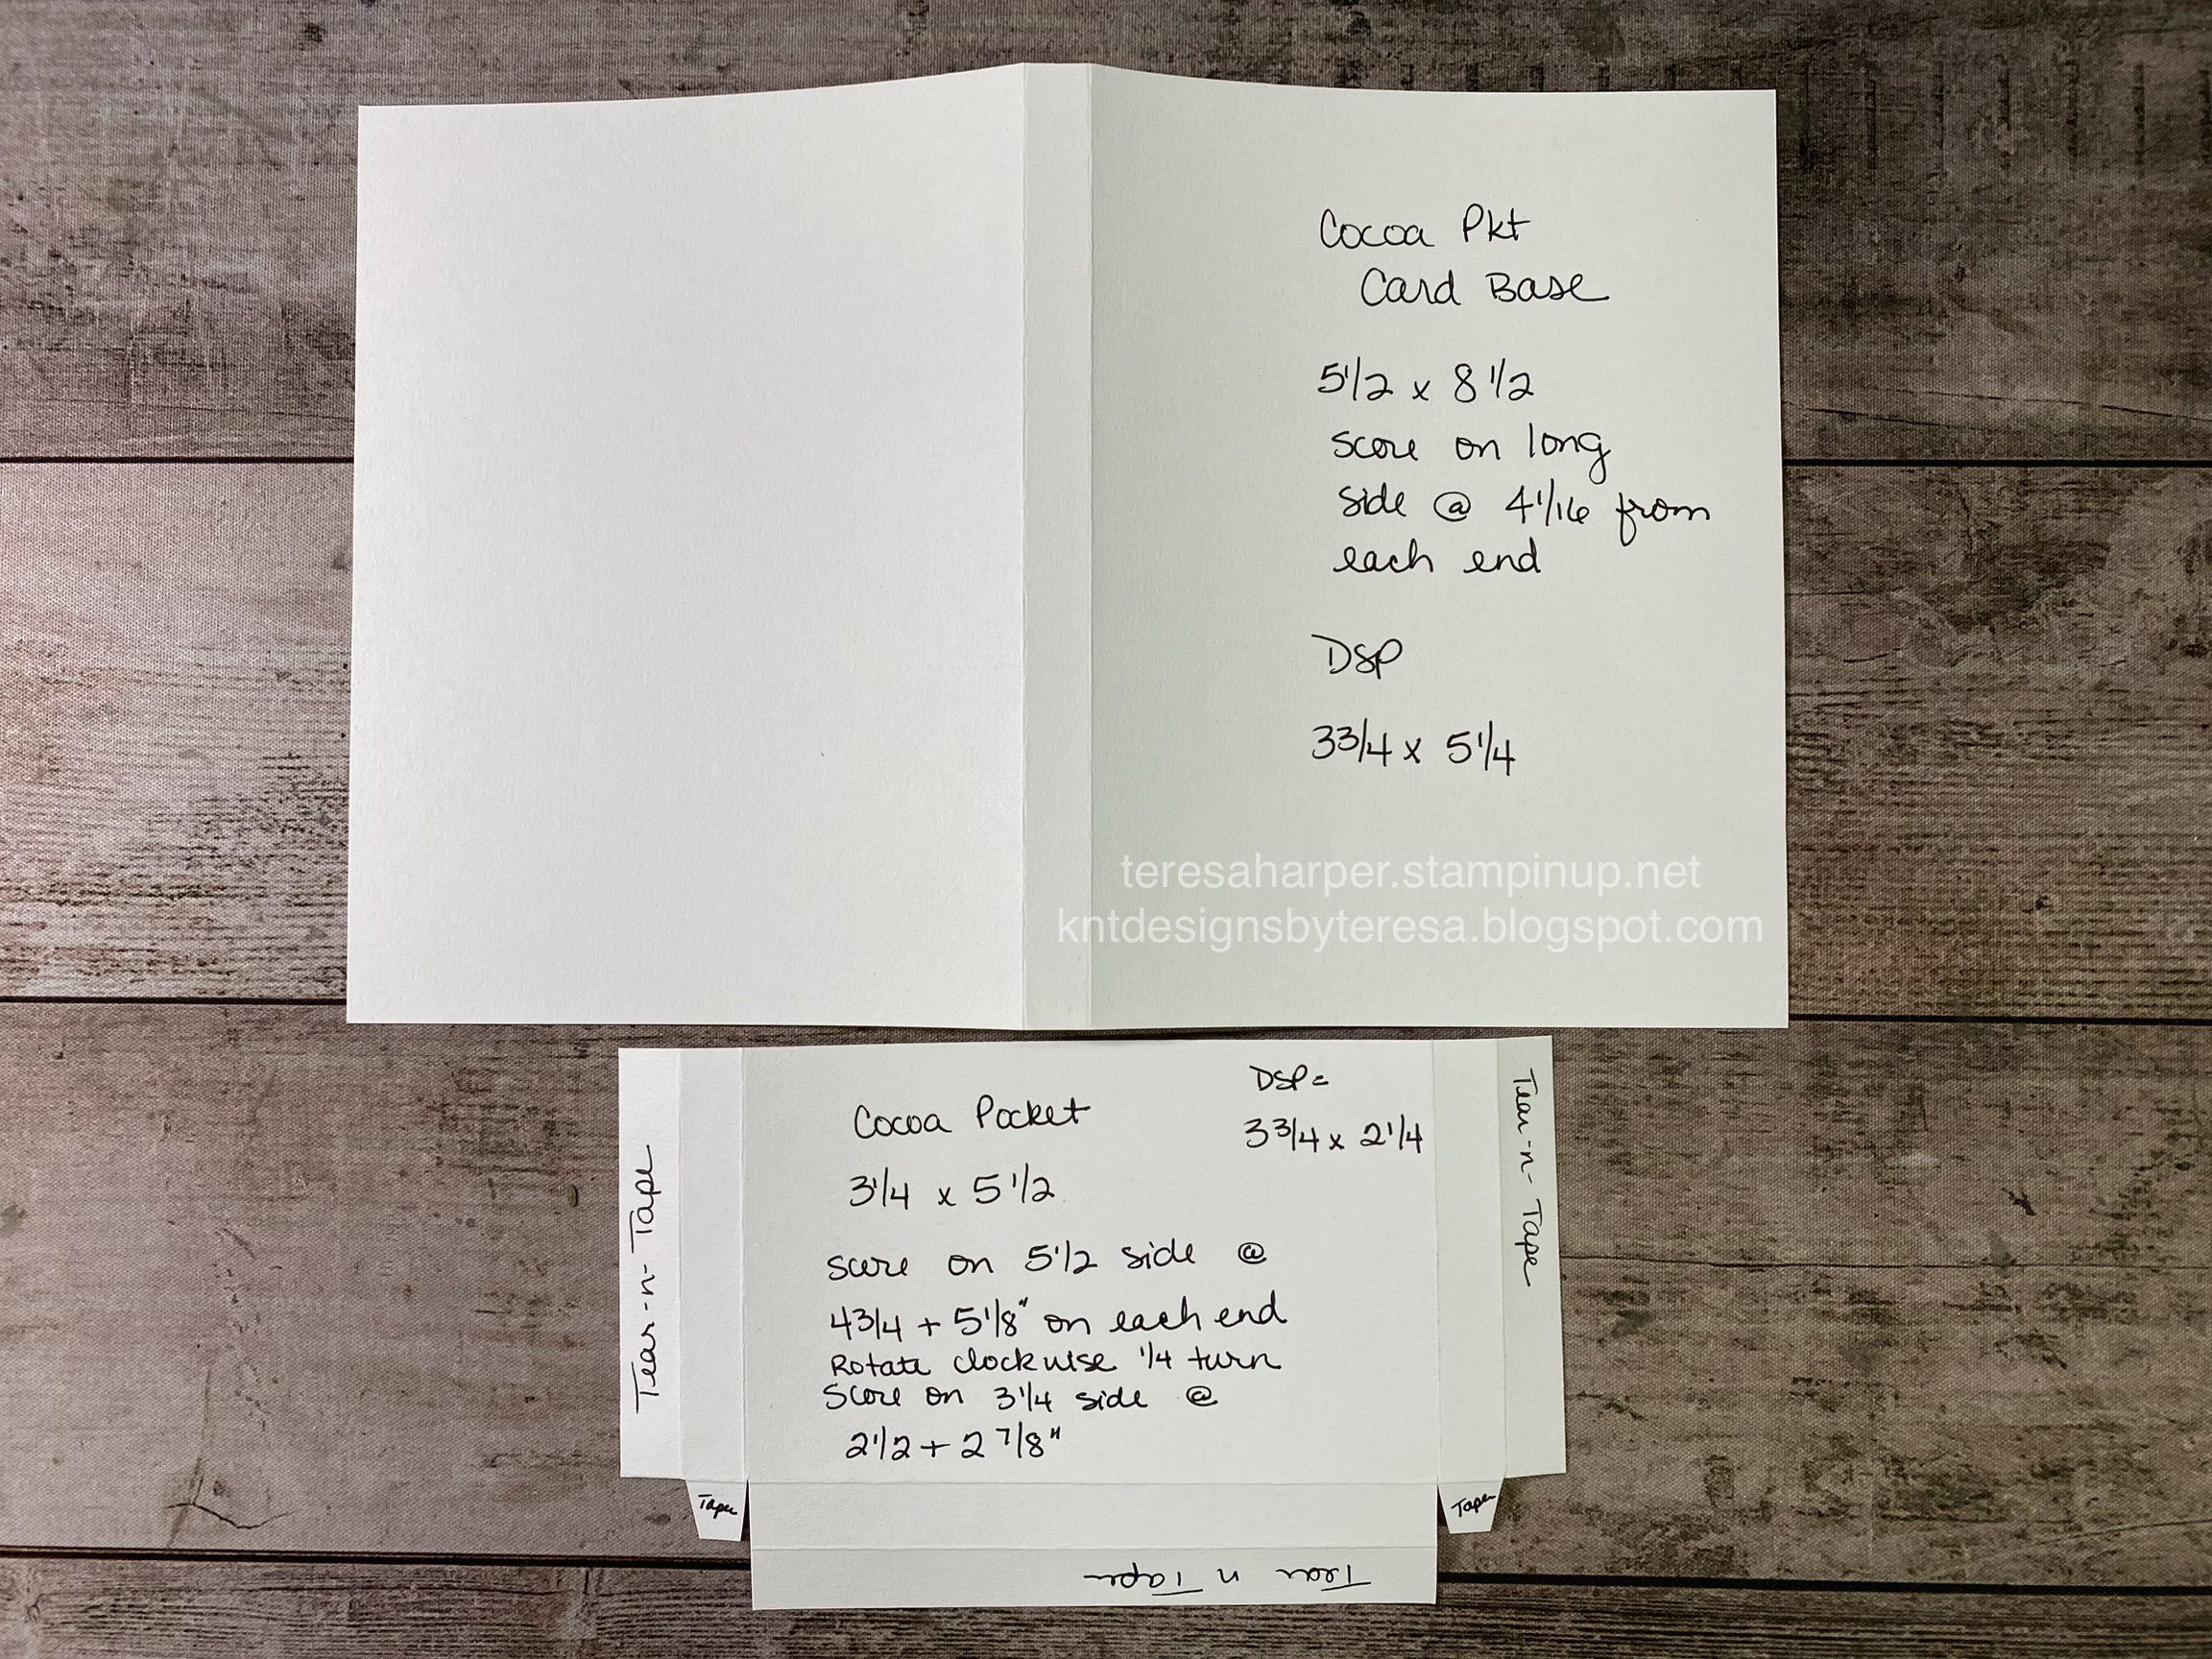
Measurements and Supplies:
Cheerful Basket bundle (includes Full Basket dies)
Ringed With Nature stamp set (poinsettias)
Teacup dies (sentiment tag only)
Vintage Christmas (sentiment only)
Fitting Florets DSP 5 7/8 x 2 1/2", if directional pattern in portrait mode
Soft Succulent cardstock (cs) 6 1/8" x 6 3/8"
score on 6 1/8" side at 3/8" (The 6 1/8" can be adjusted depending on how much of the candy bar wrapper you want showing out the top)
score on 6 3/8" side at 3/8, 3, 3 3/8 & 6"
Scrap of Soft Succulent cs to for scalloped oval punch and die cut sprigs
Scrap of Basic White cs for stamping and die cutting images
Scrap of Crumb Cake cs for stamping and die cutting basket
Scrap of Gold and Rose Gold 6x6 (Gold color) for die cutting sprigs
Ink Pads, Soft Suede, Merry Merlot and Basic Gray
Stampin' Blends alcohol markers: Lt. Smokey Slate, Lt. Gray Granite, Lt. Petal Pink and Lt. Pool Party, Color lifter
Double Oval Punch
Festive Pearls
Evening Evergreen twine from the Fan Baker's Twine combo pack (currently in the clearance rack while supplies last)
Thanks for stopping by today! So happy you came. Please leave me a comment. To purchase any of the supplies I've used today or any other Stampin' Up! items, click on the shopping cart in the upper right. Thanks again!
Until next time; be happy, stay healthy and happy stamping!
Teresa