
Monday, October 24, 2011
MCT Die Folder DT Call
Here is a fun little project I made to hold my MCT dies. They kept getting lost in the bottom of my card box which is where I store all my MCT stamps and dies. This will solve the problem and I had fun making it. Hope you enjoy looking.
 I cut the file folder from Graphically Speaking using the Icon feature cut at 8" which can be found on page 59 of the handbook. I then used the stitched oval die, XL label die, curly label die, fancy frame stamp and die set to make my sentiment frames. Stamps used were from Paper Princess, Encouraging Quotes, Whimsical Calendar Days and the Build a Banner set (this is the polka dot background you see here). All dies and stamps can be purchased here.
Saturday, October 22, 2011
Screamie Halloween Witch Box
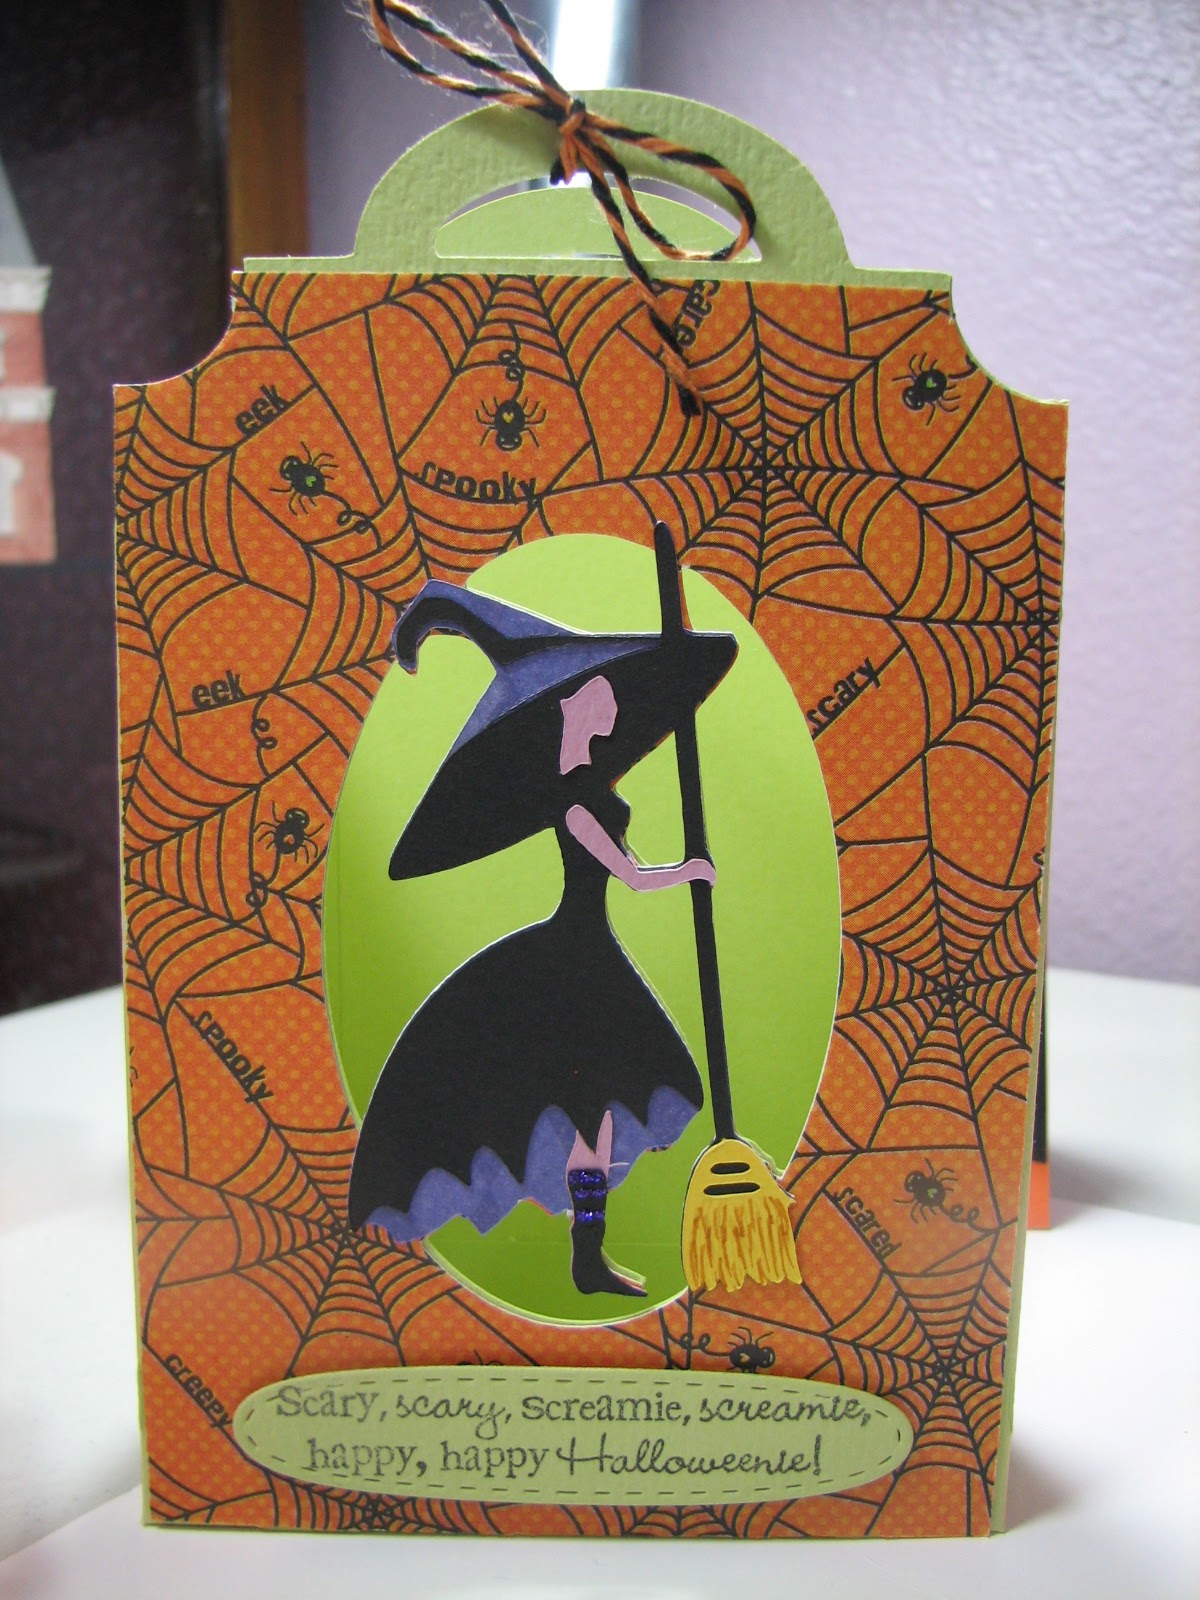
Here is cute box I made for my secret pal using the Wrap It Up Cricut cartridge. I am very pleased at how it turned out. I think she will love it! The box is cut at 8" (I did a fit to page to see how big I could make it from a 12 x 12" piece of cardstock) in green. I then used my Gypsy to cut the rest of the layers. The adorable spider paper is from DCWV ghosts and goblins mat stack. The little witch is cut at 3.10" so she will fit perfectly on top of the box cutout. (There is a layer for the box, but it is only a single layer and I wanted to have all the layers for dimension.) To cut her layers I used Cutmates paper for the black, yellow and pink colors. I cut her purple layer from a sheet of KP Halloween Harlequin paper I picked up at my local stamp store the other day.


For those of you who haven't heard of Cutmates paper, it is specifically designed to cut in diecutting machines (the Cricut). I call it my butter paper, because the tiniest of details cut out "like butter" and you don't get all those tears like you get from a lot of other papers. I discovered it while I was out shopping at the beach during our annual fall beach crop. I picked it up at Stacy's Scrapshack .
Saturday, October 15, 2011
Boo Pumpkin Card
I've created a Halloween pumpkin card for the Throwback Thursday Challenge from My Creative Time (MCT). The challenge is to use an older cartridge which has a card feature. The cartridge I chose to use is Stretch Your Imagination. The card shapes are pretty traditional, but they have an added feature of a card frame to use with them. I used my Gypsy to alter the card size to a traditional A2 size card. By doing this, I was able to save a step and handcut my cardbase in orange. I then used the pumpkin card frame on page 43 of the handbook, rotated it 90 degrees and used real dial size to make the height and width fit the A2 sizing of 4 1/4" x 5 1/2", which I cut in black. To the top of the card I added a strip of 2010 DSP by SU cut at 1/2" by 5 1/4". This is wrapped with twine from Trendy Twine in orange and black. It was then mounted to my card base. The pumpkins are from Peachy Keen stamps using Cottage Kutz Pumpkin Trio. I used MCTs Build a Banner kit to stamp the background on the two smaller pumpkins of which I cut two. I handcut the center of each of the smaller pumpkins apart so I could stamp the faces on them (these are included in the package) and then used Stampin' dimensionals to pop them up.
 Boo is from the Small Talk stamp set from MCT and is stamped on a tag cut using the Build a Banner set from MCT.
 The back of my card is stamped from the Bonus stamp set I received and the most adorable little witches hat comes from All Around Halloween. Both sets from MCT. All paper used is from Stampin' Up. I sure hope you enjoy looking. I had a lot of fun creating!


Monday, October 10, 2011
Boo Gift Card Holder
I made this gift card holder for the MCTs Throwback Thursday Challenge. The challenge is to use any font cartridge. Here is my design. I used Plantin Schoolback and Happy Hauntings for this gift card. The Boo is from Plantin Schoolbook End Caps feature. I took the bat from Happy Hauntings. Paper is from SU, gift card die and sentiment is from My Creative Time . Hope you enjoy looking.


Sunday, September 18, 2011
Paper Doll Ballerina Spinner Card
Here is my first attempt at a spinner card. My granddaughter turns 7 on Tuesday and she asked for a ballerina card as she is very much into her ballet classes. It took some work to figure out the dimensions I needed, but it was well worth the time. I can't wait to see her reaction, and I had fun putting it together. Hope you enjoy looking. I cut the card from the Wild Card cartridge at 5". The ballerina is cut at 4". I used a deco pearl pen to put the jewels in her tiara and some stickles on the tutu for a little sparkle.
 Background paper is Rich Razzleberry from SU, patterned paper is from DCWV 4x6 sweet stack. I randomly stamped happy birthday onto it with a stamp from Teeny Tiny Wishes by SU. The 7 is cut at 1" from Mickey Font in Certainly Celery (SU). Tutu is Pretty in Pink, ballet slippers are Blushing Bride.
 This face stamp is from Laffy Taffy by Peachy Keen Stamps.
 The next two faces are from Wide Eyed Kids, also from Peachy Keen Stamps.

 Sentiment stamps on the inside are also from SU. It appears to be retired. Thanks for looking.


Monday, September 5, 2011
Throwback Thursday Challenge Gift Card
My project for today is a gift card holder I made using My Creative Time's (MCT) gift card die and stitched circle die. The challenge is to make a "cricutless" card using the colors green, orange, black and purple. All paper is Stampin' Up (SU). Sentiments stamps are from MCT. Leaf stamps are from SU. Hope you enjoy looking.


Monday, August 15, 2011
I Believe in You Throwback Thursday Challenge
Here is the card I made for this month's Throwback Thursday challenge. For this project I used Christmas Cheer and Home Decor cartridges for the card base and the sentiment frame. The flower is made with Peachy Keen Stamps & Cottage Cutz Funny Flower die. For the center of the flower I used My Creative Time's die scallop & striched circle dies. The face is stamped with PKS Laffy Taffy Face Assortment. The sentiment is from My Creative Time's My Favorite Sayings. Pattern paper is from DCWV Once Upon a Time 4x6 stack. All other paper is SU. Hope you enjoy looking.


Saturday, July 9, 2011
Smile Wild Card Throwback Thursday Challenge
Here is a card I made for the Throwback Thursday Challenge this week. It was a lot of fun experimenting with different wet embossing powders, trying to get just the right look. Hope you are inspired by my final creation. First, I started with the Wild Card cartridge and used the card from pg. 39 in the handbook. I cut it at 5", then cut the inside oval of the liner also at 5". You can use the hide contour feature to save yourself some paper using your Gypsy. The sentiment tag is cut from Once Upon a Princess at .80" and 1". The flowers are from SU's Vintage Vogue stamp set. I wet embossed the large flower with irridescent embossing power I had on hand, then hand cut out the flowers. I used the same technique on the front of the card, and the sentiment shadow as well, to make it look like glittery patterened paper. On the smaller flower, I used the same stamp as the front of the card, this time using my Zig two-way glue pen applied to the stamp on the flowers. I then added MS glitter to give them some sparkle. The centers of the small flowers are from an EK Success border punch, using a small dot of The Best Glue ever and the same MS glitter. The sentiment is from Miss Emma's "Turn Your Frown Upside Down" stamp set. The ribbon is from my stash by SU.
![]() Here is a close-up of the flowers, although I was having extreme difficulty getting a clear photo. I think you can see the effect of the irredescent embossing powers well enough to get the idea. Of course, it's a lot prettier in person, and I hope the recipient likes it as much as I do. I used a lavender rhinestone gem from Darice's for the center of the large flower to add a little more bling.
Here is a close-up of the flowers, although I was having extreme difficulty getting a clear photo. I think you can see the effect of the irredescent embossing powers well enough to get the idea. Of course, it's a lot prettier in person, and I hope the recipient likes it as much as I do. I used a lavender rhinestone gem from Darice's for the center of the large flower to add a little more bling.
![]() Inside sentiment is stamped on another 5" liner from Wild Card on SU confetti white in Pear Pizazz ink and is from Miss Emma's "My Favorite Sayings" stamp set. All cardstock is Stampin' Up. The card itself is done in Pear Pizzaz, the inside liner which I attached to the backside of the front of the card is discontinued and stamped in Elegant Eggplant. The sentiment shadow is also Elegant Egglplant. Thanks for looking!
Inside sentiment is stamped on another 5" liner from Wild Card on SU confetti white in Pear Pizazz ink and is from Miss Emma's "My Favorite Sayings" stamp set. All cardstock is Stampin' Up. The card itself is done in Pear Pizzaz, the inside liner which I attached to the backside of the front of the card is discontinued and stamped in Elegant Eggplant. The sentiment shadow is also Elegant Egglplant. Thanks for looking!
![]()


Tuesday, June 14, 2011
Hello Kitty Ballerina Grad Card
I made this card for my 6-year-old granddaughter. She had a little "graduation" ceremony from kindergarten. The kids were dressed in caps and gowns and it was the cutest thing ever! She asked me to make her a ballerina with a cap on it. Hope you enjoy the creation I came up with. I think it turned out so incredibly adorable! I used an action wobble on the graduation cap for some interactive play for her. Of course, this photo doesn't do the action wobble justice.

I used the Hello Kitty Font cartridge and using my Gypsy, I welded two shadow images at 4.50" images together for the base of the card, along with the graduation cap from Wrap It Up at 2.50". Scroll is also cut from Wrap It Up at .80". All paper is SU and is pink piourette, pretty in pink, white, black and confetti white for the base of the card. The scroll is cutting using very vanilla and cherry cobbler. The kids' caps and gowns were black with red tassles. Though you really can't see it, the scroll has class of 2023 written on it. I thought it was quite cute, the decorations for the ceremony had the class high school graduation year posted.


I used the Hello Kitty Font cartridge and using my Gypsy, I welded two shadow images at 4.50" images together for the base of the card, along with the graduation cap from Wrap It Up at 2.50". Scroll is also cut from Wrap It Up at .80". All paper is SU and is pink piourette, pretty in pink, white, black and confetti white for the base of the card. The scroll is cutting using very vanilla and cherry cobbler. The kids' caps and gowns were black with red tassles. Though you really can't see it, the scroll has class of 2023 written on it. I thought it was quite cute, the decorations for the ceremony had the class high school graduation year posted.

Thanks for looking. Hope this inspires you for any graduation cards you might have to make.
Monday, June 13, 2011
Porcupine Throwback Thursday Father's Day Card
Here is a Father's Day card I made for my father-in-law and for My Creative Time's Throwback Thursday challenge. This week's challenge is to make a card using any Lite cartridge and add some bling. I used the Handy Man Lite cartridge and glitter and shimmer paint for the bling. This card is oversize to allow for his failing eyesight. Although you really can't see it well in this photo, I used shimmer paint on the wrench to give it some bling!. It's very sparkly up close. I made two cards of roughly the same design and the second card is a regular A2 size card. For the wrench on it, I used silver glitter for the bling which works out much better on the smaller sized wrench which is cut from the Handy Man Cricut Lite cartridge. Hope this inspires you for your Father's Day cards.


Hope you enjoyed looking.
Sunday, May 29, 2011
Graduation Gift Card Holder Throwback Thursday Challenge
I needed to make a graduation card for my friend's son who is graduating this next Saturday. I wanted it to be super nice as she is an avid scrapbooker and this card will almost certainly become a lasting part of his senior scrapbook. Also, he is one of six valedictorians with a 4 pt GPA. We are so proud of him! Here is my card. I hope you are inspired by it. I got inspiration from craftingwithkatie.com when she showed a video on how to make a coffee mug gift card holder using the Cheerful Seasons cricut cartridge. Here is my version.
 For my card I used my Gypsy, Wrap It Up, Plantin Schoolbook and Just Because Cards Cartridges. I took the graduation cap and scroll from Wrap It Up. The owl is cut from Just Because Cards and Plantin Schoolbook was used to weld a rectangle to the base of the graduation cap to make the gift card holder portion of the card. The owl is cut at 10.30 inches (all layers except shadow which is cut at 10.05), the graduation hat at 2.8 inches and the scroll at 1 inch.
 The graduation hat is designed to pull out from behind the shadow layer of the owl which is attached on either side and bottom to the card base with pop dots to allow enough space for the gift card to slide easily.
 To the base of the graduation hat, I welded a rectangle 2.42 inches wide by 6 inches in height to form the base for the gift card, then cut the remaining layers. I didn't want to use the tassle which is attached to the grad hat, so I cut it off with scissors to allow for a tassle made from baker's twine. The base of the card is two owl shadows cut at 10.05 inches with two grad caps cut at the 2.8 inches, with the left hand side flipped, then the two images welded together. The inside Congratulations sentiment is from Stampin' Up and the other is from My Creative Time's My Favorite Sayings stamp set. I think it goes perfectly!


All cardstock used is from Stampin' Up and colors are certainly celery (discontinued), daffodil delight, really rust, black, more mustard, night of navy and very vanilla. Googlie eyes are some I picked up at JoAnn's. I think they are very cute with the eyelashes! I also used an SU shimmer brad for the button on the top of the cap.
Monday, April 25, 2011
Paper Lace Mother's Day Card
I created these cards for the Peachy Keen Challenge #50 and as I needed to make my Mother's Day cards, I made sure they would fit the theme. Hope you enjoy them. Both cards are A2 size. The sentiment stamp is a single stamp from SU called Mother of Mine and is only available until April 30. The felt flowers, flower brad and paper are also from SU. I used my EK Success daisy border punch. The scalloped flower and shadow is cut from Paperlace at 3.8" (as I used my Gypsy) and can be found on page 35 of the handbook. I then layered the scallop circle punch (SU) and cut a flower from the same DSP paper as the base flower and popped it up with a dimensional.
 To add some bling (and also to meet the the metallic twist of the challenge), I added silver metallic stickles in the center of each daisy. I think it dresses it up nicely, although the photo doesn't do it justice.
 I needed more than one card and decided to alter the design just a bit for the second card. For this card I used flower8 on page 37 of the handbook and cut it at 2.25". Again I used a SU brad in the center of both flowers. Both cards are edged with the Martha Stewart double loop border bunch and I placed coordinating DSP inside along the bottom of the card so it would show through for some added decoration and make the double loops pop.
 Again, I used stickles in the center of each flower, this time metallic gold as the silver just didn't seem to show up well. Hope you find some inspiration for your Mother's Day cards.


Sunday, April 24, 2011
Paper Lace Flower appreciation card
Today I have an appreciation card I made from the Paper Lace cartridge. Again I used my Gypsy to weld to two base shadows from page 25 of the handbook together to make the card. I flipped the second image from left to right. These images were cut at 3.80" out of SU Pacific Point cardstock. I then cut the flower2 feature out of Daffodil Delight. Next I used the butterfly from page 35 of the handbook and cut the Lace2 and Lace2 Shadow features at 1.40". I used a discontinued DSP paper for the Lace 2 feature. I popped the butterfly up in the center of the card using dimensionals. The outside sentiment is from Teeny Tiny Wishes by SU. .
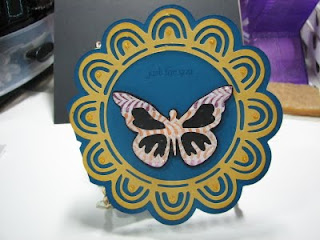
I used stickles at the center point of each scallop for a little bit of bling and on the outer edge of the butterfly for a little bling. Here is a closeup of the butterfly.

For the inside of the card I cut two base shadows from page 25 at 3.20" and stamped the sentiment from Emma's So Grateful For You set. You can find the link here. I used core'dinations pearl cardstock and pacific point ink to stamp the sentiment and ink the edges. I like to put a lighter colored cardstock inside when making cards that will be signed by several individuals as this card will be.
 Here is a snapshot of the back of the card. I like to do this will all my cards. This stamp is from a Pink By Design set called Handmade By You. You can find the link here. Hope you enjoy and find inspiration to create something today.


I used stickles at the center point of each scallop for a little bit of bling and on the outer edge of the butterfly for a little bling. Here is a closeup of the butterfly.

For the inside of the card I cut two base shadows from page 25 at 3.20" and stamped the sentiment from Emma's So Grateful For You set. You can find the link here. I used core'dinations pearl cardstock and pacific point ink to stamp the sentiment and ink the edges. I like to put a lighter colored cardstock inside when making cards that will be signed by several individuals as this card will be.


Baseball Mitt Appreciation Card

Here is a quick card I made for Administrative Professional's Day for our male secretary. He is very much into baseball so the Boys Will Be Boys cartridge inspired me to make this card. I welded two shadow baseball mitts cut at 4.15" one on top of the other so the card opens from the bottom of the mitt. These can be found on page 29 of the handbook. I flipped the top mitt upside down prior to welding on my Gypsy. I then cut the card base in black. Next I cut the base of the mitt from color core-dinations pearlized cardstock in red. Next I cut the shift base of the mitt in SU creamy caramel cardstock and ran it through my texture boutique with my square lattice folder for a little dimension. Layer was cut from close to cocoa cardstock. Next I went to the shift base of the bat and ball featured on page 39 of the handbook. I cut the ball base at 4" so it would fit nicely into the mitt out of the same red cardstock as the mitt. Next I cut the layer feature for the ball out of very vanilla cardstock and inked the edges with SU crumbcake ink. Layered the two cuts together and popped them on top of the mitt with some dimensionals. The outside sentiment is from SUs Teeny Tiny Wishes. For the inside I cut another card using vanilla cardstock. I cut the card apart at the weld so that when placed into the card and the card was closed, it will all lay nicely. I then stamped the inside sentiment in Night of Navy ink with one of Emma's stamps from My Creative Time So grateful for you. You can find the link here. Thanks for looking.

Thursday, April 14, 2011
Dreams Do Come True


Here is a look at the Snow White autograph charm.

Hope you enjoy it! Thanks for looking.
Tuesday, April 5, 2011
Treat Pocket

Saturday, April 2, 2011
Tote-ally Tess Birthday Card


Friday, March 4, 2011
Everyone is Irish for a Day Paper Doll Dress-Up My Creative Time Challenge

This card is made using my favorite cartridge Paper Doll Dress Up. I used all SU products except for my stamps. The "Everyone is Irish for a Day" stamp is from a Studio G $1 set I picked up at Craft Warehouse. I used my PK Wide-Eyed Kids face assortment for the leprechaun's face.
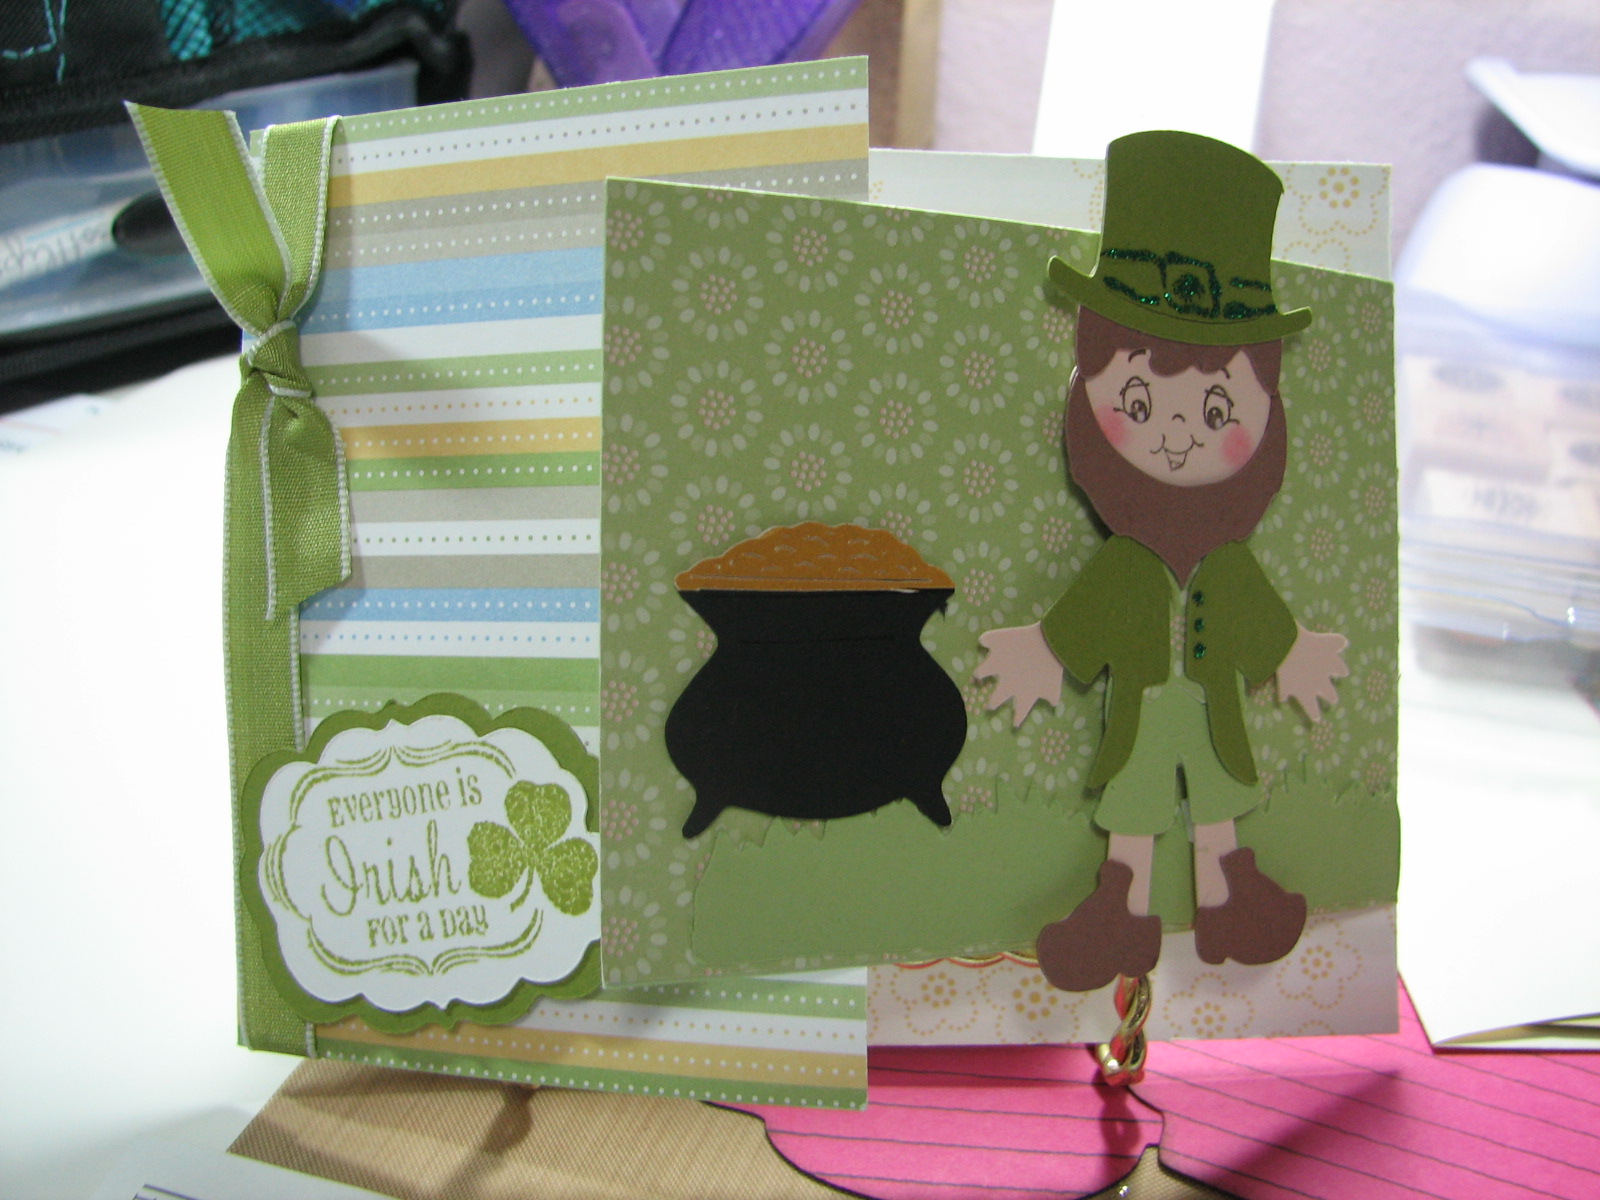
I used stickles to make the details on his hat stand-out just a bit and give it a little something extra as well as for the buttons on his jacket. The "gold coins" are cut from DCWV shimmer stack gold paper. Ribbon is SU. I cut the tag from Once Upon a Princess and welded on a shamrock using the Gypsy and Paper Doll Dress Up so it would make the shape of my stamp. Then made the shadow feature for tag with the Gypsy as well. It took a little work, but I think it was worth it in the end.

Inside sentiment is from My Creative Time's Turn that Frown Upside Down set. I love this set. Hope you enjoy it.
Subscribe to:
Posts (Atom)