Showing posts with label coloring. Show all posts

Sunday, August 31, 2025

Time to Celebrate Autumn Trees card

We are continuing on with some sneak peeks from the upcoming Stampin' Up! product release launching on September 3.  Along with that, I'm featuring some designer series paper techniques to enhance and make the paper your own.  You will find some suggested techniques in the September-December mini catalog on page 43, I hope you will give them a try.  I used an ink blending and coloring technique on my card today.  You can find the card tutorial video on my YouTube channel.  


Measurements and Supplies:
Autumn Trees bundle *165900 **Sneak peek
More Messages bundle* 165473 (outside sentiment)
Traditional Labels dies 165864 (can be purchased in a bundle* with sentiment stamps) **Sneak peek
Autumn Toile 12 x 12 DSP 165882 4" x 5 1/4" **Sneak peek
The Right Words stamp set 165316 (inside sentiment)
Streaked Dots 165902 **Sneak peek
Old Olive cardstock for card base 5 1/2" x 8 1/2", scored in center at 4 1/4"
Old Olive cardstock for label die
Very Vanilla cardstock for stamping & inside layer 3 5/8" x 4 7/8"
Ink Pads: Old Olive, Early Espresso
Stampin' Blends alcohol markers: Old Olive, Dark Cloud Cover, Light Pecan Pie & Natural Tones Medium Deep SU 300
blending brushes 160518

I hope you have liked this quick and easy card and that you learned some techniques from it.  I enjoyed teaching them.  

Until next time; be happy, good health to you and happy stamping!
Teresa

*Purchasing bundles saves 10% over the individual piece prices when combined.  You must use the bundle item code for the 10% bundle discount.  When purchasing Last Chance items; be sure to check if the individual piece prices are discounted.  Individual piece prices could be less expensive if the discounts are deep enough.

**Sneak peek items will be available to the general public beginning September 3, 2025.  If you would like to join my team, you can add them to your starter kit today!  

Saturday, April 26, 2025

Thinking of You Sketched Butterflies in Triple Time

 For my card today, I've taken an old technique called Triple Time Stamping and made it easier using a soon-to-be released die set.  Let's take a look at how it's done in the card tutorial video I've added to my YouTube channel.


Supplies and Measurements:

Last Chance products while supplies last:
Sketched Butterflies bundle 163492* (includes stamps 163490 & dies 163491)
Flat Adhesive-Backed Pearls 160449

Current Product and/or upcoming product releasing May 6:
Wonderful Thoughts stamps 161899, Wonderful Thoughts dies 161491
Gallery Blooms dies 165212 (offered in a bundle* 165213 with coordinating stamps)
Basic Black cardstock, 5 1/2" x 8 1/2", scored in center at 4 1/4"
Basic Black cardstock 1 3/4" x 3 1/2" & 2 3/4" x 4 7/16, plus small scrap for sentiment
Basic White cardstock 4" x 5 1/2" & inside layer 3 5/8" x 4 7/8"
Ink Pads: Memento Tuxedo Black, VersaMark watermark ink
Stampin' Blends alcohol markers: Pretty Peacock, Lost Lagoon, Blackberry Bliss, Fresh Freesia, Highland Heather, Peach Pie, Lemon Lolly, Summer Splash, Pretty in Pink, Smoky Slate
2025-2027 In Color Stampin' Write markers, Strawberry Slush 165292

Thanks so much for stopping by today.  I hope you took advantage of the free shipping offer over the past three days.  I know I did!  Thanks so much for supporting my small business.  It's orders like yours that make it possible for me to bring this free content to you.  So thanks again, I appreciate you so much!

Until next time; be happy, good health and happy stamping!
Teresa

*Purchasing bundles saves 10% over the individual piece prices when combined.  You must use the bundle item code for the 10% bundle discount.  When purchasing Last Chance items; be sure to check if the individual piece prices are discounted.  Individual piece prices could be less expensive if the discounts are deep enough.

Saturday, March 29, 2025

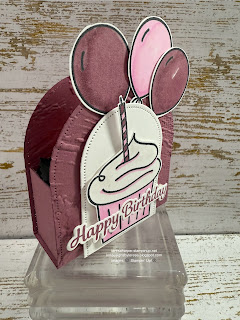
Arched Wishes birthday box to fit fun size candy bars

 My project today is a fun sized treat box for a birthday.  Of course, you could make it for any occasion.  It would make a cute table favor or place setting marker and includes a special treat!  Who wouldn’t love that?  To see how I made this little box, watch the video replay over on my YouTube channel.


Measurements and Supplies:
Arched Wishes stamp set 165428
Everyday Arches dies 164629
Plaster Painting 3D Embossing Folder 164656
Moody Mauve cardstock (2) pieces approximately 4 1/2" x 3 1/2" for 3rd largest arch
    Score 1" from the bottom of each arch    
1 piece 4 3/4" x 4"
    Score on 4 3/4" side at 1" from each end, rotate and score on 4" side at 1 1/2" from each end.
    Finished box size 2 3/4" x 2 1/2" 1" 
Basic White cardstock for stamping and approx. 3 1/2" x 2 1/4" for 4th smallest arch
Ink Pads: Moody Mauve, Memento Tuxedo Black
Stampin' Blends alcohol markers: Moody Mauve, Bubble Bath
Wink of Stella Glitter Brush 141897
2023-2025 In Color Opaque Sparkle Dots 163782 (I forgot to add my Moody Mauve ones in the video)

Non-Stampin' Up! Happy Birthday sentiment and die is from Gina K Designs Essential Greetings bundle

To purchase your Stampin' Up! supplies, be sure to click on the shopping cart to the right.  It will take you to my online store where you can shop 24/7.  I do so much appreciate your business.  

Until next time; be happy, be healthy and happy stamping!
Teresa

*Purchasing bundles saves 10% over the individual piece prices when combined.  You must use the bundle item code for the 10% bundle discount.  When purchasing Last Chance items; be sure to check if the individual piece prices are discounted.  Individual piece prices could be less expensive if the discounts are deep enough.


Wednesday, March 26, 2025

Rainbow arched lattice birthday card

 Hello all.  For my card today, I’ve gone slightly outside the box and combined the Everyday Arches dies with the Linked Together dies.  I do love how the two together can be trimmed to make an arched lattice.  It took a bit to figure out how to make it work, but once it came together, I loved it.  To see how I’ve put this one together, be sure to watch the video replay over on my YouTube channel.


Supplies and Measurements:
Wishes stamp set 165428
Everyday Arches dies 164629
Country Flowers bundle 163411* (includes stamps 163405 & dies 163410
Linked Together dies 164808
adhesive-backed Textured Dots 163338
Basic Black cardstock 5 1/2" x 8 1/2", scored in center at 4 1/4" for card base
Basic White cardstock 4" x 5 1/4" for ink blended focal piece, plus pieces for stamping & die cutting images, arch and lattice dies
Basic White cardstock for inside layer 3 5/8" x 4 7/8"
Ink Pads: Calypso Coral, Flirty Flamingo, Fresh Freesia, Azure Afternoon, Pretty Peacock, Night of Navy, VersaMark watermark ink pad & Tuxedo Memento Black
Stampin' Blends alcohol markers: Fresh Freesia, Pool Party, Flirty Flamingo, Daffodil Delight, Lemon Lolly, Pretty Peacock, Calypso Coral, Pecan Pie, Natural Tones collection Deep SU 100
Wink of Stella Glitter Brush 141897
blending brushes 160518 and/or 153611
Basics WOW! Embossing powder 165679 (black)

Thanks so much for stopping by today!  I hope you've been inspired and will stamp and send a card for someone special.  

Until next time; be happy, be healthy and happy stamping!
Teresa

*Purchasing bundles saves 10% over the individual piece prices when combined.  You must use the bundle item code for the 10% bundle discount.  When purchasing Last Chance items; be sure to check if the individual piece prices are discounted.  Individual piece prices could be less expensive if the discounts are deep enough.


Saturday, August 12, 2023

Little Monkey Apple Harvest card

 For today’s card, I’ve used the Little Monkey bundle which is my featured product this week.  I then  added a stamp set from the annual catalog along with its coordinating dies which are currently in the clearance rack (at a deep discount while supplies last.)  Again, I've also included some sneak peek items from the upcoming September-December Stampin' Up! Mini catalog.

To see how I put this card together, watch the video replay over on my YouTube channel HERE: 
Please note:  I added ribbon and sequins after I finished the video.  I've included those in the supply list.  


Measurements and Supplies:  
Little Monkey bundle 161379 (stamps 161372 & Little Monkey Builder Punch 161378)
Apple Harvest stamp set 159944
Apple Blossoms dies 160255 (clearance rack while supplies last)
Twisted Rope Embossing Folder 161545
Old Olive cardstock, 5 1/2 x 8 1/2", scored in center at 4 1/4"
Soft Sea Foam cardstock, 4 1/8 x 5 3/8", scrap for sentiment & 3 5/8" x 4 7/8" for inside layer
Crumb Cake cardstock, 3 3/4 x 5", embossed with Twisted Rope EF
Basic White cardstock for stamping and die cutting images  
Stampin' Blends: Natural Tones collection page 136 of the annual catalog-Med Deep SU 300 & 400 (159461), Medium SU 500 & 600 (159462), Light SU 1000 (159465), Color Collections-Copper Clay, Real Red, Lt Cherry Cobbler, Old Olive & Lt Soft Sea Foam
Ink Pads: Old Olive, Early Espresso & Memento Tuxedo Black
Paper Snips for fussy cutting 103579
Stampin' Dimensionals 104430
Mini Glue Dots 103683
Wink of Stella Glitter Brush 141897

These items are the sneak peek items I've used available to customers beginning September 6, 2023, in the upcoming September-December Stampin' Up! Mini catalog. 
Copper & Natural Ribbon Combo 162192 
Adhesive-Backed Glitter Sequins 162029

Thank you for joining me today.  I truly appreciate you taking time from your busy day to spend it with me.  Please shop my online store for all your Stampin' Up! needs by clicking the shopping cart in the upper right. 

Until next time; be happy, stay healthy and happy stamping!
Teresa


Thursday, May 18, 2023

Coffee (and croissants) With Friends sketch card

 Coffee With Friends is my featured Stampin’ Up! product this week.  I made two cards and showed three others during my live on Wednesday night.  For this card I used a Short Cut Card sketch by Marisa Alvarez of kitchentablestamper.com.  You can watch the video replay HERE:

I tried to show how you can use this stamp set for things other than coffee cards.  I hope you like the inspiration.  To order any products I've used today, click on the shopping cart in the upper right corner.  It will take you to my online store where you can shop 24/7.  Be sure to watch the video for three additional cards.  


Supplies and Measurements:
Coffee With Friends stamp set
Exposed Brick 3D embossing folder
Timeworn Type 3D embossing folder
Stylish Shapes dies
2" circle punch
Thick Basic White cardstock, 5 1/2 x 8 1/2", scored in the center at 4 1/4"
Glorious Gingham DSP, Berry Burst pattern three pieces
    2 1/4 x 4 3/4", 3/4" x 4" and 1/2 x 3 3/4"
Fresh Freesia scrap for die cutting
Baker's Twine Essential pack, white twine colored with Lt Fresh Freesia Stampin' Blend alcohol marker
Pecan Pie ink pad
Memento Tuxedo Black ink pad
Tinsel Gems three-pack
Stampin' Blends: Berry Burst, Fresh Freesia, Pecan Pie, Lt Smokey Slate

I hope you have enjoyed this project and are inspired to use the sketch.  It makes card making go much faster and I thank Marisa Alvarez for providing it!  

Until next time; be happy, stay healthy and happy stamping!
Teresa
Pecan Pie cardstock, 2 1/4" 3 3/4"
Basic White for stamping and die cutting


Saturday, February 4, 2023

Happiness Abounds, Artistically Inked coloring technique


My intention with the card I have for you today is to show how you can use one stamp set to color in the line images of another.  I love looking for unique ways to use my stamps when I don't feel like taking the time to color in a line image.  This is especially great if you need to make several of one design.  To see how I put this card together, be sure to watch the video replay over on my YouTube channel HERE:


Measurements and Supplies: 
Artistically Inked stamp set
Happiness Abounds bundle (stamps and Blossoming Happiness dies)
Stitched Rectangles dies (largest for DSP and third largest for basic white cs)
Flowering Fields Designer Series Paper (currently on the clearance rack while supplies last)
Thick Basic White cardstock (CS) 5 1/2 x 8 1/2", scored in center at 4 1/4"
Basic White cs for stamping and die cutting
Adhesive Backed Milky dots
Ink Pads: Memento Tuxedo Black, Pool Party, Merry Merlot, Daffodil Delight, Pear Pizzaz, and Melon Mambo
Blending Brush


Thursday, January 12, 2023

Friendly Gnomes sending happy thoughts

 Today I have a Friendly Gnomes card for you.  I really loved the gnomes we had in the July-December 2022 mini catalog, but alas they were retired.....oh wait, now we have a new gnome stamp set called Friendly Gnomes.  I tried a design style a little outside my comfort zone, but I do like how it turned out.  To see how I put this card together, you can watch the replay over on my YouTube channel HERE:


Measurements and Supplies:
Friendly Gnomes stamp set
Stitched with Whimsey dies (second largest rectangle)
Tailor Made Tags dies (second largest)
Card Base of Mango Melody card stock 5 1/2 x 8 1/2", scored in half at 4 1/2"
Basic White card stock, 4 x 5 1/4", 3/4 x 3", and for inside 2 3/4 x 4 1/4"
Rain or Shine Specialty Designer Series Paper (three pieces each 1" x 3 1/2" and 1/2" x 2 3/4" for inside)
Scraps of Basic White cardstock for stamping and die cutting images
Blending Brushes
Happy Labels Pick a Punch (for sentiment strip)
Essentials Twine Combo pack (crumb cake)
Rustic Metallic Dots
Iridescent Pearls basic jewels
Pebbles enamel shapes (on clearance $3 while supplies last)
Ink Pads: Balmy Blue, Old Olive, Momento Black
Stampin' Blends markers: Flirty Flamingo, Crumb Cake, Old Olive, Mango Melody (retired) OR Daffodil Delight, Balmy Blue, Lt So Saffron, Lt Soft Suede and SU 900 (lights natural tones)
Wink of Stella clear glitter pen (for window on mushroom house and the mushroom cap)

Thank you so much for stopping by today!  I do appreciate you taking time from your busy schedule.  Please leave me a comment, I'd love to hear from you.  If you would like to order any Stampin' Up! supplies, please click on the shopping cart in the upper right corner.  I would be ever so appreciative of your business.

Until next time; be happy, stay healthy and happy stamping!
Teresa


Thursday, February 24, 2022

Butterflies and Flowers Masks with Catching Butterflies fun fold

Happy Thursday everyone!  So happy you're here.  Today's projects stem from one of my friends asking how to complete a certain fun fold.  So while I was helping her figure out the measurements, I created these cards.  The first card is one I created for my Tuesday night Facebook live and features the Sale-a-bration stamp set Catching Butterflies which can only be received for free with a qualifying purchase through February, 2022.  Time is running out to get this stamp set for free.  Click on the shopping cart in the upper right to go to my online store and click on Sale-a-bration to see what all you can earn for free. To watch the video on how I put this card together, click here:  https://youtu.be/HQXvu3NF2lg 


Measurements and Supplies:
Card Base of Coastal Cabana 5 1/2 x 4 1/4"
Designer Series Paper (DSP) Friendly Hello, 12 x 5 1/4" (score at 2 and 4" from each end in landscape)
Focal layer and inside layer, Pool Party 3 1/8 x 4 3/8"
Image layer and inside focal image, Basic White 3 x 4 1/4"
Butterflies and Flowers Layering Decorative Masks
Catching Butterflies stamp set
Pool Party and Momento Tuxedo Black ink pads
Stampin' Blends in Fresh Freesia, Crumb Cake, Pool Party and Pale Papaya

Thank for stopping by my blog today.  I really appreciate it.  Please leave me a comment, I'd love to hear from you.  You can order any supplies you might need by clicking on the shopping cart in the upper right.  If you order by February 28, 2022, you can choose one free Sale-a-Bration product for every $50 in product you purchase.  

Until next time; be happy, stay healthy and happy stamping!
Teresa

Thursday, November 18, 2021

Seasons of Fun tree hunt

 Wow!  What a busy past several days it’s been here at the Harper house.  With OnStage @Home, putting up Christmas lights, putting together lawn ornaments and watching the smallest grandchild, it’s been very busy!  We decided to get the lights up as Sunday afternoon it was a very warm day here in Oregon, short sleeve weather in Mid-November with no rain is rare.  Don’t worry, the dry didn’t last!  It poured on Monday morning while we were out buying a couple of additions to our decorations. 

Now onto the crafting!  Today’s project features Seasons of Fun host stamp set by Stampin’ Up! It has three main images in the set which cover Halloween, Fall and Christmas.  It is an image only set so you can use any sentiment from your craft stash.   You can earn it for free with a $150 individual or group purchase and use your Stampin’ Rewards dollars to purchase it.  I just love this image.  It reminds me of my granddaughter Abigail.  The image is stamped on Basic White which has been die cut with the Stitched So Sweetly Dies.  I stamped and colored the image, then masked it with a post it note and added in the background trees which come from Peaceful Deer, but you could use any small tree stamps you have on hand.  The trees are stamped in Evening Evergreen with Soft Suede for the trunks.  It’s mounted on Evening Evergreen die cut using the Scalloped Contour dies and added to a piece of Tidings of Christmas Designer Series Paper 4x5 1/4”.  The card base is Soft Succulent 5 1/2 x 8 1/4”.  You can watch the video here https://youtu.be/4TGezNhggjA
These are the Stampin’ Blends I used to color my image with.


Here is the inside of the card.  The sentiment comes from Inspired Thoughts, which is all-around versatile set for any occasion.  I used the largest scallop rectangle from Stitched So Sweetly and mounted it on Evening Evergreen 3 3/4 x 5.
Thanks for stopping by my blog today!  I appreciate you taking time from your busy day.  To purchase any Stampin’ Up! Supplies, click on the shopping cart in the upper right corner.  It will take you to my online store where you can shop 24/7.  I would love to earn your business.

Until next time; be happy, stay healthy, and happy stamping!
Teresa

P.S. in case you’re wondering, these are the new lawn ornaments assembled inside, waiting for a dry period to put out.


Saturday, October 30, 2021

Warm winter wishes with Snowbody Better

 Here it is Saturday already!  I have another project for you today I made during my weekly Tuesday night live over on Facebook.  I would love it if you followed me there.  I usually make two projects every Tuesday evening live at 7:45 pm PDT.  You can always watch the replay over on my YouTube page at Teresa Harper kntdesignsbyTeresa.  

I started this project by stamping and coloring the snowman image in Momento Tuxedo black ink as I colored with Stampin’ Blends markers which are alcohol based.  I then fussy cut out the image with my paper snips.  I die cut a piece of basic white cardstock using the second largest Scalloped Contour die.  To this I stamped the snowflake image from Welcoming Woods stamp set in Versamark ink randomly on the top 2/3 of the die cut, added white embossing powder and heat set the powder.  Next, I used a blending brush and Misty Moonlight ink to add a little color to the “sky”.  I then began building my card layers.  To the Night of Navy cardbase, I added a piece of Beauty of the Earth Designer Series Paper, then added my scalloped die cut.  The snowmen were then added to the scalloped die cut using Stampin’ Dimensionals to give added depth.  The sentiment piece is stamped in Night of Navy ink on Misty Moonlight cardstock, then clear embossing powder was immediately added and heat set.  It must be done very fast as our classic ink dries quickly so you need to have all your supplies open and ready to go.). The sentiment was then cut out with a die from Beautiful Trees dies.  Finally, I added some white gems from Elegent Gems.   


Supplies used:
Beauty of the Earth Designer Series Paper 4 x 5 1/4”
Night of Navy cardstock 5 1/2 x 8 1/2”
Basic White Cardstock, half sheet for stamping and die cutting 
Misty Moonlight cardstock scrap for sentiment
Stampin’ Blends in Misty Moonlight light, Balmy Blue light, Flirty Flamingo, Fresh Freesia, Evening Evergreen and Soft Succulent
Blending Brush
ink pads in Momento Tuxedo black, Versamark clear and Night of Navy
White and clear embossing powders
Scalloped Contour Dies
Snowbody Better stamp set
Welcoming Woods stamp set

Thanks for stopping by my blog today.  Please leave me a comment to let me know your thoughts.  If you would like to purchase any of the products I’ve used, please click on the shopping cart in the upper right corner.  It will take you directly to my online store where you can shop 24/7.  I would really appreciate your business.

Until next time, happy stamping!
Teresa


Monday, March 18, 2019

This Little Piggy is growing up birthday card

Hello everyone!  I just had to share this card today.  It was designed and made by my 14-year-old granddaughter Kaitlyn for her mom’s birthday.  She did the majority of the work, all of the design, coloring and fussy cutting.  I am thrilled with the way this turned out.  I picked her up after school, we came home and she got started working straight away.  When she was finished, she was ready to go home.  Her mom gets a lovely card and I got to spend some quality crafting time with my granddaughter.  It was a win-win.  The stamp set she chose is called This Little Piggy.  The sentiment comes from Itty Bitty Birthdays.  The flowers were die cut from Gorgeous Grape cardstock using the Bouquet Bunch framelits.  The grass is cut from a retired framelit set which was part of the Basket Bunch bundle.  Her card base is Highland Heather, with a layer of Soft Sky (retired) and a piece of the Highland Heather gingham Designer Series Paper from Gingham Gala 6x6 Designer Series Paper stack.  She used a bit of Wink of Stella on the cloud which is also from This Little Piggy.  She colored the pig with Stampin’ Blends in Petal Pink (combo), Ivory for her nose and light Crumb Cake on the hooves.  I think she did a fabulous job for her first time using the blends.  She then fussy cut out the pig and popped her up on stampin’ dimensionals.


I should have taken a photo of the inside of the card, but forgot.  Inside she used the Making a Difference stamp set to spell out Kinda, then added lol and jk (just joking).  Her mom got a laugh out of the sentiment she made.

I hope you’ve enjoyed today’s project and are inspired to create something of your own.  Please leave a comment, we’d love to hear from you.  If you want to purchase any Stampin’ Up! Supplies, I would be grateful for your business.  Please click on the shopping cart in the upper right.  It will take you directly to my online store.  Thanks for stopping by my blog today, make it a great day and happy stamping!