Showing posts with label #simplestamping. Show all posts

Thursday, August 18, 2022

Ringed With Nature Fun Fold two designs

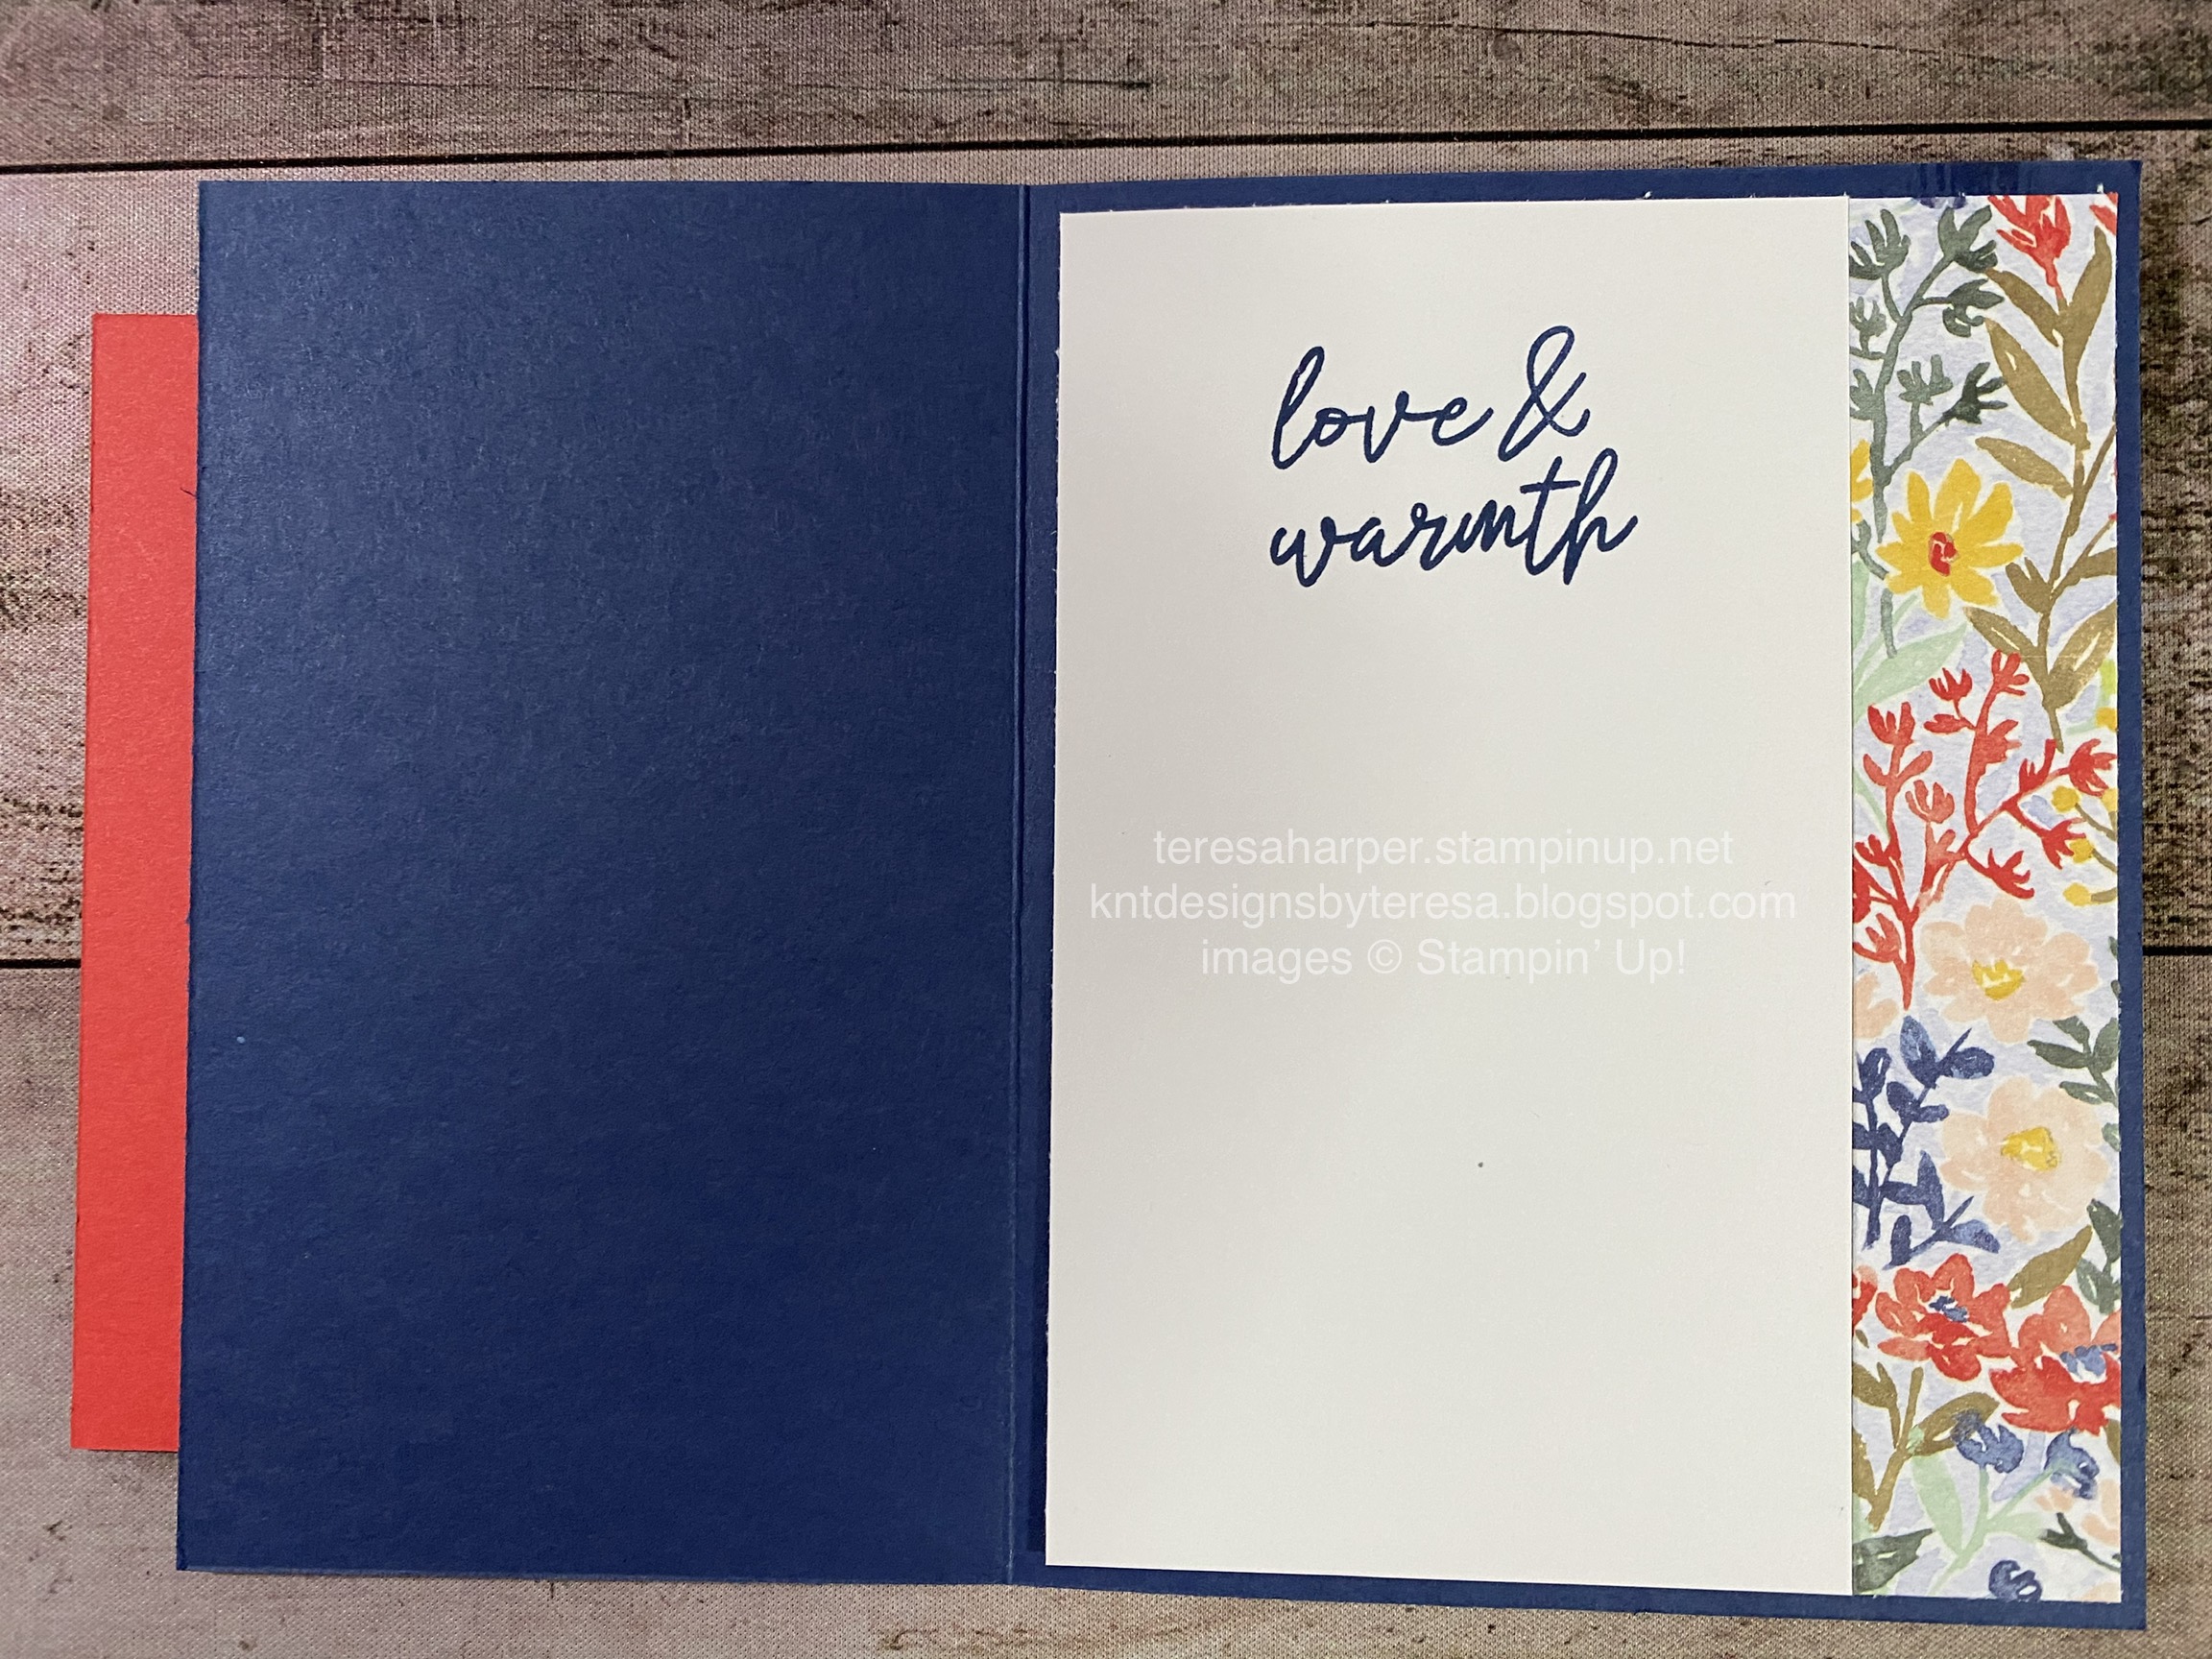
 Hello everyone!  Today we are playing with the Ringed With Nature bundle.  We are also using the Rings of Love Sale-a-Bration Designer Series Paper which is free with a qualifying purchase through August 2022 or while supplies last.  

This is actually the second design I put together with this fun fold, and it is the design I demonstrated how to make on my live video which you can watch by clicking the link HERE:


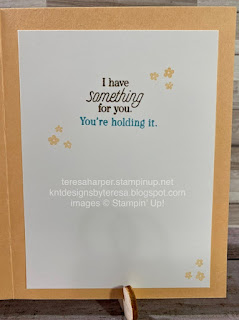
This is my first design and features the poinsettia flower and coordinating Designer Series Paper from the Rings of Love Sale-a-Bration offering.  

Measurements and Supplies:
Night of Navy or Poppy Parade cardstock 5 1/2 x 8 1/2", scored at 4 1/4"
Rings of Love Sale a-Bration DSP 4 x 5 1/4", then cut 1" off the 4" side.
Poppy Parade or Evening Evergreen cardstock 3 1/4 x 4 1/2" for mat layer
Basic White cardstock either 2 3/4 x 4 or 3 x 4 1/4 depending on how much of a border you prefer.
Basic White cardstock for inside layer 3 x 5 1/4"
Ink Pads in Poppy Parade, Evening Evergreen, Mint Macaron, Soft Suede, Parakeet Party, Blushing Bride, Crushed Curry and Night of Navy.
Ringed With Nature Stamp (159883) set (can be purchased in a bundle 159889 with the Tree Rings dies for a savings of 10%)
Rings of Love Designer Series Paper (Sale a-bration free choice with qualifying order through August, 2022 or while supplies last only)

Thanks for joining me today!  I truly appreciate you stopping by.  If you would like to purchase any items from my online store, click on the shopping cart in the upper right.  I would love to earn your business.

Until next time; be happy, stay healthy and happy stamping!
Teresa

Thursday, May 26, 2022

Flowers of Friendship #simplestamping challenge card

 I created this card for the May #simplestamping Stampin’ Up! Demonstrator challenge.  The requirements were stamps, ink, paper and my favorite new in color.  You can watch the replay of my video tutorial on my YouTube channel here.  For my in color, I chose Starry Sky.  I love the richness of the color and the fact that it actually is a very deep purple with a blue hue to it.  


For the inside of my card, I chose a stamp from the Here Together stamp set which has a coordinating die set but is only available for a few more days.  Be sure to order it before May 31, 2022, if you want this one.
Measurements and Supplies:
Here Together Stamp set 158634 (can be purchased as a bundle (160263) to save 10%) with Here For You Dies 159278
Flowers of Friendship 155358
Stamperatus (optional BUT extremely helpful)
Basic White thick card base 5 1/2 x 8 1/2, scored at 4 1/2
Basic White card stock 2 1/4 x 4 1/4" for front image, 3 5/8 x 4 7/8" for inner layer (optional)
4 x 5 1/4" piece 2022-2024 In Color 6x6 DSP in Starry Sky
Starry Sky cardstock 3 x 4 1/4"
Fresh Freesia cardstock 3 1/2 x 4 3/4"
Stamp pads in Starry Sky, Blackberry Bliss and Momento Tuxedo Black
Lt Fresh Freesia Stampin' Blend marker, SU 900 (one of two in the Natural tones Light pack 159465)
Wink of Stella glitter pen 

Thank you for joining me today.  I sincerely appreciate you stopping by.  Please leave me a comment.  If you would like to purchase any of the Stampin' Up! supplies I've used today, be sure to click on the shopping cart in the upper right corner.  

Until next time; be happy, stay healthy and happy stamping!
Teresa

Saturday, January 1, 2022

Happy Hedgehog birthday sneak peek

 Happy New Year everyone!  I hope you have a wonderful start to the new year.

Today's the second card of my Happy Hedgehog sneak peeks.  This stamp set and the Sale-A-Bration stamp set Special Moments will be available beginning January 4, 2022.  I hope you like it.  I didn't use the hedgehogs on this card at all.  I wanted to show how to make a #simplestamping card using only stamps, ink and paper; along with a Sale-A-Bration product.  In addition, I wanted to show the versatility of the stamp set.  If you have been following me, you will know that #simplestamping is a difficult challenge for me.  This one I think, really meets the parameters.  You can see how I put this card together, along with the card from my post on December 29, 2021, over on my YouTube channel here:  https://youtu.be/bNQWgPHSfmc 


A look at the inside of the card is below.  

 Supplies and measurements:
Pale Papaya cardstock for the card base at 5 1/2 x 8 1/2"
Sale-A-Bration DSP Simply Marbleous 3 x 4"
Basic White 2 3/8 x 3 3/8 main focal image, 3 5/8 x 4 7/8 for inside, 1/2" x 3 1/4" for sentiment strip
Just Jade cardstock 5/8 x 3 3/8"
ink pads in Momento Tuxedo Black, Soft Suede, Pale Papaya and Balmy Blue
Stamps Happy Hedgehogs, Special Moments (Sale-A-Bration free item with a $100 purchase) and Sweet as a Peach
Stampin' Blends:
Lt. Soft Suede for tree trunk
Dk. Pale Papaya for flower centers
Balmy Blue for flowers
Just Jade for leaves

Thanks for stopping by today.  I hope you enjoyed what you saw and were inspired to make something of your own.  To purchase Stampin' Up! supplies, click on the shopping cart in the upper right.  It will take you to my online store where you can shop 24/7.  Be sure to leave me a comment.  You can follow me on Facebook here where I conduct a live card tutorial most Tuesday nights at 7:45 pm PDT  https://www.facebook.com/KnT-Designs-by-Teresa-276658209676338/

Until next time; be happy, stay healthy and happy stamping!
Teresa

Wednesday, October 20, 2021

Evergreen friendships are deer

 Good morning everyone!  Today is the final day of our 5-night craft retreat.  We will all be returning to our prospective busy lives but it was very nice to get away from reality if only for a short time.  I want to thank all the ladies for such a wonderful getaway.  Today’s project is one that I shared with the ladies during one of two make-n-take sessions.  It features the Peaceful Dear bundle of products by Stampin’ Up!  I call this a #simplestamping project as it uses, stamps, ink, and paper. I did add an embellishment in the rhinestones.  You can punch your dear out with the coordinating punch, but honestly I forgot I had the punch, so I fussy cut the deer.  I also fussy cut the sentiment.  When the girls made their cards, we used a frame from the Ornate frames die set to cut out the sentiment and we used the punch!  

Products used 
Cardstock in Evening Evergreen, Cherry Cobbler and Basic White
Inks in Pool Party, Cherry Cobbler and Momento Tuxedo Black
Stampin’ Blends in Soft Suede combo, Lt Petal Pink
Red Rhinestones

Thought I would share this photo I took Monday night as a few of us walked down the lane to lock the gate.  It was a beautiful night, if a bit on the chilly side here in Oregon.


Thanks for taking time from your busy day.  Please leave me a comment and let me know what you think. Should you need to order any supplies, I would be appreciative of your business.  Just click on the shopping cart in the upper right corner and it will take you to my online store.  

Have a great day, stay healthy and happy.  Happy stamping!

Teresa


Sunday, April 26, 2020

As You See It Challenge #224—-Speed Painted Poppies


Today’s card I made as a challenge from my stamping friend Tracy.  She had participated in her very first challenge, I can’t say I’m very far ahead of her.  Although, this isn’t my very first challenge, it’s pretty close.  So here goes, the challenge was to make a card with flowers in 10 minutes or less.  I was allowed to gather my stamps, ink and paper and design my card in my head or sketch it out.  I designed this card in my head, loosely based on a card I had created several weeks back.  It was a time intensive card with a lot of coloring and shading with my stampin’ blends.  So, I pulled out my Painted Poppies, Varied Vases for the sentiment and First Frost to use one of those stamps to color in my smaller poppy.  I sure hope you like it as much as I do.  

I started with a piece of whisper white cardstock cut at 5 1/8 x 3 7/8I stamped the sentiment in early espresso first near the center of the card to ensure I would have plenty of room for it.  Next, I stamped the large poppy outlines, then the smaller poppies in early espresso.  I then filled in the larger poppies using lovely lipstick.  The smaller poppies were filled in with a stamp from First Frost in seaside spray and grapefruit grove.  I then masked the poppies with a post it note and stamped the leaves in early espresso.  These leaves are very quickly colored using the stampin’ blends in the old olive combo with a little light mossy meadow.  I then added my focal image to a card base of early espresso cut at 5 1/2 x 8 1/2, and folded in half.  Time to finish was 8:37:57. #simplestamping

I would love it if you would play along as well.  This was a lot of fun!  Thanks Tracy for asking me to play along.  Now, if you would like to purchase any of the items I’ve used in my project, click on the shopping cart to the right.  It will take you directly to my online store, where you will find the products you might need.  I would love to earn your business.  

Thanks for stopping by, I hope I’ve inspired to you to go and create something of your own.  Until next time, stay safe, stay healthy and happy stamping!
Teresa


Friday, June 14, 2019

Beautiful Friendship wish list bookmark

I made today’s project after being inspired by a Facebook video I watched last night by LeeAnn Greff.  Then while looking at our quarterly publication Stampin’ Success, I saw we had some printouts for making wishlists.  I was immediately inspired to combine the two projects together.  Here is what I came up.


The bookmark features a new photopolymer stamp set from the 2019-2020 annual catalog released on June 4, called Beautiful Friendship (149252).  It’s one of our distinktive stamp sets which makes it look almost real.  These are my favorite new types of stamps.  They are always so detailed and vibrant.  Here the hydrangea is stamped in highland heather, leaves in granny apple green and the roses in gorgeous grape with centers in early espresso.  I added some Wink of Stella to the roses for a little shimmer.  I then punched a small hole and tied some of our beautiful new purple tricolor ribbon (149708) to the top to finish it off.


Thank you for taking time from your busy day to stop by my blog.  Please leave me a comment, I would love to hear from you.  If you would like to purchase any of the items I’ve used today, please click on the shopping cart it will take you directly to my online store.  Until next time, make it a great day and happy stamping.

Friday, May 17, 2019

Amazingly Incredible like you sneak peak

Today’s project features the stamp set Incredible Like You which is retiring at the end of month.  It uses the 2019-2021 in colors of seaside mist, rococco rose and pretty peacock ink stamped on whisper white cardstock.  Then mounted on a card base of seaside mist.  All that’s needed for this #simplestamping card is stamps, ink and paper.
Sentiment is stamped in Momento tuxedo black ink.  Thank you for taking time from your busy day to stop by my blog.  If you would like to purchase Incredible Like You (148708) before it retires, please click on the shopping cart it will take directly to my online store.  

Please leave me a comment, I would love to hear from you.  Have a fabulous day and happy stamping!


Monday, April 29, 2019

Flowering teacup z fold card #simplestamping

Today's card features the Flowering Desert stamp set (148700) and an image from the stamp set found in the February 2019 Paper Pumpkin monthly subscription kit.  It is a Z fold card and stands upright.  I used cajun craze, grapefruit grove and mint macaron card stock to make the base and Z fold of the card.  The focal image is on a piece of whisper white which has been sponged with sponge daubers and the following inks starting from the bottom and working up:  sahara sand, daffodil delight, mango melody, pumpkin pie, cajun craze, flirty flamingo, gorgeous grape, pacific point and night of navy.  I stamped the cacus over the top in mint macaron.  I then stamped the botanical teacup on a piece of whisper white and colored with my Stampin' Blend alcohol markers in light and dark old olive, light flirty flaming, light crumb cake and light and dark calypso coral.  The flowers on the cup are stamped in cajun craze and are also from the February Paper Pumpkin kit.  I then fussy cut the tea cup image out and added to the focal panel with stampin' dimensionals to give it some added depth and interest.  The mint macaron layer on the smaller front panel and the larger back panel are stamped with an image from Flowering Desert to make my own designer series paper to coordinate.  All you need to make this card is stamps, ink and paper which makes it a #simplestamping card. 

I did not put a sentiment on this card as I did not want to detract from the focal panel.  This card was made as a thank card and the sentiment can be found on the inside of the card, hidden from view until the card is opened.

Thank you for taking time from you're busy day to stop by my blog today.  It's very much appreciated.  I hope I've inspired you in some way to do something creative.  If you would like to purchase any of the items I've used today, click on the shopping cart to the right and it will take you directly to my online store.  There you will also find information on how to purchase a prepaid Paper Pumpkin subsription.  If you would like to sign up for a monthly Paper Pumpkin subscription please copy and paste this link into a new tab, not the search bar :  https://www.paperpumpkin.com/en-us/sign-up/?demoid=2109129
Should you need any help, please contact me and I will try to help you through the sign up process.  I would love to earn your business.  Please leave me a comment, I would love to hear from you.

Until next time, make it a great day and happy stamping!
Teresa

Thursday, April 25, 2019

Vibrant Vases thanks #simplestamping


Today's project is a thank you card I made for customers for shopping with me in March.  It features the Vibrant Vases (148656) stamp set and utilizes only stamps, ink and paper making it a #simplestamping card.  I started with a card base in merry merlot, then added a layer of Wood Textures (144177) designer series paper (DSP).  To that I added my focal image which is a panel of whisper white cut at 2 1/2 x 3 3/4 and layered on another piece of merry merlot cut at 2 3/4" by 4".  This card uses only one stamp set, Vibrant Vases which is a two step stamping set which means, there is no coloring.  For instance, the Vase outline is stamped in tranquil tide and has the leaves in it.  I then stamped the inside of the vase in lemon lime twist.  The flower outline is stamped in fresh fig and the inside of the flowers in merry merlot.  The leaves of the flowers were stamped in tranquil tide as well as the sentiment.  To line things up properly, I used the Stamperatus stamp positioning tool (146276) and was able to make multiples of this card very quickly.

For the inside, I used a piece of the Wood Textures DSP left from the front panel to decorate along the bottom.  The inside sentiment comes from the Flowering Desert (148700) stamp set, but you could just as easily use a sentiment from Vibrant Vases.
I want to thank you for taking time from your busy day to visit my blog.  I appreciate you so much.  Please leave me a comment, I'd love to hear from you.  If you would like to purchase any of the Stampin' Up! products I've used today, please click on the shopping cart in the upper right.  It will take you directly to my online store where you can shop 24/7.  I would love to earn your business.

Until next time, I hope I've inspired you to do something creative.  Make it a great day and happy stamping!
Teresa

Monday, April 22, 2019

Waterfront Flowering Desert own kind of beautiful #simplestamping

Today's project is a card I designed which features the Waterfront stamp set.  The stamp set was designed with the help of million dollar sales achiever Connie Heisey (146386)  You can do so much with this set to make any kind of scenery easily and quickly just be stamping images here and there.  It also features the Flowering Desert stamp set from the 2019 Occasions catalog (148700).  I used the following ink colors to achieve this picturesque scene:  berry burst, fresh fig, sahara sand, tanquil tide and lemon lime twist for the ground cover.  Mango melody, crushed curry, flirty flamingo, pacific point and night of navy inks for the sunset. 

The sentiment comes from the Flowering Desert stamp set and is stamped in tranquil tide.  For the inside of my card, I stamped the cactus image and flowers in tranquil tide and berry burst also from the Flowering Desert stamp set.  Because this card utilizes only stamps, ink and paper and features at least one of the retiring colors (it actually features four of them), it qualifies for the April #simplestamping challenge issued to demonstrators.  

Thank you for taking time from your busy day to stop by my blog.  I'm honored and ask that you leave me a comment.  I'd love to hear from you.  If you would like to purchase any of the items I've used today, please click on the shopping cart in the upper right.  It will take you directly to my online store where you can shop 24/7.  I would very much appreciate the business. 

I hope you've been inspired today and will have some fun creating a project of your own.  Until next time, make it a great day and happy stamping!
Teresa

Thursday, April 11, 2019

Glad we’re friends with Incredible Like You #simplestamping

Today's project is an all occasion card.  It features the Incredible Like You stamp set (148708).  I started with a thick whisper white card base.  I stamped the sentiment and tiny flowers in berry burst, the foliage in granny apple green and the large flower in Gorgeous Grape.  I layered a piece of berry burst cardstock to the image which is only 1/8" larger than the focal panel which is cut at 5x 3 3/4".  The stamp set is a two step stamping set so you can easily achieve depth and dimension just by using the stamps.  That makes this a #simplestamping card as all you need are stamps, ink and paper.  Anyone can create this card and make it look really nice.  I love these kinds of stamps.  This is a photopolymer set which means that you can see through the stamps for perfect placement every time.  This card was inspired by Kylie Bertucci, an Austrialian Stampin' Up! demonstrator. 

Thank you for taking the time out of your busy day to stop by my blog today.  Please leave me a comment, I'd love to hear from you.  I hope you have been inspired to CASE my card and/or make another one of your own.  If you would like to purchase any of the products I've used today, please click on the shopping cart in the upper right, it will take you directly to my online store which is open 24/7.  I would really appreciate the business.

Until next time, make it a great day and happy stamping!
Teresa

Thursday, February 28, 2019

By the Bay sunset of hope card

For my project today, I made a card for a my friend who was knocked over by her dog and suffered a broken shoulder which required a shoulder replacement surgery.  Ouch!  I hope she likes it.  The sentiment comes from High Tide which can be found in the annual catalog.  The house is a FREE Sale-a-Bration stamp set called By the Sea which can only be earned with a purchase of $50 or more through the end of March 2019.  I used our watercolor pencils to color in the scenery.  The sunset background is sponged using sponge daubers and the following colors of ink:  So Saffron, Mango Melody, Pumpkin Pie, Highland Heather, Pacific Point and Night of Navy.  The water is sponged using Balmy Blue and the waves were stamped in Bermuda Bay and also come from the High Tide stamp set.  This is attached to a larger piece of whisper white cardstock which has also been stamped with the same scene from By the Bay and then mounted on a card base of Mango Melody.  My inspiration is from the Sale-a-Bration brochure and I added my own touches.


For the inside of the card, I used the birds from the same set to stamp along the bottom and sea shell to stamp over the sentiment which is taken from the Flourishing Phrases stamp set.  I also added these elements to my envelope prior to mailing.  


Thanks for taking time from your busy day to stop by my blog today.  If you are interested in purchasing any of the items I used today, please click on the shopping cart in the upper right.  It will take you directly to my online store.  I would love to earn your business.  I hope you’ve received some inspiration today.  Please leave me a comment, I would love to hear from you.  Make it a great day and happy stamping!

Thursday, February 21, 2019

Beauty Abounds as Part of My Story

I’m loving the Beauty Abounds stamp set out of the Occasions catalog.  It makes simple and quick cards.  I used one of the Bokeh dots images from this set.  The butterfly stamp is from Butterfly Gala.  Here I paired it with Part of My Story which is a Sale-a-Bration item you can earn for free.  The card also has a strip of the Botanical Butterfly Designer Series Paper which is also a free Sale-a-Bration item.  Colors used are Mango Melody, Flirty Flaming, Lovely Lipstick and Lemon Lime Twist.  This card was very easy to make a set of four quick cards and envelopes, ready for gift giving, or very easily mass produced if you’re in need a lot of cards for a special event.  I used these as customer thank you cards this month.


I hope you’ve found some inspiration day and thank you for stopping by my little blog today.  If you’d like to purchase any f the items I’ve used, please click on the shopping cart and it will take you directly to my online store.  If you’d like to join my team and earn a discount, now is the time to join as we have a great deal.  All the details can be found on my shopping page.  

Please leave me a comment, I’d very much love to hear from you.  Thanks again for stopping by and happy stamping.  

Monday, February 4, 2019

You make me happy notecard

For today’s project, I used the Whisper White notecards and envelopes which are found on page 193 of the annual card.  This card is #simplestamping and makes a great card for Valentines, an anniversary or just because.  It’s so easy and quick to put together.  I started with a notecard, added a layer of Designer Series Paper from the Tropical Escape 6x6 Designer Series Paper stack then stamped my focal image and sentiment from the Meant to Be stamp set on a piece of Whisper White cardstock in Momento tuxedo black ink and colored it in with my Stampin’ Blends markers.  The colors I used were Flirty Flamingo, Lovely Lipstick and Call Me Clover.  Super simple and quick.  I used my Stamperatus for perfect placement of the sentiment.


The inside image is from the same stamp set and I used the same piece of Designer Series Paper to decorate the envelope.


Thanks for stopping by my blog today.  I hope I’ve inspired you in some way to be creative.  Please leave me a comment, I’d love to hear from you.  If you would like to purchase any of the products I’ve used today, click on the shopping cart in the upper right.  Remember, during Sale-a-Bration for each $50 increment in product you purchase, you receive one free level one Sale-a-Bration item.  If you purchase $100, you can choose, two level one OR a level two Sale-a-Bration item.  Sale-a-Bration runs until March 31.  

Monday, January 28, 2019

Enjoy Life ghosting

 This is my card today.  I love how it turned out.  It utilizes the Enjoy Life photopolymer stamp set I. The 2018-2019 Stampin’ Up! Annual catalog.  My girl friend challenged me to teach our little group how to make cards with this stamp set.  This is one of them I came up with.
I started with a card base of crumb cake.  The main focal point is a piece of glossy cardstock.  I first stamped my images in versamark ink, then set them aside to dry.  I then started in the center of the card and sponged crumb cake ink across the image.  Then went to the bottom sponging granny apple green ink and finally finished the top portion with Balmy Blue.  I blended the green and crumb cake, but didn’t worry so much with the blue as I rather liked the lighter horizon line between those two.  Finally I stamped the sentiment also from the same stamp set in Stazon black in using the Stamparatus to ensure the stamp didn’t slip on the glossy card for a clean crisp image.  The focal image image is then mounted a piece of whisper white card 5 3/8 x 4 1/8 for the thinnest of borders.

I will use this as a make-n-take in an upcoming workshop.  I know the gals will love it.  It makes for a great masculine card that could be used for most any occasion.  I also think this qualifies for #simplestamping with one stamp set, ink and paper.  I did add a piece of linen thread to the bottom to dress it up just a bit.  I didn’t want to overwhelm the beauty of the focal image.

Thanks for stopping by my little blog today.  Should you want any Stampin’ Up! Supplies, please click on my shopping cart and it will take you directly to my online store where you can place your order.  Now is the best time to purchase your crafting supplies as it Sale-a-Bration until March 31.  For each $50 increment of product, you can choose one item out of the SAB brochure for free.  If you spend $100, you can choose 2 level one items or one level 2 item.  Free is the only way to get the pose products.  They can’t be purchased.  If you have any questions, please feel free to leave me a message.

Please leave me a comment, I would love to hear your thoughts.  Make it a great day and happy stamping.
Teresa

Friday, January 25, 2019

Celebrate Vibrant Vases

While at Onstage in Orlando in November, we were challenged to create some #simplestaming cards.  Now for those who know me best, my friends know simple stamping just isn’t in my nature.  I try to make things simple, and by the time I’m through, simple has left the building.  This is a card I came up with using primarily stamps, ink and paper.  It also uses only one stamp set so it can be reproduced with minimal supplies.  This card features a new photopolymer stamp set in the occasions catalog bu Stampin’ Up!.  It’s called Vibrant Vases and is a sister stamp set to Varied Vases in the 2018-2019 annual catalog.  Both sets have a coordinating punch, the Vase builder punch.  Varied Vases can be purchased as a bundle with the coordinating punch for a savings of 10%, then feel free to add on today’s featured set Vibrant Vases.  Doing this will qualify you for a free item from the Sale-a-bration brochure from January through March 31, 2019.


I started with a thick whisper white card base and added a layer of highland heather gingham paper from the Gingham Gala 6x6 Designer Series Paper stack.  I stamped my images on another layer of whisper white regular cardstock in black memonto ink.  These images have stamps to color in the details and I chose to use those rather than coloring them on my own.  Ink colors used are grapefruit grove, daffodil delight, Gorgeous grape, Highland heather and garden green.  For a finishing touch, I added some faceted gems in he grapefruit grove and a touch of wink of Stella.

I hope you’ve enjoyed my project today.  Should you want any of the supplies used or anything else Stampin’ Up!, please click on the shopping cart in the upper right.  It will take you directly to my online store.  I would be grateful for your business.  In addition, if you would like to join my team, it’s the very best time of year to do so.. you get $175 worth of product for $99 and there is no obligation to continue.  Join for the discount, or join to start a business,either way is fine with me.  No pressure, no judgments.

Please leave me a comment, I would love to hear your thoughts.  Make it a great day and happy stamping!
Teresa