Showing posts with label 3D project. Show all posts

Thursday, August 4, 2022

Best Remedy Card Kit 3D Purse Tissue Box

 When I received this kit, I just knew I needed to make a tissue box with the cute little skunk image and the sentiments!  So I sat down Monday night and designed a box to fit my purse pack of Kleenex tissues.  Here is the project I came up with.  I'll show you a photo of my first project as well.  Not much difference in the two, except my pattern paper for the final project actually came from the kit as half of one of the card bases.  

You can watch how I put this project together by clicking here:


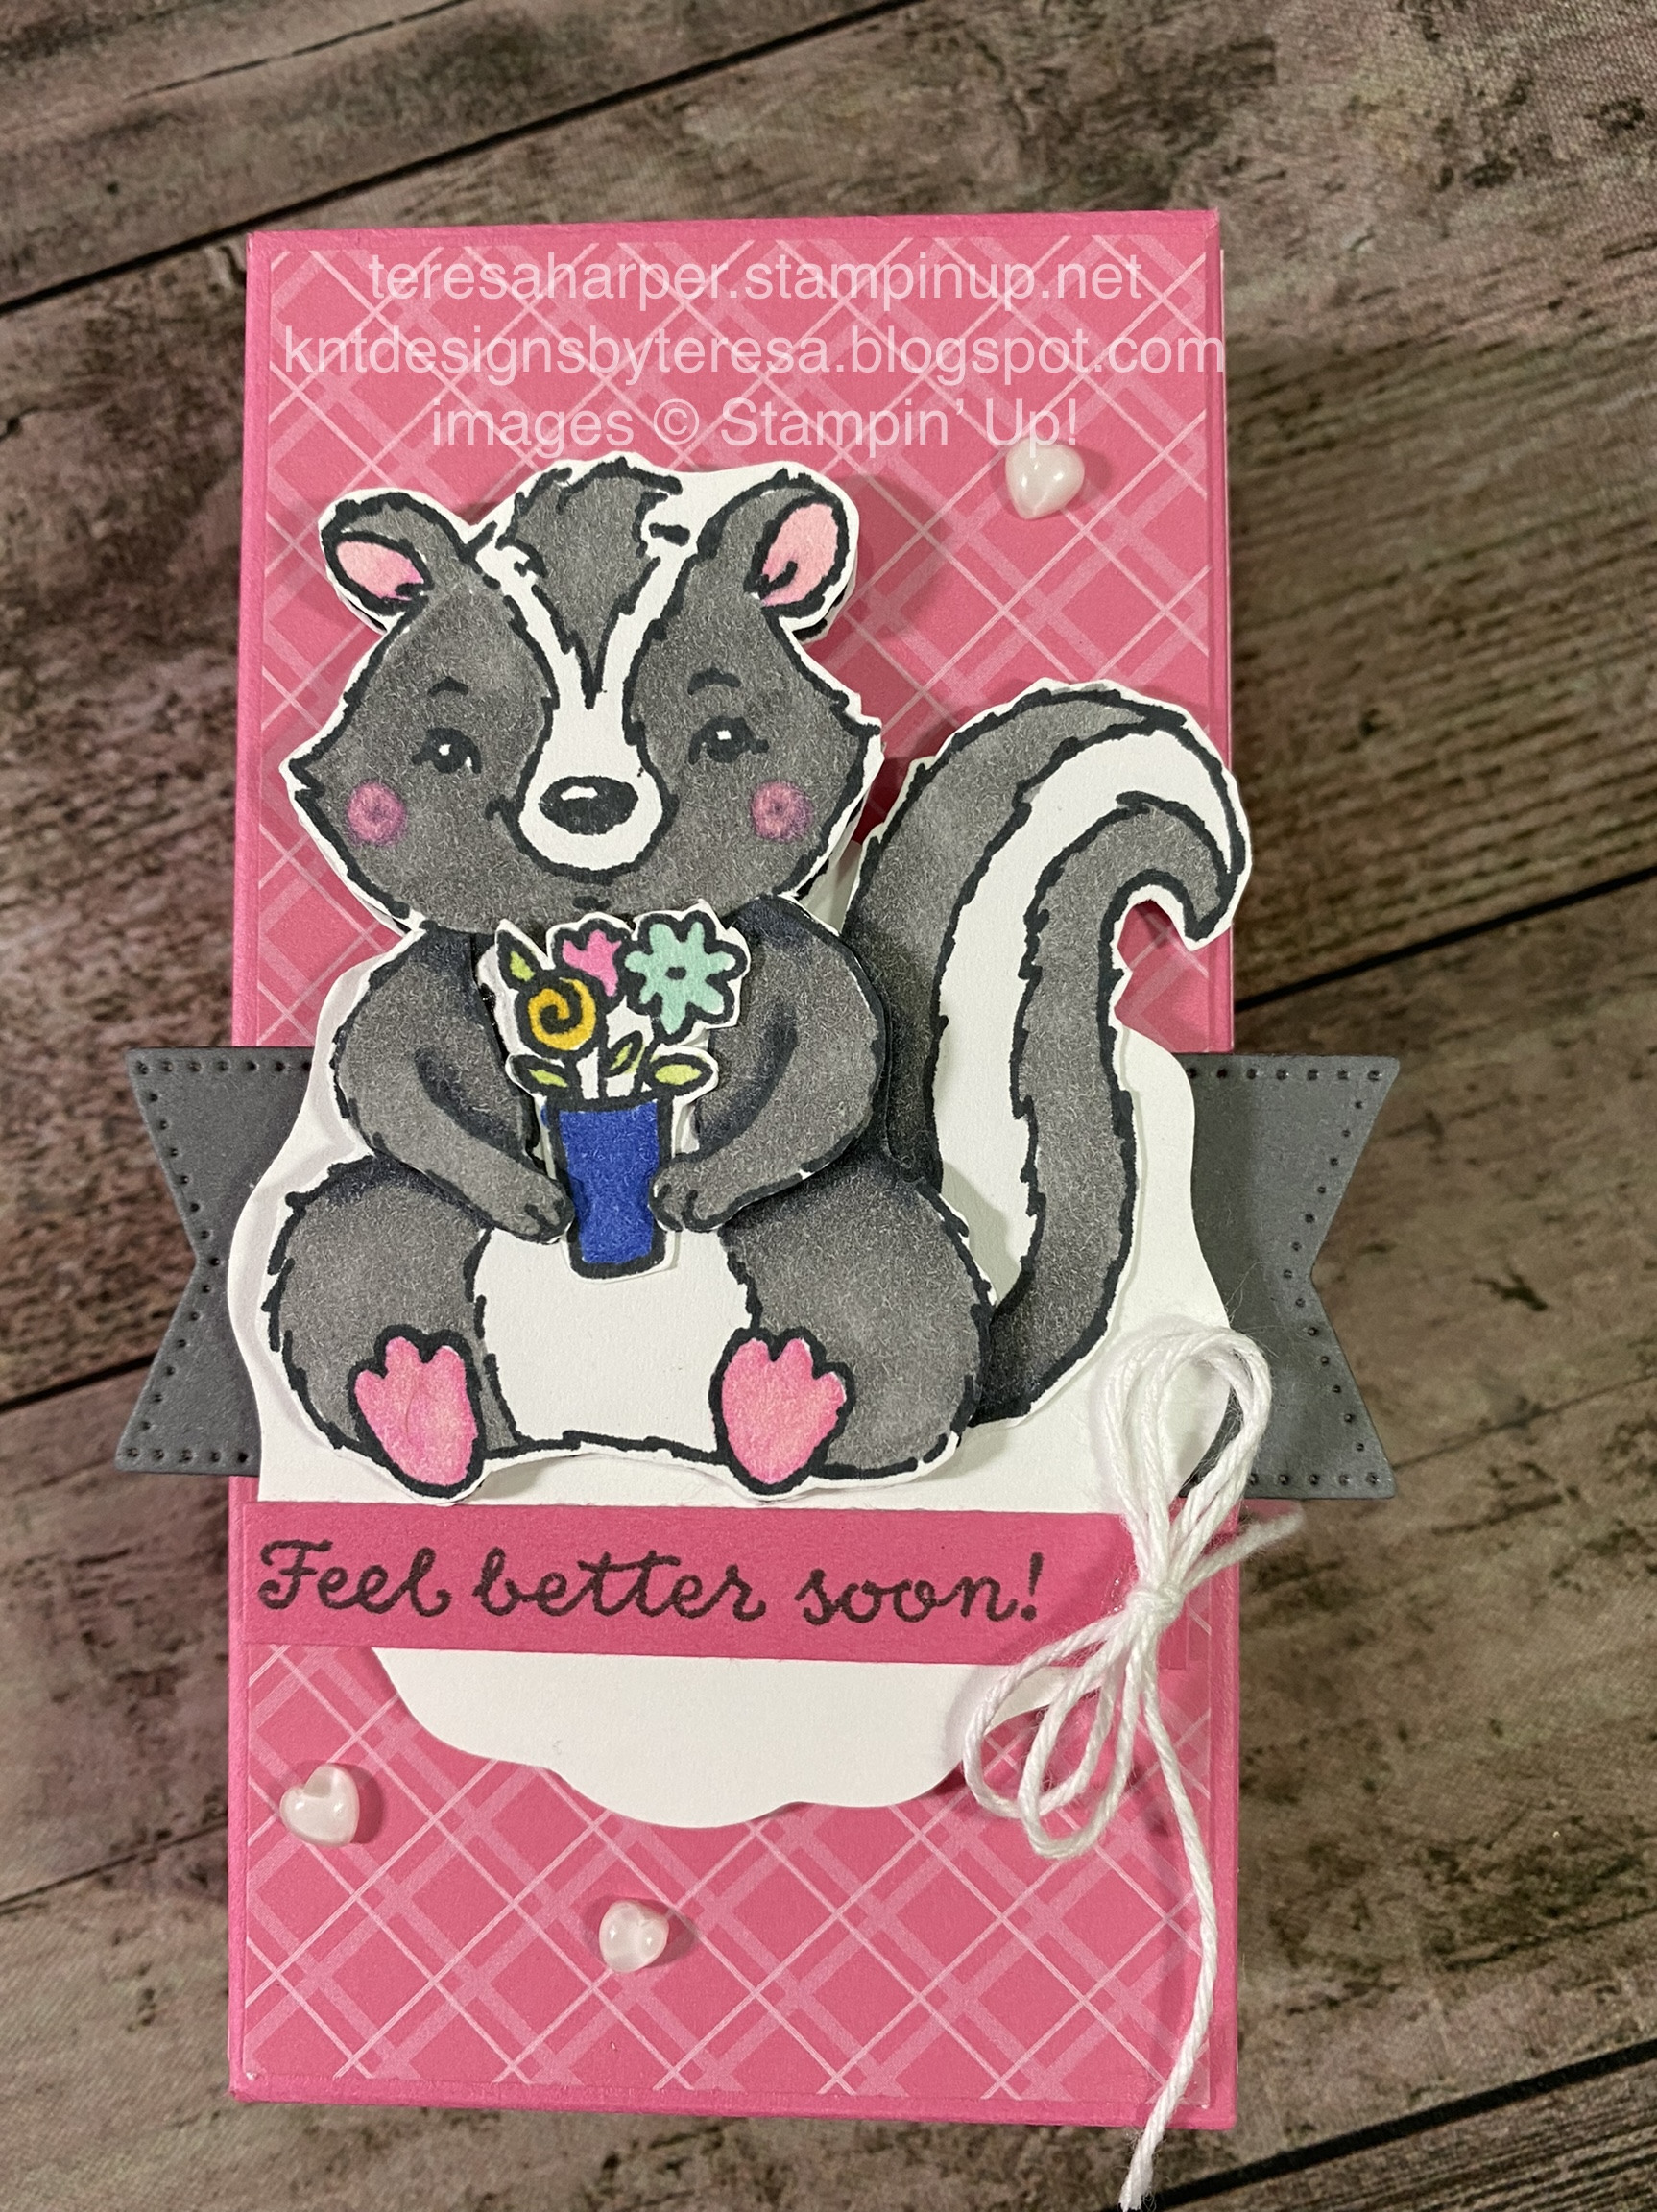
This is my original design and uses last year's 2021-2023 6x6 In Color DSP in Polished Pink.  After designing it, I realized I could just use half a card front from the card kit.  With the way I cut the card front, I was able to have a piece left over for the inside of the card you will see in Thursday's blogpost.  
Measurements and Supplies:
Best Remedy Card Kit
Half of striped card base for patterned paper, you will need one piece at 7/8 x 2 1/4", one piece 2 1/4 x 4 3/8 and two pieces 7/8 x 4 3/8"
Polished Pink card stock for box 7 x 7 1/8"--Score on 7 1/8" side at 1, 3 3/8, 4 3/8 and 6 3/4", rotate clockwise and Score on 7" side at 1, 5 1/2 and 6 1/2"
Basic White for stamping and diecutting 1/2 sheet
Basic Gray scrap approximately 1 1/4 x 4"
Polished Pink cardstock 3/8 x 2 1/4" for sentiment strip
Decorative Label Punch
Stylish Shapes dies
Black and White Gingham ribbon
Heart Pearls
Stampin' Blends markers in Lt Polished Pink, Lt Granny Apple Green, Lt Starry Sky, Dk Pool Party, Dk Daffodil Delight, Lt Flirty Flamingo, Dk Smokey Slate and Lt Basic Black
Stamperatus

Thank you for visiting today, it was fabulous to have you stop by.  If you need to order supplies, click on the shopping cart in the upper right.  I'd be ever so grateful.

Until next time; be happy, stay healthy and happy stamping!
Teresa


Wednesday, July 20, 2022

Wonderful World card gift box

 Today’s project is a card gift box I made for a friend.  It will hold six cards, if not too bulky with a little extra room to spare.  Of course, you can make these for any season.  Be sure to check out my blog on Saturday and see the cards I made to go inside.  It features the Wonderful World stamp set and coordinating designer series paper (DSP) which you can choose as a free gift with a qualifying purchase during Sale a-bration while supplies last during July and August.  If you would like to see how I put my card box together, you can watch over on my YouTube channel HERE:


This is the box I made on my YouTube video.  
This box I made during my Facebook Live.  Dimensions are the same.  I simply used different coordinating cardstock and Designer Series Paper from the same pack Wonderful World pack of paper
 
Measurements and Supplies:
Wonderful World Stamp and DSP bundle from Sale A-Bration brochure (free gift with $100 purchase)
Fabulous Frames Dies
26" of Coordinating Ribbon of your choice (I used Soft Sea Foam Seam Binding Ribbon colored with Lt Old Olive Stampin' Blend and Satin Edged Ribbon colored with Lt. Orchid Oasis Stampin' Blend)
Box Top: Blackberry Bliss or Orchid Oasis cardstock 6 13/16 x 8 1/16", score at 1" on all four sides. 
Box Bottom:  Blackberry Bliss cardstock or Orchid Oasis 8 1/2 x 7 1/4", score at 1 1/4" on four sides.
Wonderful World DSP 4 5/8 x 5 7/8"
Orchid Oasis cardstock 4 x 5 1/4", die cut with rectangular frame from Fabulous Frames Dies
Basic White cardstock 2 3/8 x 3 1/4" for stamping and die cutting.
Rich Razzleberry or Blackberry Bliss cardstock 2 3/8 x 3 1/4" for die cutting oval frame.
Stampin' Blends in Orchid Oasis or Old Olive to color ribbon if desired.
Ink pads in Melon Mambo and Pear Pizzaz OR Rich Razzleberry and Pear Pizzaz
Sponge Daubers
Tear n Tape adhesive
Paper Snips
Brushed Brass Butterflies

I sure hope you've enjoyed my project for today.  To order any of the products I've used, click on the shopping cart in the upper right.  Please leave me a comment, I'd love to hear what you're thinking and if you plan to make this project.

Until next time; be happy, stay healthy and happy stamping!
Teresa

Thursday, December 2, 2021

Poinsettia Petals Cocoa Bomb treat box 12 Projects of Christmas 2021

Just a reminder, the Last Chance products sale from the July-December 2021 mini catalog is happening now through January 3, 2022.  All products are while supplies last so be sure to get yours!  In addition, check out the Clearance Rack as we just had a clearance rack refresh of new items.  Again, these are while supplies last and deeply discounted.

Today’s box is the 2nd project in my 12 Projects of Christmas series.  It is a treat box I designed to hold a cocoa bomb.  My particular cocoa bomb fits in a 2 1/4” square treat box.  It is decorated with the Heartwarming Hugs Designer Series Paper.  You can find a video showing how I made these here https://youtu.be/SsXTpISGacY 
The Poinsettia decoration is cut from the Red Velvet Paper using both the outline and the embossing dies from the Poinsettia Dies by Stampin’ Up! The leaves are cut from Pear Pizzazz using the leaves dies in the same way.  Flower center has a trio of Champagne rhinestones.
The box is made from a 9 1/2 x 7 3/4” piece of Mossy Meadow cardstock cut like the template below.  It is matted with five pieces of 2 1/8” square cardstock in pear pizzazz and five pieces of Heartwarming Hugs Designer Series Paper cut at 2” square.  The sentiment on the front is stamped from the Poinsettia Petals stamp set in Mossy Meadow and cut with a rectangle die from Beautiful Trees dies.
Here are the measurements and cutting template for the box. 

Thanks for stopping by my blog today!  I do appreciate you taking time from your busy day.  Please leave me a comment, I would love to hear your thoughts.  I hope I've inspired you to make something of your own.  Should you wish to purchase any supplies, please click on the shopping cart in the upper right corner.  It will take you to my online store.

Until next time; be happy, stay healthy and happy stamping!
Teresa


Thursday, March 14, 2019

St. Patricks Day tea together treat card

Today’s project is a 3D project.  I got the idea from LeAnn Greff who had made a similar project; however, her’s did not fit my chosen treat.  I had to alter the dimensions of the holder to fit my treat.  The finished size of the card front is 2 3/4” x 2 3/4”.  It features the Painted Seasons Designer Series Paper 149574 free during Sale-a-Bration but only until the end of this month, so hurry to get your $50 order in to earn this paper for FREE!  I used the tea cup from Tea Together 148779 and the matching Tea Time framelit dies 149697 which are also a Sale-a-Bration FREE item with a $100 purchase.  I masked the outside of the tea cup after stamping it in Momento Tuxedo black ink, then stamped the clover from Amazing Life onto the tea cup.  The dot stamp is also from Amazing Life.  I then colored the image using the Call Me Clover Stampin’ Blends combo set.  Then using the coordinating framelits, I diecut the tea cup (Inspiration from Kathy Morgan for the tea cup). The sentiment comes from the Amazing Life stamp set and is diecut with the Rectangle Stitched Framelit dies which can be purchased as a bundle 150624 through the end of May 2019 to save you 10%.


In order to make the card base treat holder, you need a 2 3/4” x 10 1/2” piece of Call Me Clover cardstock.  Score at 3/4, 3 1/2, 4 1/4, 7 and 7 3/4”.  On the square closet to the 3/4” inch score, using your layering circle framelits 141705, diecut a hole with the circle closet to 1 1/4”.  Then diecut in whisper white a scallop closest to 1 1/2” and the same circle die used previously to make the scalloped frame to got around.  Adhere this to the card base.  Stamp Have a Lucky Day from Itty Bitty Greetings in the lower right corner in Call Me Clover.  Fold and burnish on all the score lines.  On the 3/4” strip at one end, place liquid glue or tear tape.  I trimmed this piece off just a hair so it would fit properly when folding up and adhering to make the treat holder portion.  Adhere the 3/4” end to the 3/4” scored strip between the squares to form the treat box.  I designed this size to fit a Knoppers  Milk Hazlenut Wafer I found at Walmart.  You can now decorate the front with the tea cup and sentiment.  I love how his project turned out and the wafers are delicious.😋

I thank you for stopping by my blog today and I hope your are inspired to stamp something today.  Please leave me a comment, I would love to hear from you.  If you need to purchase any Stampin’ Up! Supplies, please click on the shopping cart in the upper right, it will take you directly to my online store.  I would really appreciate your business.  Make it a great day and happy stamping!

Monday, October 8, 2018

Trick or Tweet chick hand sanitizer holder

This project is inspired by Julie Dimatteo of the PaperPixie.com.  She made a Christmas version.  I decided to make this for a door prize.  I used Highland Heather cardstock for the holder.  It is wrapped in a piece of Designer Series Paper from the Brights collection 6x6 paper stack(146964).  I stamped the little bird and pumpkin bucket from Trick or Tweet (147722) and colored them with Stampin’ Blends markers in Daffodil Delight dark, Pumpkin Pie light, and Mango Melody dark.  They hold a hand sanitizer from Bath and Body Works.  These are very easy to put together and use the envelope punch board (133774).


Thanks for stopping by my little blog today.  I hope I’ve inspired you to create some crafty today.  Please leave me a comment, I’d love to hear from you.  If you would like to purchase any of the items I’ve used today, I would love to earn your business.  Please feel free to click on the shopping cart to the right, it will take you directly to my online store.  I hope you have a crafty day.