Showing posts with label shamrock. Show all posts

Wednesday, March 11, 2026

Seasonal Celebrations fold-flat shamrock box

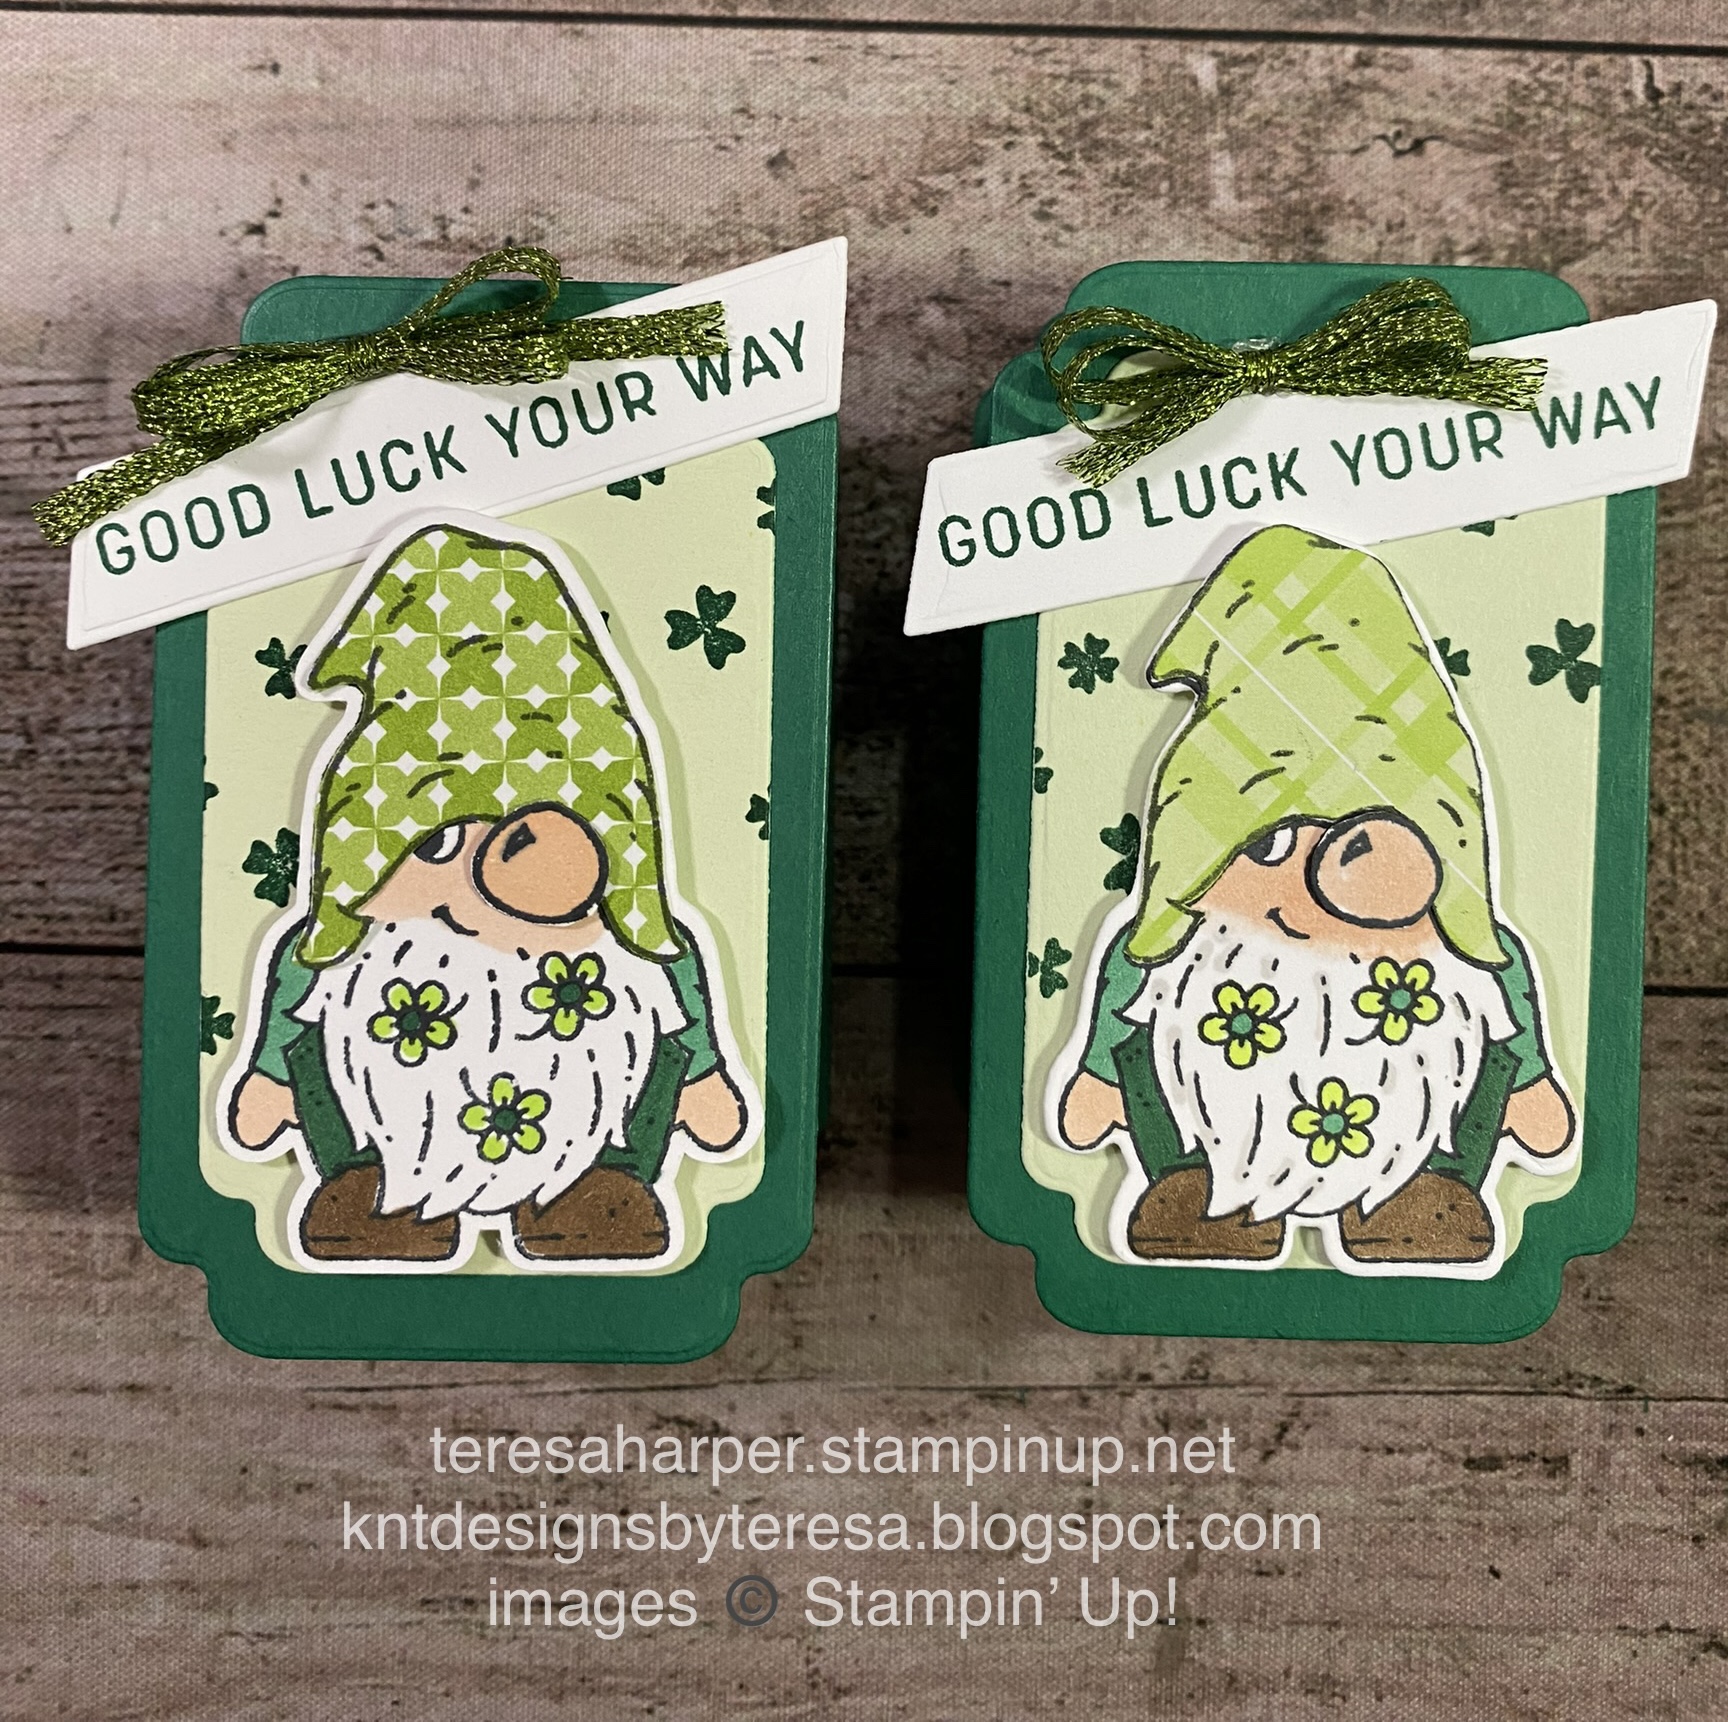
Hello everyone!  I have a quick and easy treat box for you today featuring the Seasonal Celebrations stamp set.  If you don't have the Party Banners dies, you definitely need them, you can use a different shape you already have on hand.  You can see how quickly this project comes together by watching the video tutorial over on my YouTube channel by clicking this link.  Let's spread a little cheer.  We can all use some right now even if we aren't all Irish.


Supplies and measurements:
Seasonal Celebrations 167225
Good Luck 167223
Party Banner Dies 165264 5th & 6th from the smallest
Sparkle Dots Essentials 166991
Chevron Ribbon, garden green & white 167212
Garden Green cardstock  6 1/2" x 8 1/4"
    score on 6 1/2" side at 5 1/4" & 6" each end
    score on 8 1/4" side at 3/4" & 3 3/4"
Basic White cardstock for banner
Soft Sea Foam cardstock for banner
Garden Green ink pad
mini glue dots, Tombow mono adhesive glue
Velcro thin fasteners 3/8" (not Stampin' Up!)

I hope you are inspired by my project today and will make some of these boxes.  They are simple to make, and you can decorate them for any occasion.  You can order any Stampin' Up! supplies you may need by clicking on the shopping cart in the upper right.  I'd be very grateful for your business.  

Until next time; be happy, good health to you and happy stamping!
Teresa

Sunday, February 8, 2026

You're gold pop-out diamond fun fold card

 I've made another pop-out diamond fun fold card for you today.  I love this fold, it looks like it should be so hard but comes together so easily!  It adds an additional wow factor to your handmade card.  I wanted to showcase the Good Luck stamp set as Stampin' Up! rarely gives us a stamp set for St. Patrick's Day.  I suggest you get it as soon as possible before it sales out.  Once Valentine's Day is over, it will start to sell quickly.  To see how I've put my card together, be sure to pop on over to my YouTube channel for the video tutorial.  You can find it easily by clicking this link.


Supplies and measurements:
Good Luck stamp set 167223
Woolly Friends stamp set (for grass stamp) 166881 (can be purchased in a bundle* with punch)
Exposed Brick 3D embossing folder 161600
Scalloped Wishes Dies 167452 (can be purchased in a bundle* with coordinating stamps)
    Sneak Peek item (will be available beginning March 3, 2026)
Garden Green cardstock (2) pieces each 4 1/4" x 5 1/2"
    score each piece at 3/4" each end on the long side and @ 2 3/4" in the center
Soft Sea Foam cardstock 2" x 4", emboss with embossing folder
    cut into (4) 1/2" x 4" strips
Soft Sea Foam two-tone cardstock 1 3/4" x 8" stamp & emboss with gold powder
    then cut into two pieces each 1 3/4" x 4" (cut in half on the 8" side) 
Soft Sea Foam two-tone cardstock scraps for oval sentiment and for hinges
    cut two pieces 3/4" x 1", score in the center at 1/2" on the long side.
Basic White cardstock 1 3/4" x 4" for back sentiment piece
Thick Basic White cardstock for focal die cut approx. 3 1/2" x 2 3/4" (slightly larger for the die)
Gold Gems (mine are from the 12 Days of Crafting kit in the last chance category)
Ink Pads: Garden Green, Memento Tuxedo Black & VersaMark
Blending Brush 160518
Stampin' Positioner Tool (free in a starter kit through March 2, then available for purchase by the public at a later date to be determined.) 167768
Embossing Additions tool kit 1559971 (optional but helpful)
Take Your Pick Tool 144107 (I use mine for every crafting project I love it so much)

I hope you have enjoyed this card.  It was the make-n-take project for our monthly crop day yesterday and the ladies all loved it.  I hope you give it a try!  My original inspiration for the fun fold came from Susan Campfield.  

Until next time; be happy, good health to you and happy stamping!
Teresa

 *Purchasing bundles saves 10% over the individual piece prices when combined.  You must use the bundle item code for the 10% bundle discount.  When purchasing Last Chance items; be sure to check if the individual piece prices are discounted.  Individual piece prices may be less expensive if the discounts are deep enough.

Monday, March 6, 2023

Lucky Clover Fancy Gnome treat box

 I’m not sure which of my three Lucky Clover projects is my favorite, I do really love how this one turned out.  I’ve combined several products to pull this one together.  To see how I made it, head on over to my YouTube channel HERE:


Measurements and Supplies:
Lucky Clover stamp set
Friendly Gnomes and Gnomes dies
Something Fancy dies
Sending Smiles stamp set for sentiment
Parakeet Party Metallic Woven Ribbon
Shaded Spruce Ink Pad
2022-24 In Color 6x6 Paper stack in Parakeet Party OR Dandy Designs DSP in Granny Apple Green (now retired) for gnome hat
Shaded Spruce cardstock
    For Box bottom: 3 7/16 x 4 7/16", scored at 1" on all four sides
    For Box top: 3 x 4" scored on all four sides at 3/4"
Shaded Spruce cardstock for two of the largest scalloped corner rectangle dies
Soft Sea Foam cardstock for second largest scalloped corner rectangle die 
Stampin' Blends alcohol markers: SU 900 (Natural Tones light combo), Dark Parakeet Party, Shaded Spruce, SU 300 (Natural Tones Medium Dark Combo)
Basic White cardstock for gnome, gnome nose and sentiment strip

Click on the shopping cart in the upper right to shop my online store for Stampin' Up! supplies.  I truly would appreciate your business.  Thank you for taking time out of your busy day to stop by my blog!

Until next time; be happy, stay healthy and happy stamping!
Teresa


Saturday, March 4, 2023

Good friend Lucky Clover shamrock wreath square treat box

 Another Saturday has arrived which brings another Lucky Clover project.  This time I have a square treat box for you.  These are really pretty easy to make.  The wreath is made with the Cottage Wreath dies which carried over from the holiday mini catalog.  I love wreaths and I’m so happy this set carried over.  I didn’t use the coordinating stamp set, but the dies, along with the Lucky Clover stamp set make a beautiful wreath.  To watch how I made this treat box be sure to go my YouTube channel for the video replay HERE:


Measurements and Supplies:
Lucky Clover stamp set
Cottage Wreaths dies
Hive 3D embossing folder for embossing gold foil circles (optional)
scrap gold foil for 3/8" circles
3/8" circle punch or circle die of similar size
Soft Sea Foam cardstock for cutting two wreaths
Shaded Spruce cardstock 5 1/4" x 8"  
    Score on 5 1/4" side at 1, 3 3/4 and 4 3/4"
    Score on 8" side at 1, 3 3/4, 4 3/4 and 7 1/2"
Basic White cardstock scrap for stamping small shamrocks and for die cutting the bow
Basic White cardstock for back of box 2 1/2 x 2 1/2"
Designer Series Paper 2 5/8 x 2 5/8" (I used the Dandy Designs dsp which is no longer available)
Ink Pads in Soft Sea Foam and Shaded Spruce
Small Blending Brush for ink blending the smaller wreath for the top

Thanks for stopping by today.  I do so appreciate you taking the time from your busy day to spend it with me.  Click the shopping cart in the upper right to shop my online store for Stampin' Up! supplies.  

Until next time; be happy, stay healthy and happy stamping!
Teresa


Thursday, March 2, 2023

Lucky Clover St Patrick’s Day card

 This week I am featuring the Lucky Clover stamp set.  Today’s project is a very simple card put together with scrap strips of paper.  I did use the Lucky Clover punch to punch out the large clovers, but you can just as easily fussy cut them as the punch is already sold out.  I apologize for the lack of inventory.  I have two other projects for you this week and neither of those use the punch.  This is a great little stamp set and pretty inexpensive.  To watch the video replay of how I put this together, head on over to my YouTube channel HERE:


Measurements and Supplies:
Lucky Clover stamp set (Lucky Clover punch optional, fussy cut if you don't have it)
Basic White Thick cardstock 5 1/2 x 8 1/2", scored in center at 4 1/4" for card base
Five (5) 1/2" x 3 1/2" strips in each of Soft Sea Foam and Shaded Spruce cardstock
Basic White cardstock 3 1/2 x 4 3/4" to adhere strips to
Basic White cardstock scrap for stamping and punching shamrocks and 1/2" x 3" piece for sentiment strip
Shaded Spruce and Soft Sea Foam ink pads
For inside:
Basic White cardstock 2 3/4 x 4 1/4" 
Shaded Spruce cardstock 3 x 4 1/2"

Thank you for stopping by.  Click on the shopping cart in the upper right to shop my online store for Stampin' Up! supplies. 

Until next time; be happy, stay healthy and happy stamping!
Teresa