Showing posts with label Stampin' Blends markers. Show all posts

Sunday, November 6, 2022

Book Fold Caroling Mice, 3rd in the 12 Projects of Christmas series

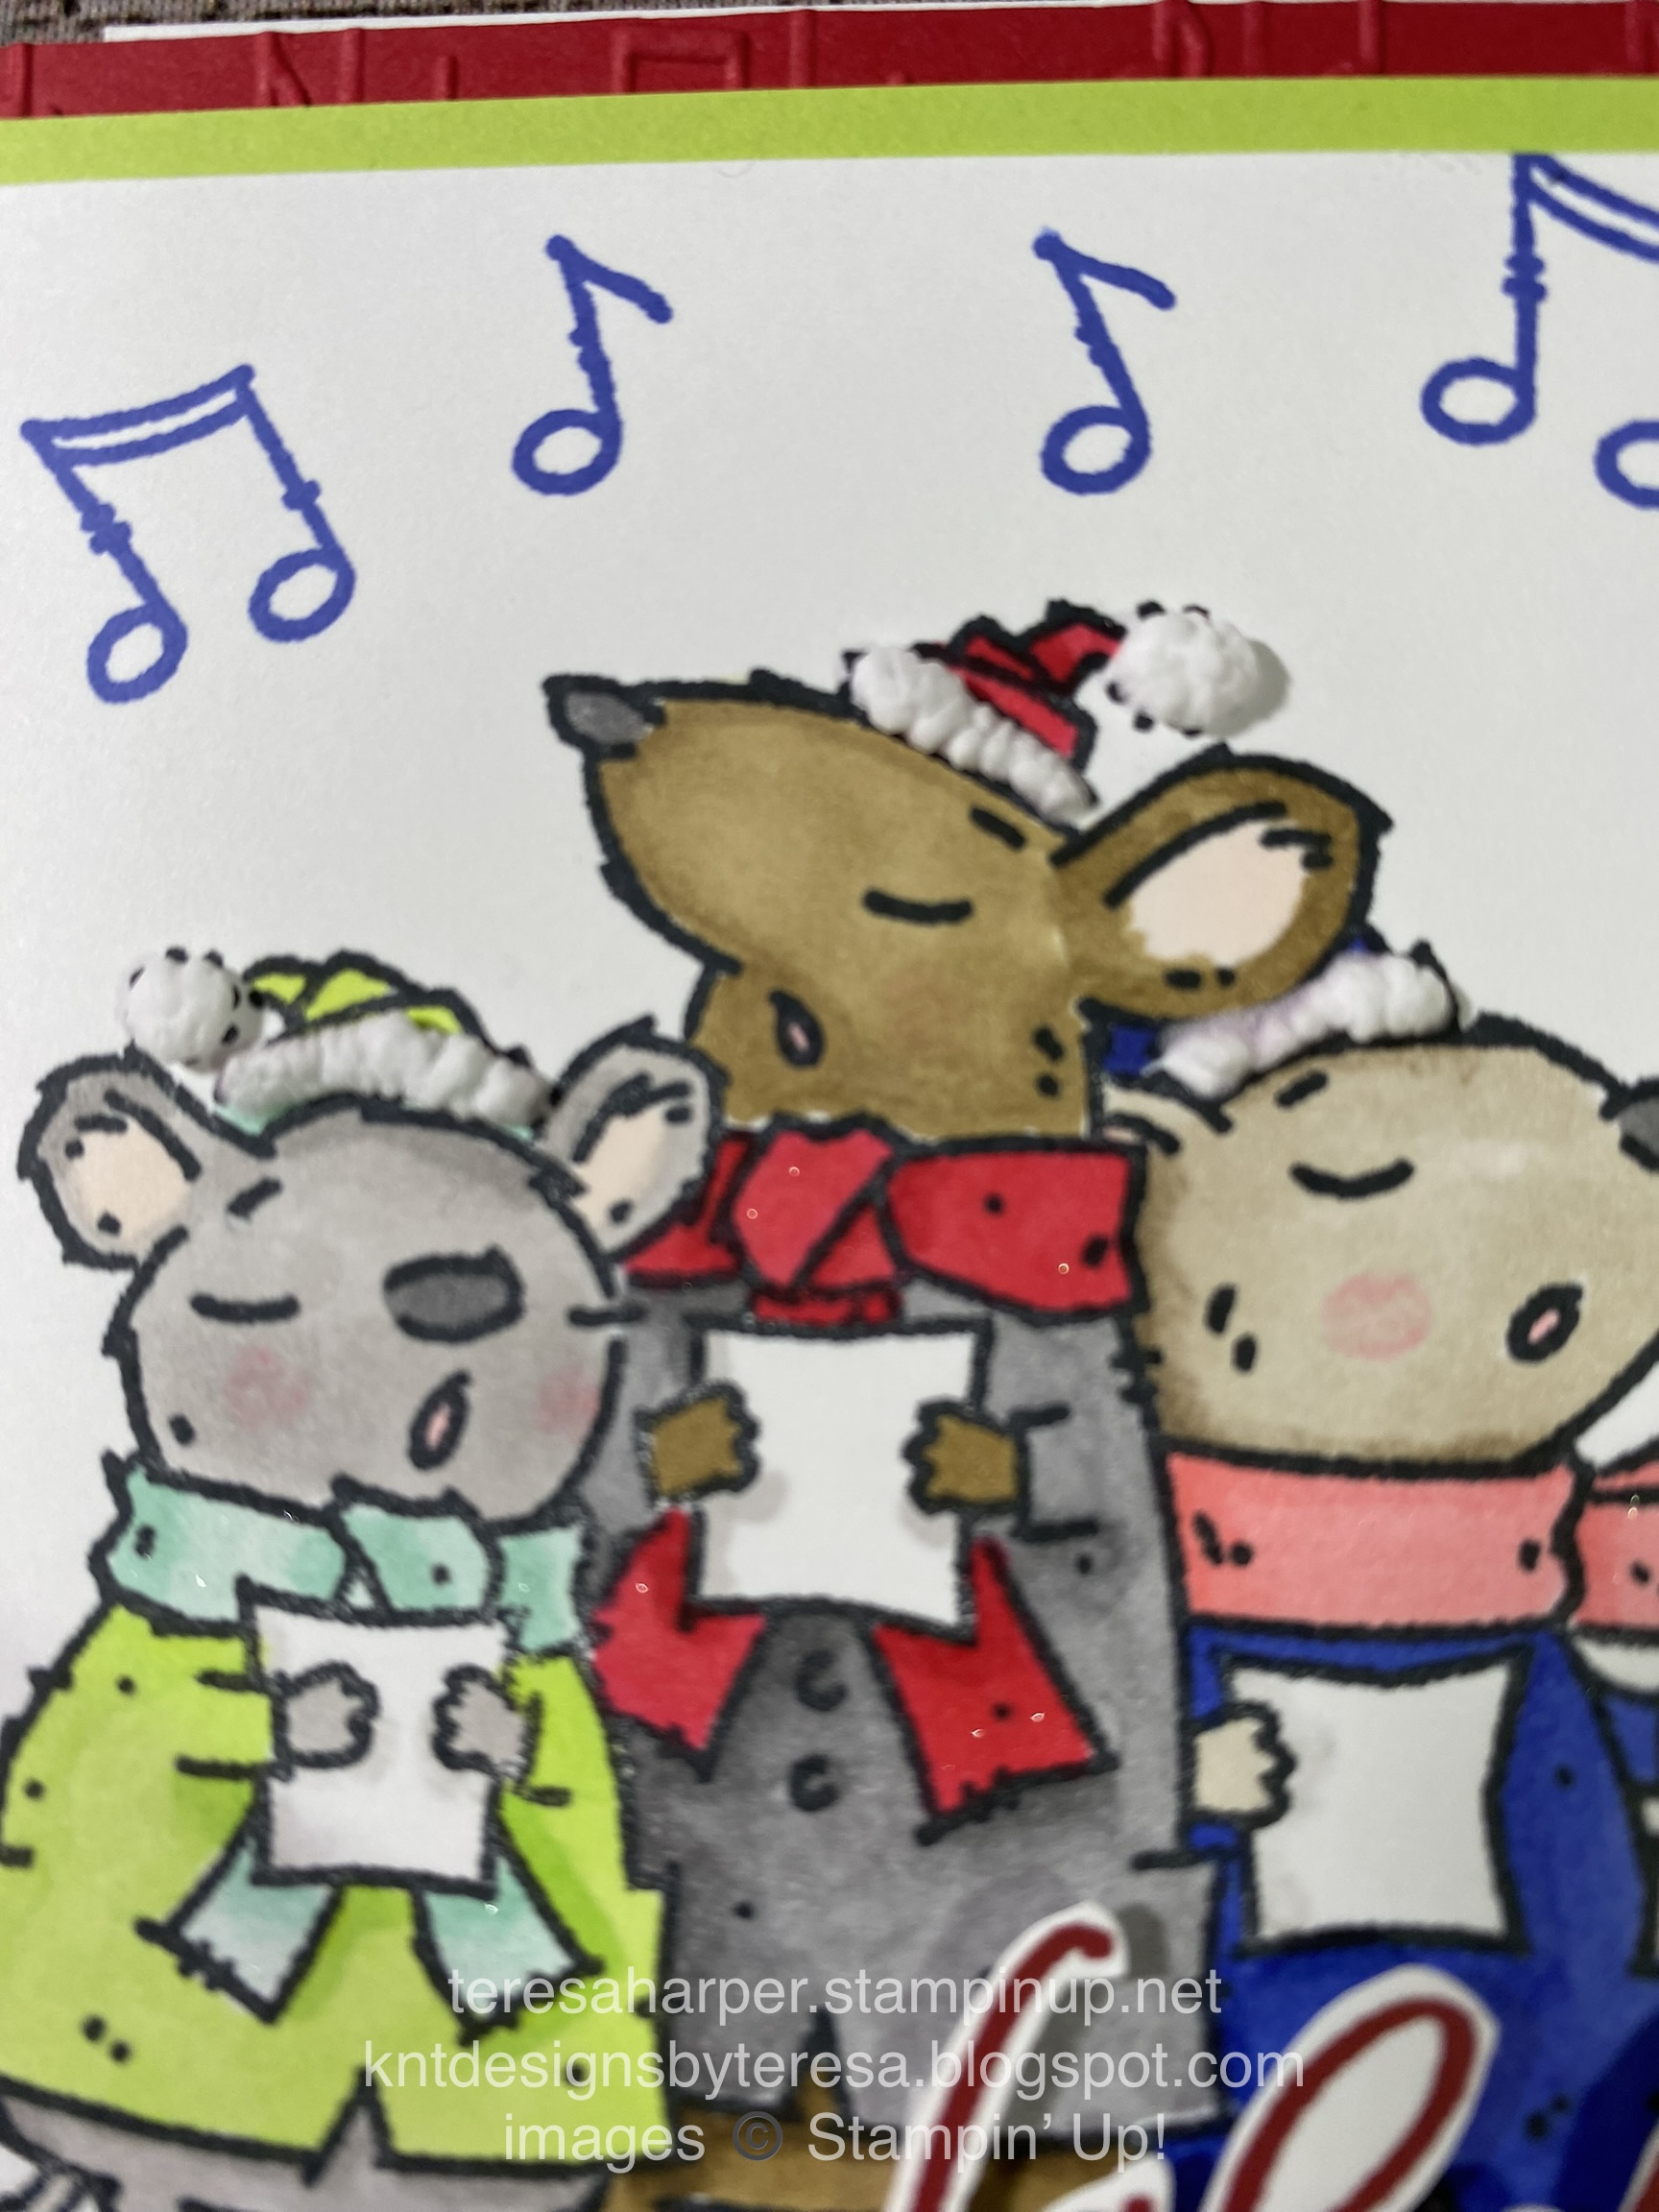
 This is the 3rd Project in my 12 Projects of Christmas series for 2022.  Today I've made a Book Fold card using the Caroling Mice and Framed & Festive.  I think those mice are just adorable and who wouldn't smile when they receive this card in their mailbox?  I know I definitely would!  To see how I put this card together, be sure to hop on over to my YouTube channel and watch the replay HERE:


Measurements and Supplies:

Caroling Mice stamp set (exclusive with Stampin' Rewards)
Framed & Festive (Part of the Fitting Florets collection available while supplies last 160888)
Satin Edged Ribbon
Merry Melody 3D Embossing Folder
Real Red cardstock 4 1/4 x 11, scored at 5 1/2" & 6 3/4"
Parakeet Party cardstock 4 x 4"
Basic White cardstock 4 x 4" and 3 3/4 x 3 3/4"
Scrap for stamping sentiment
Ink Pads: Memento Black, Pool Party, Cherry Cobbler, & Orchid Oasis
Stampin' Blends:
Mice 1: Parakeet Party, Pool Party & Gray Granite
Mice 2: Smokey Slate, Real Red and Soft Suede
Mice 3: Flirty Flamingo, Crumb Cake and Orchid Oasis
Flirty Flamingo for inside ears and cheeks (be sure to add prior to filling in with the appropriate color to avoid the alcohol ring)
Cherry Cobbler, So Saffron and Smokey Slate for lamp post
Snowfall Accents Puff Paint
Wink of Stella
Stampin' Cut & Emboss machine
Stamperatus

Thank you for stopping by today!  Please leave me a comment and let me know if you plan to make your Christmas cards this year.  To order any Stampin' Up! supplies I've used, please click on the shopping cart in the upper right.  I'd be so appreciative of your business.  

Until next time; be happy, stay healthy and happy stamping!
Teresa

Saturday, September 3, 2022

This Birthday Piggy Fun Fold


 Hello, hope you are having a great start to your weekend!  Thank you for stopping by my blog.  I really appreciate you taking time from your busy day.  The project I have for you today is a fun fold card sketch Inspired by Kelly Acheson.  I’ve changed it up a bit, and I love how it turned out with This Birthday Piggy stamp and die set by Stampin' Up!  The bundle happens to be part of a new promotion starting this week!  Stampin' Up! added six new dies sets to existing stamp sets and is offering them in bundles but only for the month of September 2022 and only while die supplies last!  If you would like to order them, be sure to click on the shopping cart in the upper right corner, but hurry, I'm sure these Playful Piggy dies will fly off the shelf!  You can watch how I put this card together over on my YouTube channel HERE:


Supplies and Measurements: 
This Birthday Piggy stamp set 159107 (Bundle 162521, September 1-30, 2022 only)
Playful Piggy dies 160254 (September 1-30, 2022 only)
Brick and Morter 3D embossing folder
Celebrate Everything Designer Series Paper (DSP) 1 1/4 x 5 1/2"
Pacific Point cardstock 2 3/4 x 5 1/2" and  3 1/4 x 5 1/4"
Pool Party cardstock 5 1/2 x 7, scored at 1 3/8 from each end along the landscape or 7" side
Pool Party cardstock 2 1/8" square
Basic White cardstock (4 Pieces total):  
1 7/8" square OR die cut with 3rd largest Sylish Shapes square die
2 3/4 square OR die cut with largest Sylish Shape square
2 15/16" square
3 x5"
Thick Basic White cardstock for stamping pig on scooter image
Stampin' Blends alcohol markers: Poppy Parade, Petal Pink, Dk. Smokey Slate, Daffodil Delight, Pool Party, Lt Basic Black, Crumb Cake Lt, SU 1000 (Light Natural Tones)
Ink Pads: Momento Tuxedo Black, Crumb Cake, Pool Party and Pacific Point
Blending Brushes
Stampin' Write markers: Crushed Curry, Pacific Point, Poppy Parade and Pool Party
Small Grid Paper
Brights 6x6 DSP paper pack, small scraps for die cutting packages
Small scraps of Basic White, Poppy Parade and Pacific Point for die cutting bows

Thanks for stopping by today!  I'm so glad you did.  Leave a comment, so I'll know you were here.  

Until next time; be happy, stay healthy and happy stamping!
Teresa


Saturday, April 23, 2022

Bottled Happiness black magic technique

 The project I have for you today is the second of the projects made during my weekly Tuesday Night live tutorial.  It features a sneak peek from the upcoming Stampin’ Up! 2022-23 Annual Catalog releasing to customers on May 3.  It is available to demonstrators now during the preorder period and can be added to a starter kit when you join my team today.  For more info on how to join click here https://teresaharper.stampinup.net/join_now

Today’s featured stamp set is A sneak peek of the Bottled Happiness stamp set.  It can be purchased in  bundle with it’s coordinating Vintage Bottle punch to save 10%.  It will be available beginning May 3, 2022.  You can watch how I put this card together on my YouTube channel here:  https://youtu.be/H1pN01CJnC8 

I love how the black magic technique makes this floral image pop!  It's really very easy and I forget how stunning it looks when done.  
Supplies and Measurements:
Polished Pink cardstock 5 1/2 x 8 1/2, scored at 4 1/4" for card base.
Pattern Party Designer Series Paper (last chance list while supplies list, host reward) 
    3/4" x 3 5/8" and 3 3/4" x 5"
Basic White card stock die cut with 2nd largest Scalloped Contour die 
Basic White card stock for inside layer 3 5/8 x 4 7/8"
Basic Black cardstock for stamping and fussy cutting approximately 3 1/2 x 4
Versamark ink pad
White embossing powder (Part of the Basics Embossing Powders 155554)
Stampin' Blends markers in Pale Papaya, Pool Party, Granny Apple Green, Polished Pink and Fresh Freesia
Granny Apple Green Classic ink pad
Brushed Brass Butterflies
Black and White Gingham Ribbon
Rectangular Postage Punch
Stamperatus stamp positioning tool (highly recommended!)
Bottled Happiness stamp set (purchase as a bundle along with the Vintage Bottle punch to save 10%)

Thanks for stopping by my blog today!  It's very much appreciated.  Be sure to leave me a comment.  If you would like to purchase any of the products I've used today, head on over to my online store by clicking on the shopping cart in the upper right corner.  I thank you in advance for your order.  

Until next time; be happy, stay healthy and happy stamping!
Teresa