Saturday, November 13, 2021

Merry Moments Festive Season

 Oh my gosh!  I’m having such a wonderful time attending Stampin’ Up!’s Onstage at Home.  So much fun and inspiration.  You are going to love all the new products that will be arriving in the new year.  We have add some very good stamping and business presentations.  Today we are participating in a Stamp and Share experience with a collection of products from the upcoming January to June 2022 mini catalog by Stampin’ Up! 

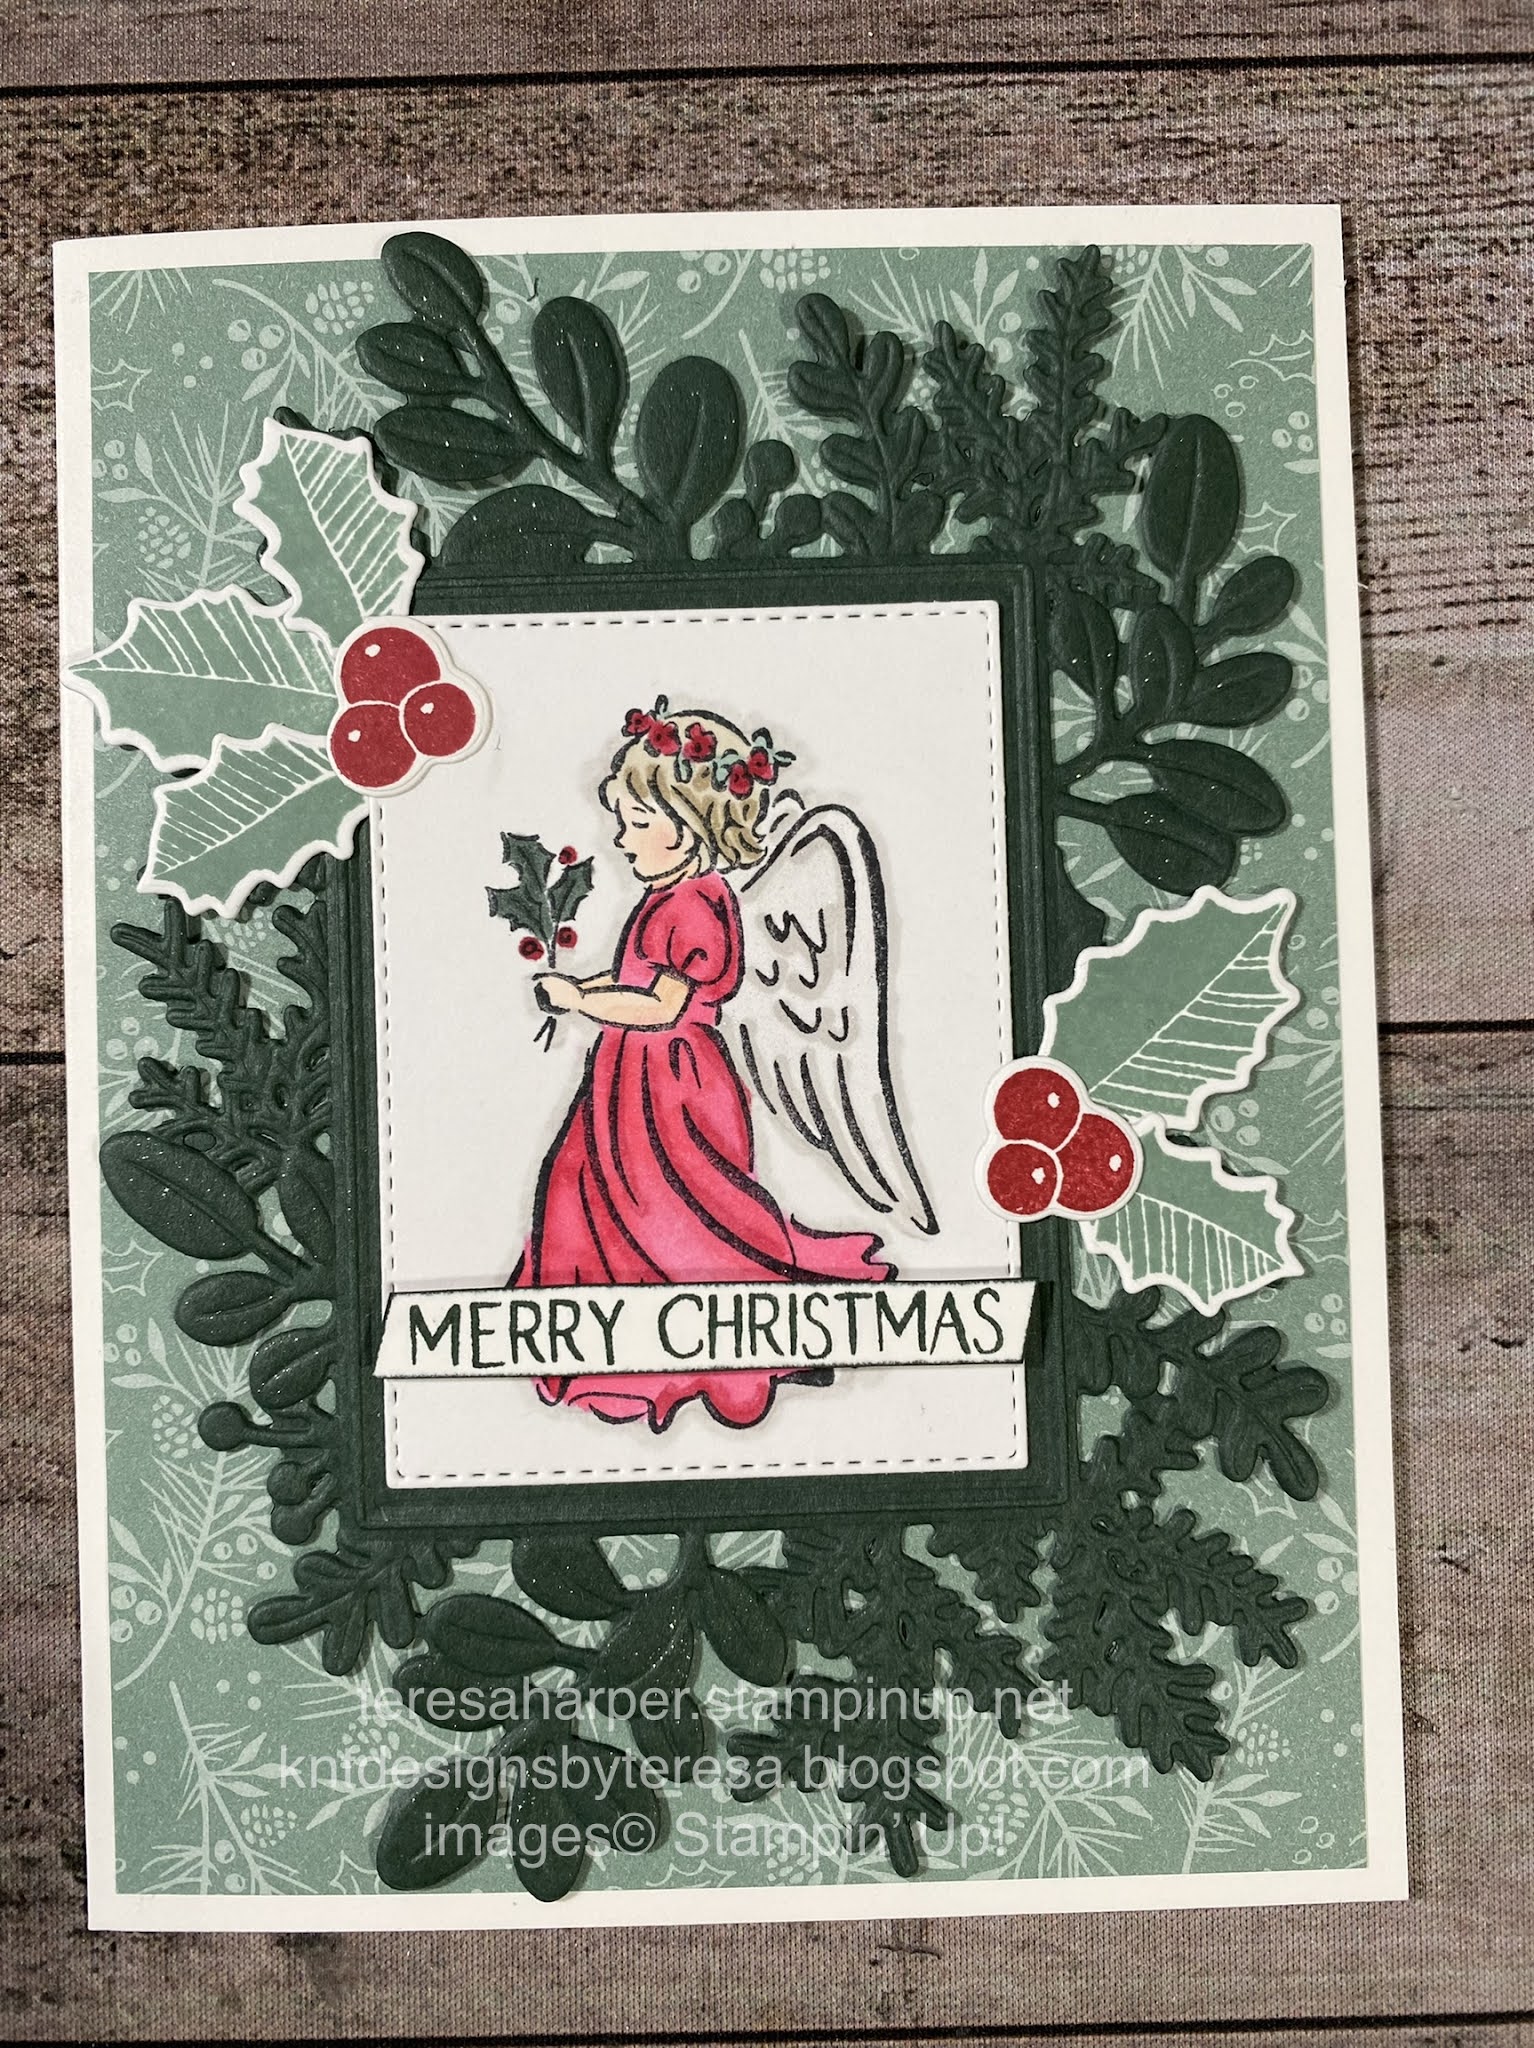
Now on to today’s project.  My card today fully showcases the Merriest Moments bundle of products which includes the Merriest Frames hybrid embossing folder and dies.  I hope it inspires you.  To see how I made this card, you can check out my video on YouTube here https://youtu.be/dEE0uMQYTNk


Supplies used: 
Thick Basic White cardstock 8 1/2 x 5 1/2"
Evening Evergreen cardstock 4 1/4 x 5 1/2"
Basic White cardstock for stamping and die cutting images 5 1/2 x 8 1/2"
ink pads in Evening Evergreen, Cherry Cobbler, Sahara Sand, Bumblebee
Dark Cherry Cobbler Stampin' blends marker
Stampin' Write markers in Evening Evergreen and Soft Succulent
2021-2023 In Color Jewels
Medium Basic White Envelopes

Thanks for taking time from your busy day to stop by my blog.  Should you wish to purchase any of the products I've used today, click on the shopping cart in the upper right corner.  Leave me a comment and let me know if this inspired you.  

Until next time; be safe, stay healthy and happy stamping!
Teresa

Thursday, November 11, 2021

Merriest Moments Angel of Peace

 Hello everyone, we’re just about to begin Onstage at Home, Stampin’ Up!’s virtual stamping convention. I am very excited to be able to participate in this inspirational event.  We will be able to take a look at the new January-June 2022 mini catalog and have the opportunity to purchase a small sampling of products from it.  This is just one of the perks of being a Stampin' Up! demonstrator.  If you would like to join the Stampin' Up! family, now is a very good time to do so.  There is currently a sale on the starter kit.  For $75, you get to choose $125 in free product from any current products and you get free shipping.  If you are interested in joining my team, go to teresaharper.stampinup.net and click on join.  I'd love to welcome you to the Stampin' Up! family.

Today’s project is made with the Angel of Peace stamp set and I’ve paired it with the Merriest Moments bundle.  The Designer Series Paper I used is from the Tidings of Christmas 6x6 dsp stack.  The foliage piece is cut with the Merriest Frames dies and then embossed with the coordinating hybrid embossing folder in Evening Evergreen.  I added a bit of Wink of Stella to some of the leaves to give it a little sparkle.  The holly leaves are stamped in Soft Succulent and the holly berries in cherry cobbler, then diecut with the coordinating dies which are included in the Merriest Frames.  I cut a the stitched rectangle in basic white also from the same die set.  I then stamped the angel in Momento tuxedo black ink as I colored her with Stampin' Blends alcohol markers.  You can watch my video on how to make this card at https://youtu.be/dEE0uMQYTNk 


Here are the Stampin' Blends I used to color the angel.


Other supplies used:
Basic White thick 8 1/2 x 5 1/2" 
Evening Evergreen 4 1/4 x 5 1/2"
Basic White scrap 3" x 4" approx to cut stitched rectangle, additional scrap for stamping holly leaves and berries along with sentiment
Tidings of Christmas 6x6" Designer Series Paper
Ink pads in Soft Succulent, Evening Evergreen, Cherry Cobbler and Momento Tuxedo Black
Wink of Stella Glitter Brush
Cherry Cobbler Stampin' Write marker  

Thanks for taking time from your busy day to stop by my blog.  Please leave me comment and let me know if you enjoyed this project.  If you would like to purchase any of the items I've used today, please click on the shopping cart in the upper right corner.  It will take you to my online store where you can shop 24/7.  I'd love to earn your business.

Until the next time; stay safe, be healthy and happy stamping!
Teresa


Friday, November 5, 2021

Christmas Season Tailor Made Tag Ornament Box 6x6

Today's project features several projects from the July-August 2021 mini catalog by Stampin' Up!  I came up with this idea after seeing someone make a box for some Christmas tags and that inspired this project.  I tried making the box for the tags three different ways before I was happy with the end result.  The really nice thing about it is, if you want to use up your Designer Series Paper, this is a good use of it.  Because I designed this to be hung on a Christmas tree,  I chose to use cardstock for mine.  You can watch my FB Live video over at KnT Designs by Teresa from November 2, 2021, to see how I made the tags and box.  This box will hold three tags of each of the largest dies of the Tailor Made Tags along with two of the smaller tags.  That's eight tags in all.


For the box, you will need a 6x6 piece of cardstock or DSP (Soft Succulent)
Score on one side at 1/2, 2 3/4, 3 1/4 and 5 1/2"
Turn 1/4 turn clockwise and score at
1/2, 5 and 5 1/2"  Trim according to the photo template


Designer Series Paper
1 piece at 2 1/8 x 4 3/8 If using a directional pattern, it should be in portrait mode
2 pieces cut at 3/8 x 4 3/8  Portrait
1 piece 3/8 x 2 1/8 in landscape  I used the new Ever Eden DSP which is available while supplies last

Other products used:
Christmas to Remember for the sentiments stamped in Cherry Cobbler ink
Christmas Season for all the stamped and die cut images
Pinecones- Early Espresso and Soft Suede ink stamped on Crumb Cake cardstock
Holly Leaves- Garden Green 1st and 2nd generation stamping on Basic White cardstock
Tailor Made Tags cut from Basic White Cardstock
2 x 5 1/4" Thick Basic White, one end punched with the Delightful Tag Topper punch
Evening Evergreen cardstock for the O and D ring reinforcers.  I placed adhesive sheet on the back of the cardstock prior to die cutting.
Wink of Stella glitter pen
Evening Evergreen ink for the pine boughs 1st and 2nd generation stamping
Versamark ink and gold embossing powder for the gold dots on the pine boughs
Simply Elegant trim for the tag strings


I hope you enjoyed today's project.  Please leave a comment with your thoughts.  I'd love to hear from you.  If you make this project be sure to tag me in your post or send me an email.  I'd love to see what you made.  If you need to purchase of the products I've used today or any additional Stampin' Up! products, please click on the shopping cart in the upper right.  It will take you to my online store where you can shop 24/7.  I'd love to earn your business!  My current host code through November 20th is HXMSF2TF.  Please use for orders under $150.  If your order is over $150 DO NOT use the host code.  You will earn stamping rewards for yourself.  

Until next time, stay happy and healthy and most of all happy stamping!
Teresa