Showing posts with label Painted Christmas. Show all posts

Thursday, July 14, 2022

Vintage Christmas Fall Blessing card

 It's been a very warm and busy week here in Oregon.  Today's project features the Vintage Christmas stamp set but I've tried to show you how it isn't just for making Christmas cards.  By using some different colors and a non-Christmas looking Designer Series Paper, I've turned this set into more of a fall card.  The layout for this card was from a mystery card challenge I participated in by Barb Milliken.  She gave us the pieces and sizes of cardstock and we chose the stamps and supplies.  Let's see how I put this card together.  You can watch the video replay over on my YouTube channel here: 


Supplies and Measurements:
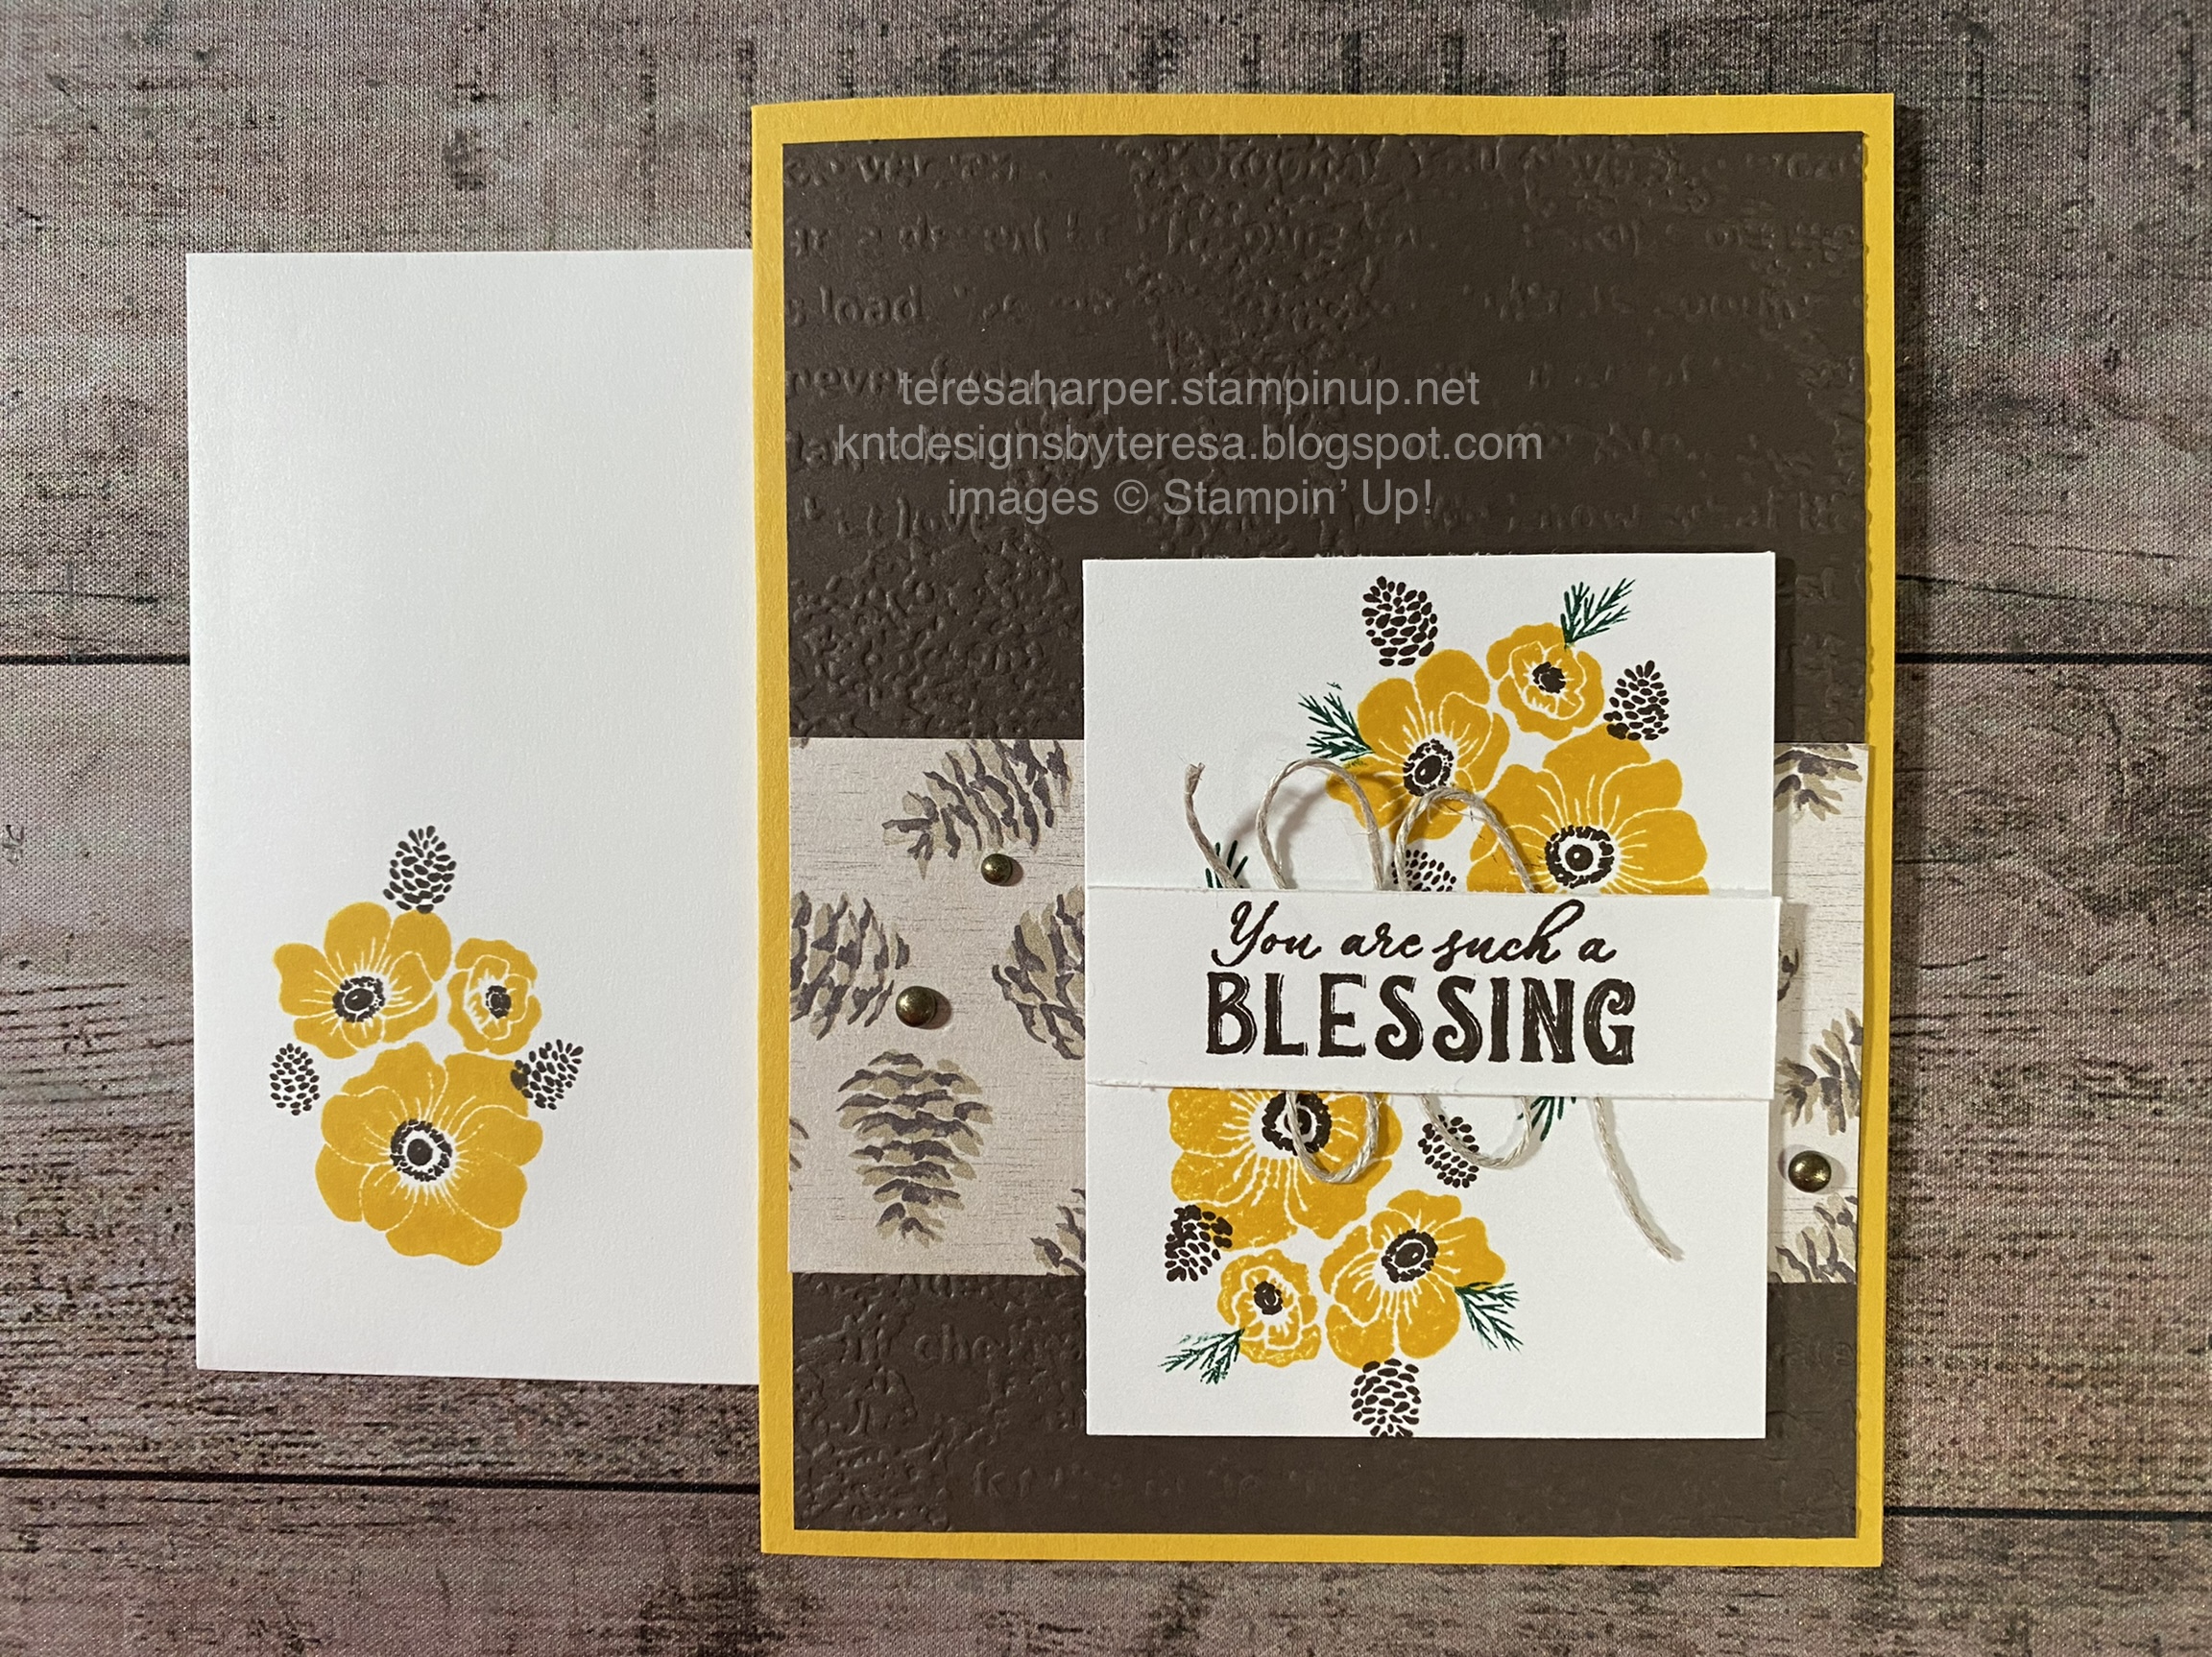
Crushed Curry cardstock for card base 5 1/2 x 8 1/2" scored in the middle at 4 1/4"
Early Espresso cardstock 4 x 5 1/4"
Painted Christmas Designer Series Paper 2 x 4"
Basic White cardstock 2 1/2 x 3 1/4", 3/4 x 2 1/2" and 3 5/8 x 4 7/8" 
Linen Thread
Rustic Metallic Adhesive backed dots
Ink Pads in Crushed Curry, Early Espresso, Shaded Spruce and Crumb Cake
Vintage Christmas stamp set by Stampin' Up!
Hello Harvest stamp set by Stampin' Up! (for greeting)
Timeworn Type Embossing Folder
Stampin' Dimensionals
mini glue dots
Stampin' Seal adhesive
Stampin' Cut and Emboss Machine

Thanks for stopping by today!  You can purchase any of the supplies I've used on my card today in my online Stampin' Up! store by clicking on the shopping cart in the upper right.  Please leave me a comment after ordering, I'd love to hear from you!  

Until next time; be happy, stay healthy and happy stamping!
Teresa


Wednesday, December 8, 2021

Joyful Life Double Flap treat box --Project 7 of the 12 Projects of Christmas 2021

 Before I get started with the project, I want to share that today only, December 8, 2021, is FREE SHIPPING day on orders of $50 or more (pretax) for Stampin' Up!  Click on my shopping cart in the right corner and it will take you directly to my online store where you can enjoy free shipping on all orders  of $50 or more before tax (if you have that--we don't here in Oregon.)  

Now, let's get started with our project!  For today, I have another treat box.  I have to confess, I had intended to use Snowflake Wishes with this project, but it just didn't work out!  The adorable little hedgehog from Joyful Life won out.  I was inspired by Cathryn Themann.  She made a similar project, but her measurements did not fit my treats so I tweaked them to fit my design.  You can watch out I put my box together here: https://youtu.be/cdTtvxfNN2E


You can watch my video on how to make it here 

 
Supplies and Measuresments
Evening Evergreen cardstock 8 1/4 x 5 1/2"  Score and cut according to the template below.
Basic White (for inside flap) 2 x 2 3/4 & Basic White scrap for stamping and diecutting Seasonal Label die approximately 2 1/2 x 3"
Painted Christmas Designer Series Paper 2 7/8 x 2 1/8 in Portrait mode (if directional pattern), 2 pieces 2 7/8 x 5/8 in Portrait, 2 pieces 2 1/8 x 5/8 in Landscape.
finished box size is 3 x 2 1/4 x 3/4"


Thank you for stopping by my blog today.  I really appreciate you taking time from your busy day.  Please leave me a comment.  I'd love to hear from you.  If you need any Stampin' Up! supplies you can shop my online store 24/7 by clicking on the shopping cart in the upper right corner.

Until next time; be happy, stay healthy and happy stamping!
Teresa