Showing posts with label Itty Bitty Birthdays. Show all posts

Saturday, July 4, 2020

Time to celebrate treat boxes

Happy July 4th everyone!  Today’s project is a box inspired by Angie Pyjas of Stampingwithamore.  I slightly changed her measurements so the box would fit together more to my liking.  These will be going out to the employees of our local Winco store.  The finished box size is 3 x 1 3/4 x 1”.  I used whisper white, real red and misty moonlight cardstock along with the Designer Series Paper from the Boho Indigo product medley.  The sentiment comes from Itty Bitty Birthdays.


You will need a piece of whisper white cut at 5x5.  Score on the one side at 1” and 4”. Rotate clockwise score at 2” and 3”.  Burnish score lines then cut up the score lines on either side of the small squares to form tabs.  Place adhesive on the inside of two of the longer flaps on one end.  Fold the opposing sides in over your tabs, then fold the adhesive tabs up and secure to make the box.

Next you will need a piece of  real red card stock that is 8 1/8” x 3 1/8”.  Score on the landscape side at 2 1/32, 3 1/32, 5 1/16 and 6 1/16.  This piece will wrap around your box.   Dry fit your box by placing the box bottom into the 1” sections and wrap.  Then round the corners of the top flap.  You will need Designer Series Paper cut at 3/4 x 2 7/8 and another piece cut at 1 3/4 x 2 7/8 in landscape if a directional Paper.  Adhere to box to the wrap in the bottom 1” section.  I used liquid glue.  I the. Adhered then front and back to the box front and back to secure.  You do not have to do this step if you like the look of it hanging loose.  To secure the flap, I used a very thin Velcro adhesive dot.

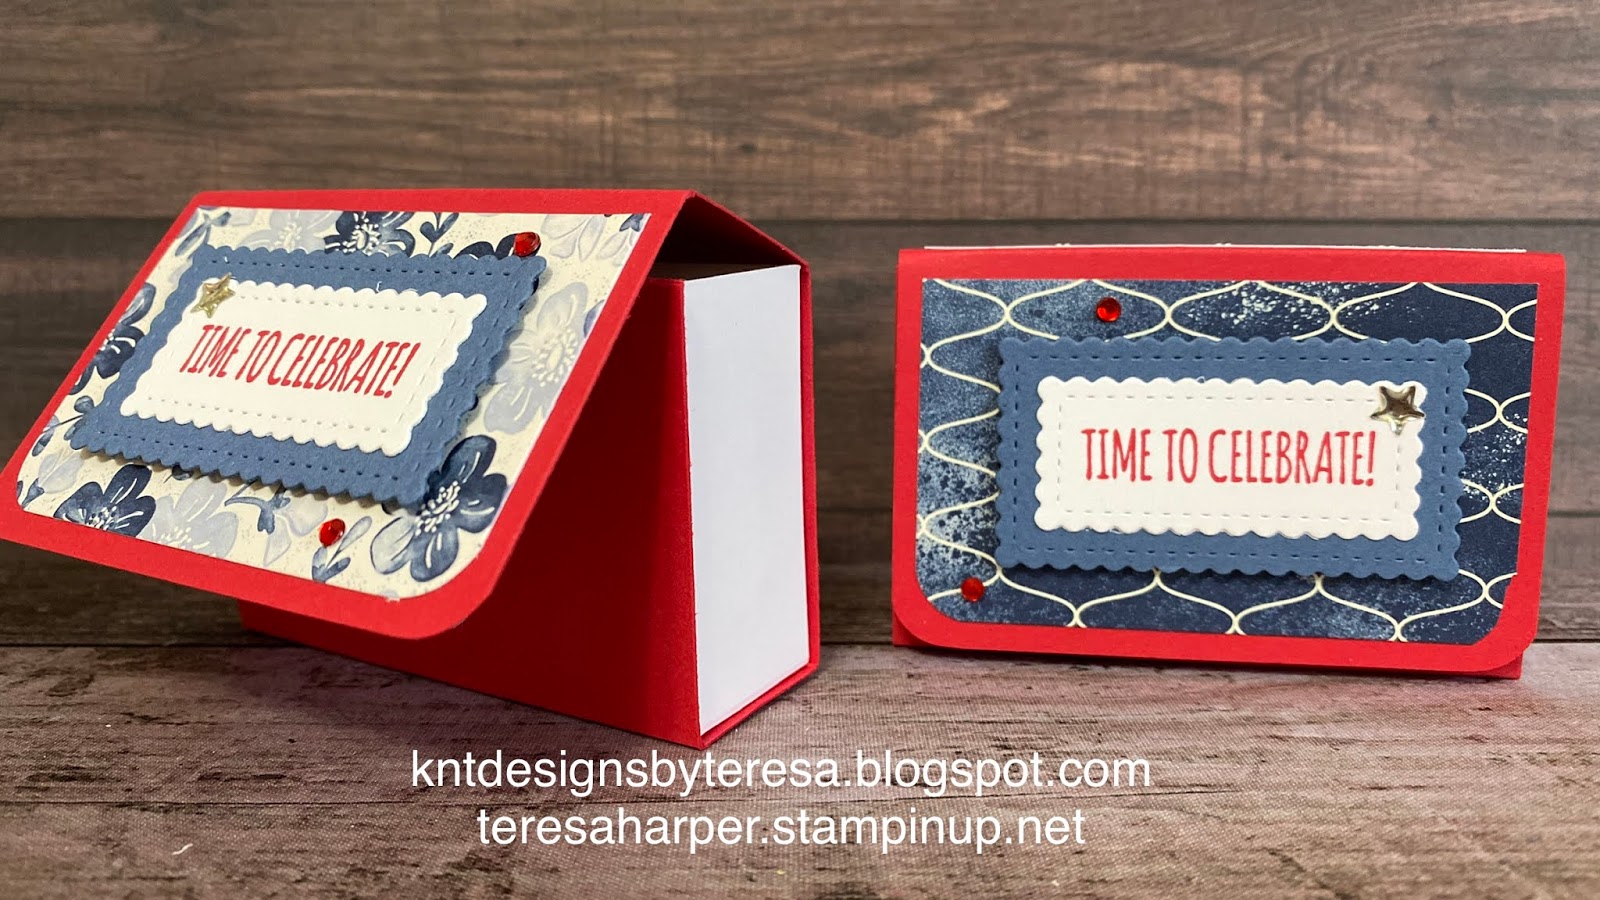
To decorate, I stamped my sentiment in real red on whisper white and cut with the smallest scallop from the stitched so sweetly dies.  I added this to the second smallest scallop rectangle from the same die set.  This was added to the front.  I had some retired stars on hand to embellish and added some red rhinestones to finish it off.

I hope you’ve enjoyed my project today.  This box could be used for any occasion simply by changing the colors and sentiment.

Thank you for stopping by my blog today.  Please leave me a comment, I would be happy to hear from you.  If you would like to purchase any of the supplies I’ve used, you can click the shopping cart to the right.  It will take you directly to my online store where you can shop online 24/7.  I would love to earn your business if you do not currently have a Stampin’ Up! demonstrator.

Until next time, stay safe, be healthy and happy stamping.
Teresa

Monday, March 18, 2019

This Little Piggy is growing up birthday card

Hello everyone!  I just had to share this card today.  It was designed and made by my 14-year-old granddaughter Kaitlyn for her mom’s birthday.  She did the majority of the work, all of the design, coloring and fussy cutting.  I am thrilled with the way this turned out.  I picked her up after school, we came home and she got started working straight away.  When she was finished, she was ready to go home.  Her mom gets a lovely card and I got to spend some quality crafting time with my granddaughter.  It was a win-win.  The stamp set she chose is called This Little Piggy.  The sentiment comes from Itty Bitty Birthdays.  The flowers were die cut from Gorgeous Grape cardstock using the Bouquet Bunch framelits.  The grass is cut from a retired framelit set which was part of the Basket Bunch bundle.  Her card base is Highland Heather, with a layer of Soft Sky (retired) and a piece of the Highland Heather gingham Designer Series Paper from Gingham Gala 6x6 Designer Series Paper stack.  She used a bit of Wink of Stella on the cloud which is also from This Little Piggy.  She colored the pig with Stampin’ Blends in Petal Pink (combo), Ivory for her nose and light Crumb Cake on the hooves.  I think she did a fabulous job for her first time using the blends.  She then fussy cut out the pig and popped her up on stampin’ dimensionals.


I should have taken a photo of the inside of the card, but forgot.  Inside she used the Making a Difference stamp set to spell out Kinda, then added lol and jk (just joking).  Her mom got a laugh out of the sentiment she made.

I hope you’ve enjoyed today’s project and are inspired to create something of your own.  Please leave a comment, we’d love to hear from you.  If you want to purchase any Stampin’ Up! Supplies, I would be grateful for your business.  Please click on the shopping cart in the upper right.  It will take you directly to my online store.  Thanks for stopping by my blog today, make it a great day and happy stamping!