Showing posts with label snowy scene. Show all posts

Sunday, November 16, 2025

Snowy Woodland Scenery Winter Wishes

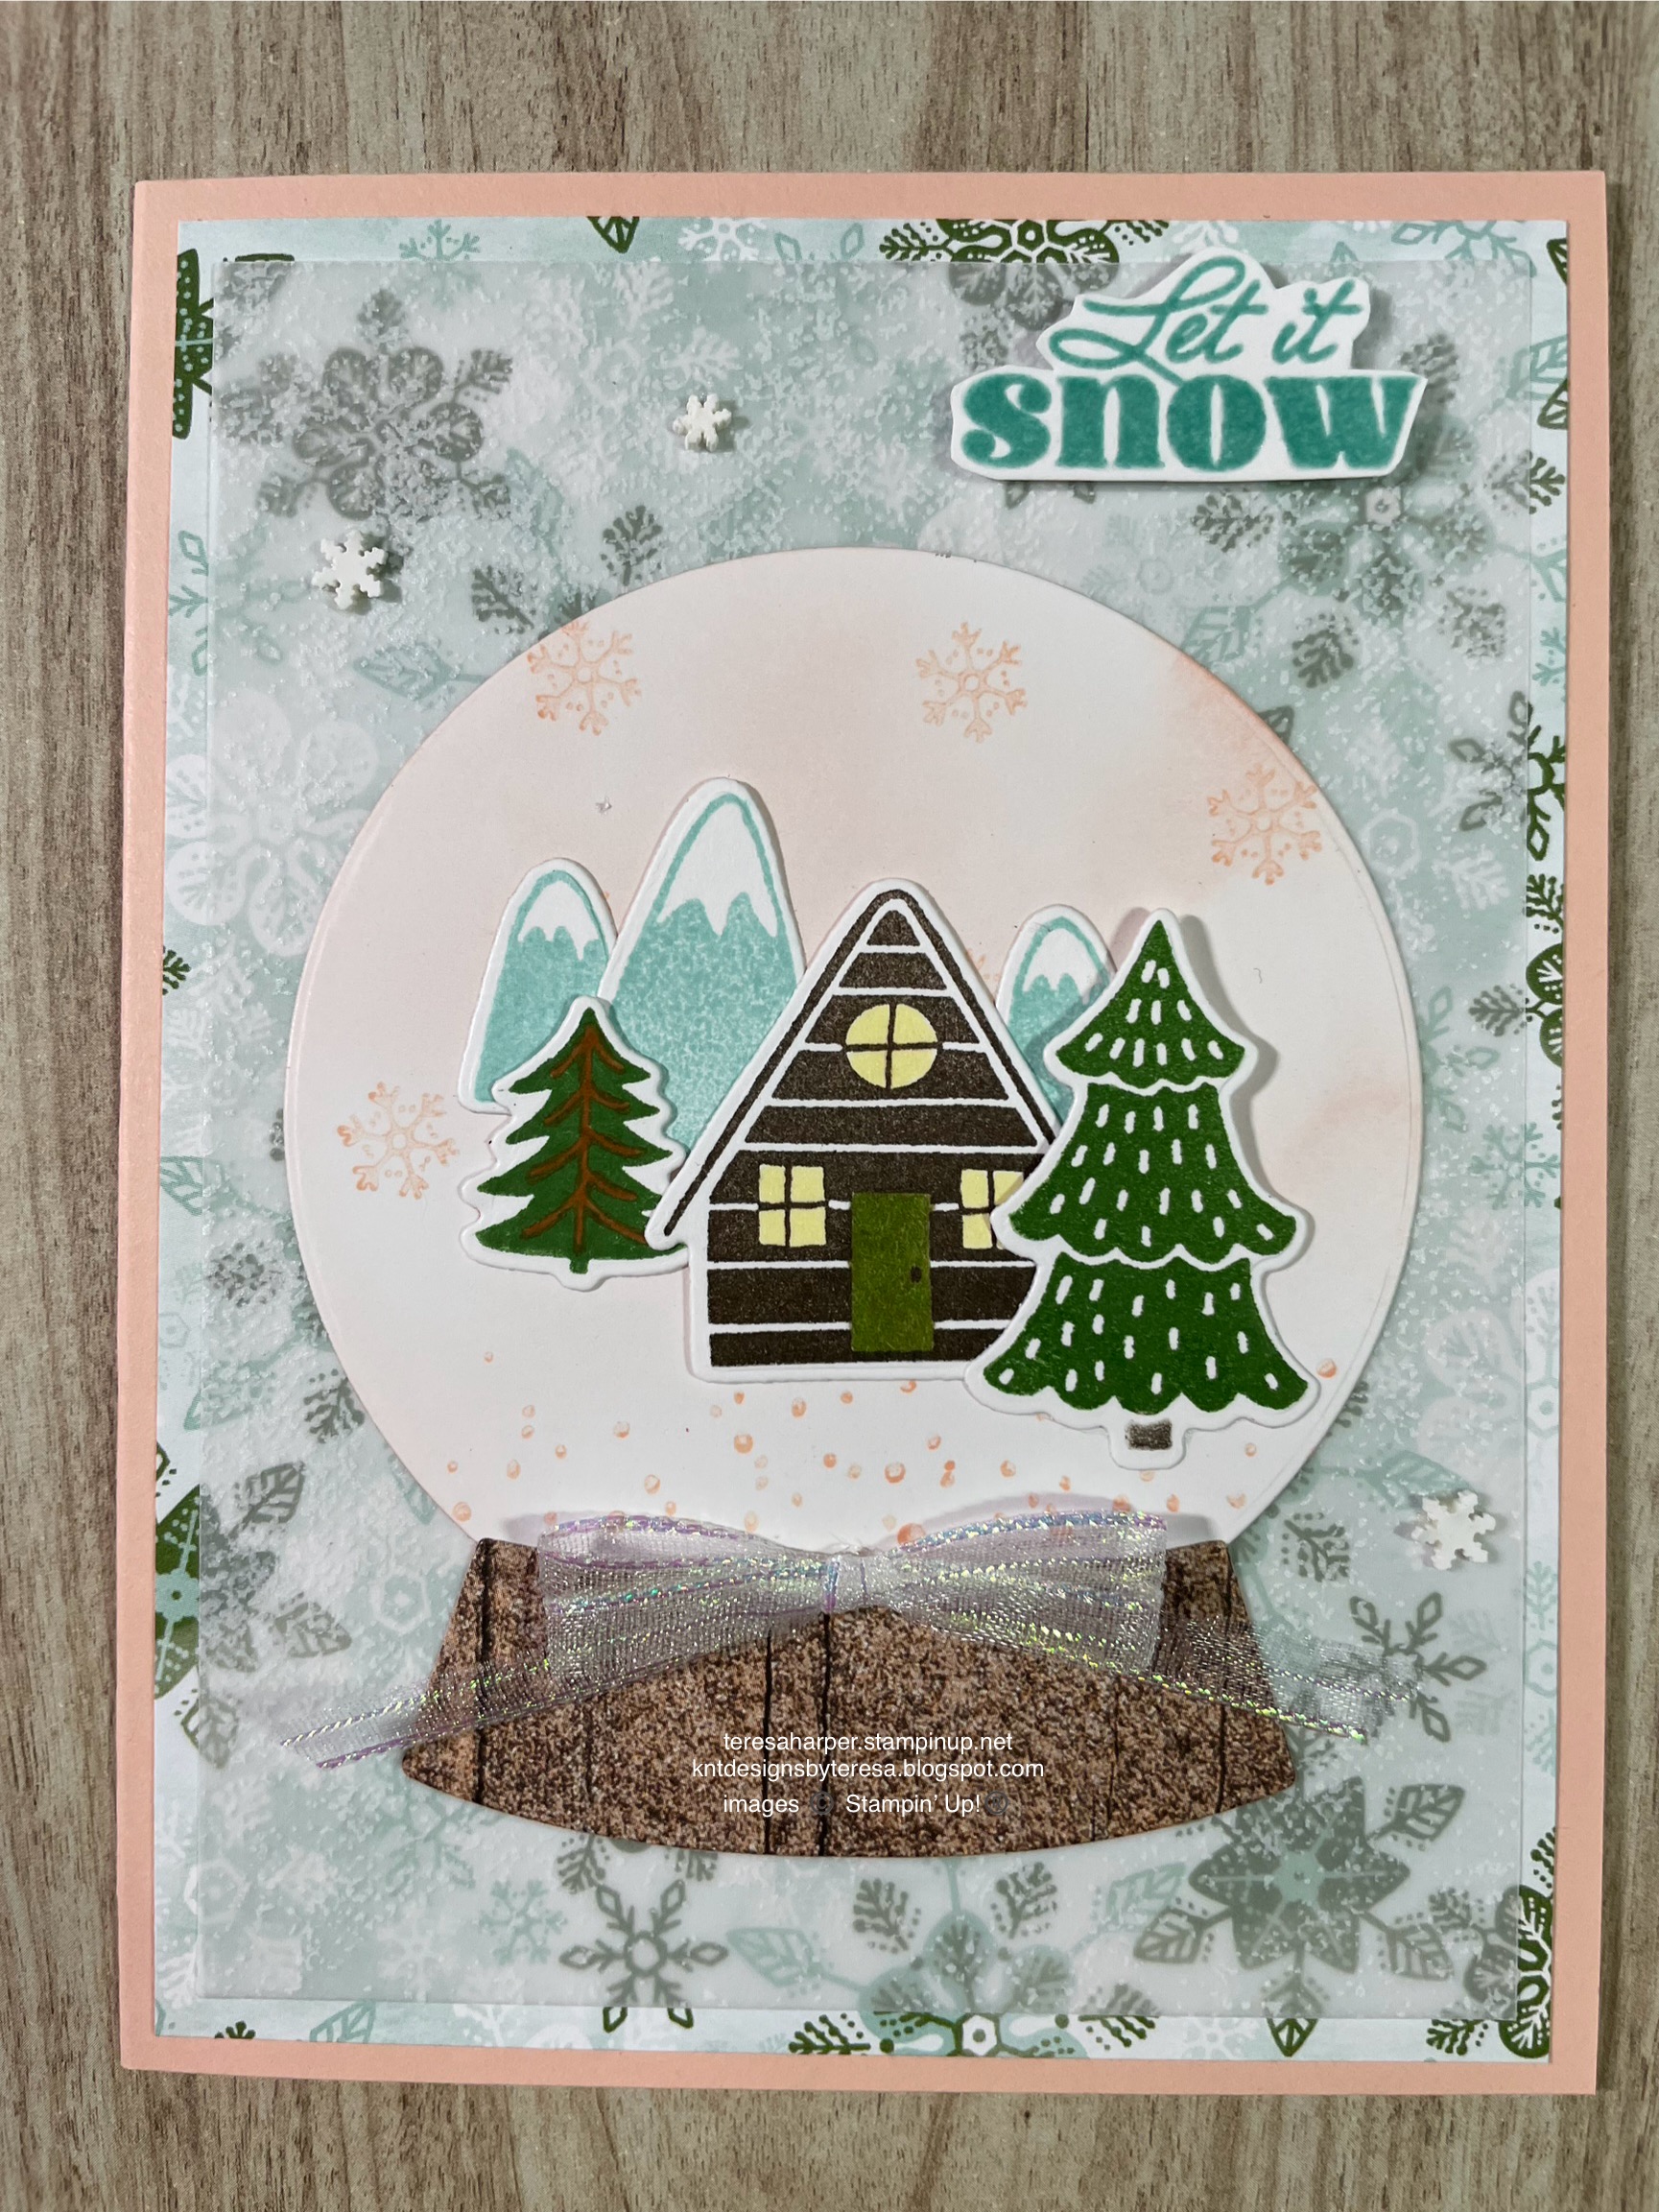
 I’ve really loved working with the Woodland Scenery stamp set this week.  It makes such beautiful cards without a lot of effort, especially when paired with the Lights of Aurora Designer Series Paper which is stunning on its own.  With the northern lights popping in this week in the continental part of the US, it’s especially fitting.  You can see how I’ve created this card and learn how to make one by watching the video tutorial over on my YouTube channel.  You can access it by clicking on this link.


Supplies and measurements:
Woodland Scenery stamp set 166060
More Messages die 165472 (can be purchased in a bundle* with a coordinating sentiment stamp)
Lights of Aurora 6"x6" Designer Series Paper
    4" x 5 1/4"
Basic White cardstock 
    (three pieces for scenery of varying heights approximately 2 1/4", 3" & 2" x 4" wide)
    inside layer 3 5/8" x 4 7/8"
Vellum scrap
Ink Pads: Memento Tuxedo Black, Pool Party, Secret Sea, Early Espresso, Basic Beige, VersaMark
Stampin' Blends markers: Lemon Lolly, Cloud Cover & Pecan Pie
Metallics Wow! Embossing powder (silver) 165678
Embossing Additions tool kit (optional, but very useful) 159971
Wink of Stella glitter brush 141897
blending brush 160518
Stampin' Dimensionals, Stampin' Seal & Mini glue dots for adhesives
sharp scissors for fussy cutting

Thanks so much for looking.  I do appreciate you taking time from your day to spend a little bit with me.  To order your Stampin' Up! supplies, click on the shopping cart in the upper right.  I would love to earn your business.  It allows me to bring you free content.  

Until next time; be happy, good health to you and happy stamping!
Teresa

*Purchasing bundles saves 10% over the individual piece prices when combined.  You must use the bundle item code for the 10% bundle discount.  When purchasing Last Chance items; be sure to check if the individual piece prices are discounted.  Individual piece prices could be less expensive if the discounts are deep enough.


Saturday, November 15, 2025

Woodland Scenery ornament gift storage box 2025

 For today, I've created a gift storage box to hold the ornament I posted on Wednesday this week.  You will want to check that out if you haven't already seen it.  I've designed this clamshell box with reinforced sides on the top and bottom so that it won't crush as easily for you to be able to store the ornament, as well as use as gift packaging.  The box is sized to fit a gift card as well.  You can watch the video tutorial for both projects over on my YouTube channel by clicking on this link.


Measurements and supplies:
Woodland Scenery stamp set 166060
Festive Friends for outside sentiment tag 166035
Words For the Season 165716 (or use what you already have on hand for the both sentiments)
Three Banner Punch 167050
Secret Sea two-tone cardstock, 5 5/8" x 9 3/4"
    Score on 5 5/8" side at 1/2" & 1" from each end
    score on 9 3/4" side at 1/2", 1" & 4 5/8" from each end
Basic White cardstock, two pieces    
    (1) 3 1/2" x 3 1/2"
    (1) 3 3/8" x 3 3/8"
    scrap for sentiment tag
Ribbon (I used the retired Silver & White Sheer Ribbon, you use what you have on hand)
Real Red & White Baker's Twine 164051
Ink Pads: Secret Sea, Pool Party, Basic Beige
Wink of Stella Glitter Pen 141897
Blending Brush 160518
Masking paper 155480
small circle punch (I used 3/4") for finger notch to open box

Thanks so much for stopping by today.  If you make one of these boxes and/or the ornaments, please share over on our Facebook stampers group social page.  You will find the page  by clicking this link. 

Until next time; be happy, good health to you and happy stamping!
Teresa

Wednesday, November 12, 2025

Woodland Scenery ornament 2025

I have a really pretty ornament for you today.  It doesn't take a lot of supplies and is fairly easy to make.  It does take a little bit of patience, but I think I've given you some tips and tricks that will make it so much easier for you.  I have a video tutorial over on my YouTube channel.  You can access it by clicking this link. 


Measurements and supplies:
Woodland Scenery stamp set 166060
Spotlight on Nature dies 163580
Lights of Aurora 6"x6" DSP 
    Cut largest of the dot & dash circle 
Secret Sea cardstock 
Basic White cardstock
    two die cut circles approximately 3 1/4" from Spotlight on Nature dies
12" x 12" Vellum scrap for chimney smoke
Large Gold Hoops 166004 (Approx 3 3/8")
Metallic WOW! embossing powder (silver) 165678
Embossing Additions Tool kit (optional but helpful) 159971
Small sharp pointed scissors for fussy cutting
Ink Pads: Secret Sea, Pool Party
Stampin' Blends markers: Cloud Cover, Lemon Lolley (I used the light marker in the combo)
Black & Gold & White Baker's Twine 166005
Mini Glue dots, Stampin' Dimensionals, Tombo Multipurpose Liquid Glue
Wink of Stella Glitter Brush 141897
Blending brush 160518
Masking paper 155480

I do hope you will give these ornaments a try.  Now that I've shown you the basics on how to make them, you can use whatever supplies you have on hand to recreate them for your family and friends!  If you do, I would love to see what you make.  Please share on my Facebook social group.  You will find the private group by clicking this link.  We would love to have you join our little stamping community.

Should you need to purchase Stampin' Up! supplies, I would love it if you would purchase through my online store.  Simply click on the shopping cart in the upper right.  Thanks so much for supporting my small business and allowing me to keep these free tutorials coming your way.

Until next time; be happy, good health to you and happy stamping!
Teresa


Saturday, October 26, 2024

Let It Snow with Snowy Scenes suite

 I have a card for you today which could be used for any wintery occasion.  It doesn't have to be Christmas and would make a rather nice birthday card I think.  You can see how I put it together by watching the video replay over on my YouTube channel.


Supplies & Measurements:
Snowy Wonder bundle 164125* (includes stamps 164334 & dies 164124)
Snowy Scenes 12 x 12 Designer Series Paper, 4 x 5 1/4" and 3/8" x 3 5/8" for inside 164333
Graceful Greenery Vellum 12 x 12 Specialty DSP 164118** 3 3/4" x 5"
Country Woods DSP scrap for snow globe base 163393
Basic White Cardstock for stamping and die cutting
Basic White for inside layer, 3 5 /8" x 4 7/8"
Petal Pink cardstock for card base, 5 1/2" x 8 1/2" scored in center at 4 1/4"
Ink Pads: Early Espresso, Garden Green, Pool Party, Petal Pink, VersaMark, Memento Tuxedo Black
Stampin' Blends alcohol markers: Lt Lemon Lolly, Dk Old Olive, Dk Granny Apple Green
Stampin' Write Marker: Pecan Pie & Early Espresso
Wink of Stella Glitter Brush (optional for mountain tops and windows) 141897
White Loose Snowflakes 164128
Iridescent Striped Trim 163299

Thanks so much for looking!  I hope to see you back here soon for another project!
Until next time; be happy, stay healthy and happy stamping!
Teresa

*purchasing bundles saves 10% over the individual piece prices when combined.  You must use the bundle item code for the 10% bundle discount.

**Online Exclusives items can be while supplies last.  If they are in the store, they are available for purchase.  If they say Currently Unavailable, the stock will be replenished.  If they are no longer in the store, unfortunately, they will not return.